Echelon IzoT Commissioning Tool User Manual
Page 320
4. Right-click the title bar of the new stencil and then click Save on the shortcut menu. Select a
folder, assign a name for the stencil file, and click Save. Save the stencil to the
LonWorks\LonMaker\Visio directory (by default, C:\Program
Files\LonWorks\LonMaker\Visio [32-bit system] or C:\Program Files
(x86)\LonWorks\LonMaker\Visio [64-bit system]) to easily access it with the open stencil (
)
button, or save the stencil to the drawing folder for simplified backup.
Creating Custom IzoT Commissioning Tool Master
SmartShapes
You can create a custom IzoT Commissioning Tool master SmartShape to reuse any part of a design
within the same drawing or in many OpenLNS CT drawings. To create a master SmartShape, you
must first open a stencil as an original file, with read/write access. Normally, stencils open with
read-only access. To work with a read/write stencil while maintaining the original, open a copy of the
original.
To open an original stencil, follow these steps:
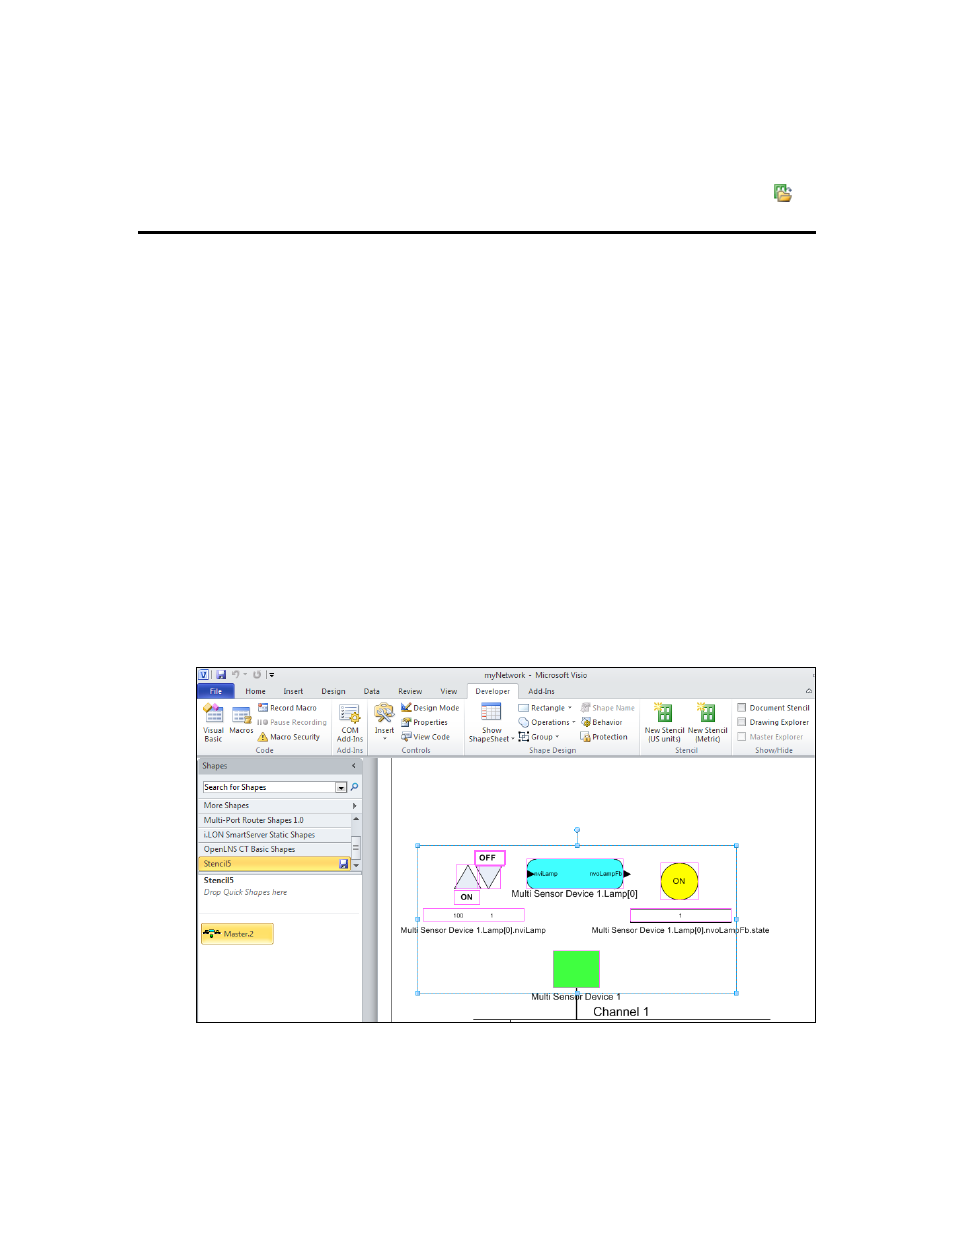
1. On the Shapes window, point to More Shapes, and then click Open Stencil. Open the folder that
contains the stencil, and then select the stencil.
2. Right-click the stencil title bar, and then click Edit Stencil on the shortcut menu. The stencil
window opens, with a red asterisk in the title bar indicating that you can modify the stencil. Once
you have a stencil open for editing, you can create new master SmartShapes in it.
3. Select the object or objects to be included in the master SmartShape. You can create a master
SmartShape that contains routers, channels, devices, functional blocks, connections, subsystems,
and Data Point SmartShapes. To select multiple objects you can either drag a selection net around
the objects or hold down CTRL and click the objects.
4. Drag the selected object or objects to the stencil you opened. A new master SmartShape
representing the selected object or objects opens in the stencil.
5. Save the stencil by clicking the Save button. You can then rename, modify, or edit the icon of the
master SmartShape.
To copy any number of SmartShapes between IzoT Commissioning Tool networks, use a custom IzoT
Commissioning Tool stencil with custom IzoT Commissioning Tool SmartShapes as described in this
304
Creating and Using Custom IzoT Commissioning Tool Shapes and Stencils