Using the upload scheduler, Chapter 13 retrieving recorded files, Uploading files on demand – SATEC SA300 ezPAC Operation Manual User Manual
Page 130
Chapter 13 Retrieving Recorded Files
Viewing Real-time Waveforms
130
SA300 Substation Automation Unit
7. If you wish to retrieve data recorded before a known date, check
the “To” box and select the last date for retrieving data.
8. Click
OK.
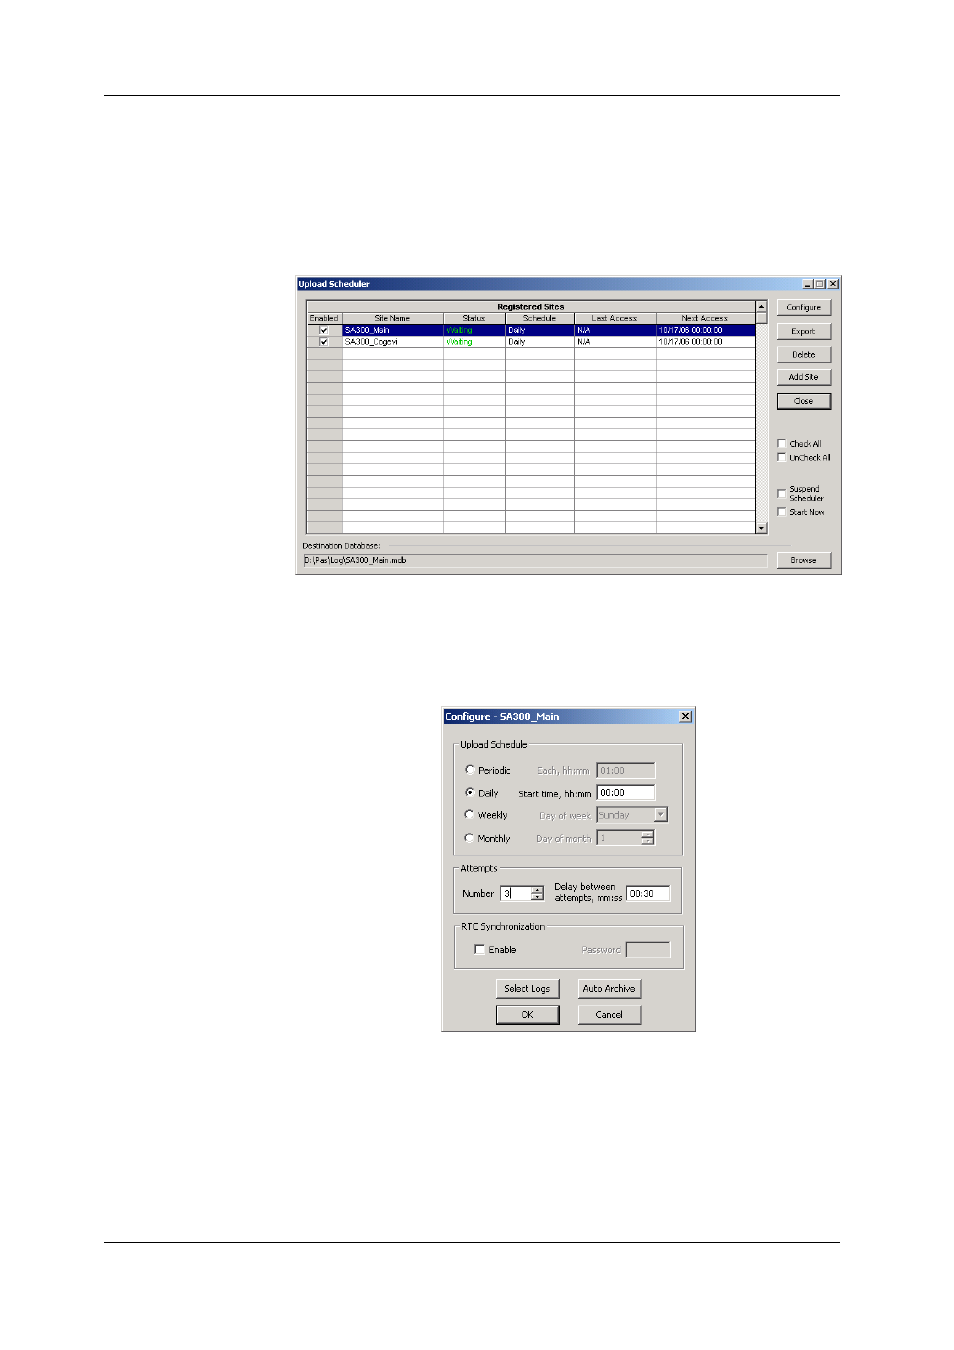
Using the Upload Scheduler
To setup the Upload Scheduler:
1. Select Upload Scheduler from the Logs menu.
2. Click Add Site, point to the site database for which you want to
organize the schedule, and then click OK.
3. Click Browse and select a database for storing retrieved data, or
type the name for a new database, select a directory where you
want to save it, and then click OK.
4. Click Configure or double click on the site row.
5. Select a daily, weekly or monthly schedule, and adjust the start
time. If you wish to upload data periodically in predefined intervals,
click on “Periodic” and define the time period in hours and minutes.
6. Select the number of attempts to upload data in the event of
temporary communication problems or unavailability of your
device, and the delay between attempts in minutes and seconds.
7. If you wish to use the schedule to synchronize the device clock
with your PC, check the “RTC Synchronization Enable” box. If your
device is password protected by a communications password, type