3 setting general display options, Setting general display options -2, Section 4.1.2 – Yokogawa Data Logging Software GA10 User Manual
Page 64
4-2
IM 04L65B01-01EN
4.1.2 Displaying the Monitor Page
Open a project, and click the
Monitor Page icon on the
Project tab to open the Monitor Page.
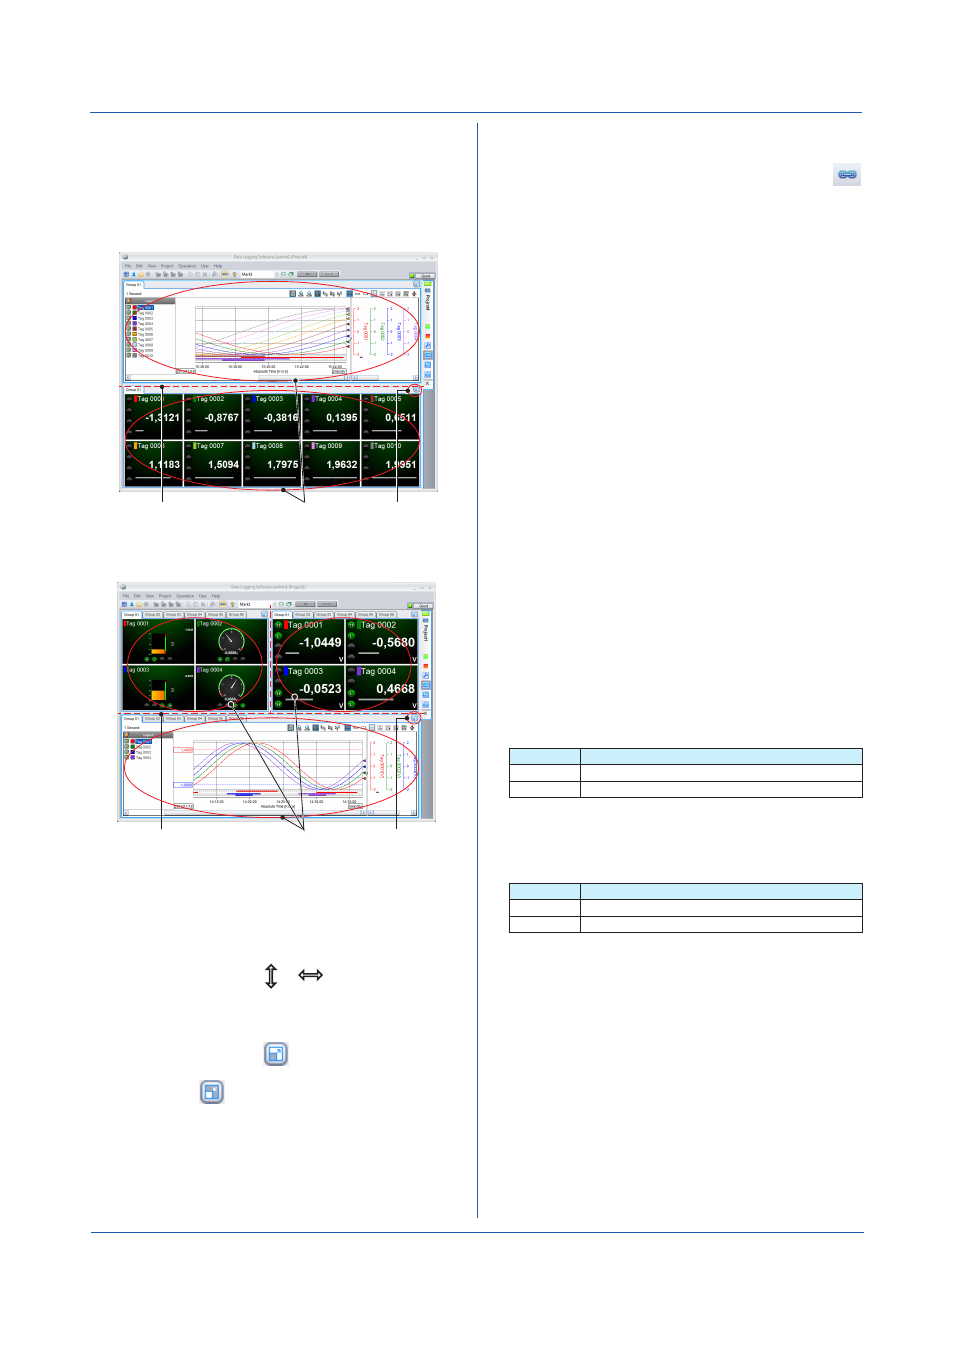
In Simple Settings mode, the Monitor Page consists of
the Trend Monitor Set and Digital Monitor Set as shown
below.
Maximize icon
Monitor set boundary
Monitor sets
In Detail Settings mode, the Monitor Page that you
configured opens.
Maximize icon
Monitor set boundary
Monitor sets
• Resizing the Monitor Set
To resize the Monitor Set,
Resize the Monitor Set on
the Acquisition & Monitor Setting page must be set to
On.
Move the pointer near the boundary of the Monitor Set
to change the pointer to or
. In this condition,
drag the pointer to move the boundary to the desired
position.
• Maximizing the Monitor Set
Click the Maximize icon
in the upper right of the
Monitor Set to expand the Monitor Set to fill the entire
window. Click
to return to its original size.
• Switching the Display Group at Once
On the
View menu, click Group Link. Or, click the
icon on the toolbar.
When you change the display group of one Monitor
Set, the display group of other Monitor Sets also
changes.
To cancel linking, on the
View menu, click Group
Link to unselect it. Or, click the icon on the toolbar to
unselect it.
4.1.3 Setting General Display Options
• Tag Display Form
From the list of options that appears when you click
Tag Display Form on the View menu, select the items
to display as tags. This applies to all pages.
• User Display Form
From the list of options that appears when you click
User Display Form on the View menu, select the
items to display as user names. This applies to all
pages.
• Screen Background Color
On the
View menu, click Style, and click Light or
Dark to select the background color. This applies to all
pages.
• Date Format
From the list of options that appears when you click
Date Format on the View menu, select the date
format. This applies to all pages.
• Month Display Form
From the list of options that appears when you click
Month Display Form on the View menu, select the
month display format. This applies to all pages.
Item
Description
Digit
Example: “10” for October
Character Example: “OCT” for October
• Decimal Point
On the
View menu, click Decimal Point to select the
symbol to use for the decimal point. This applies to all
pages.
Item
Description
.
Period
,
Comma
Chapter 4 Monitoring Data Collection