Yokogawa Data Logging Software GA10 User Manual
Page 37
3-13
IM 04L65B01-01EN
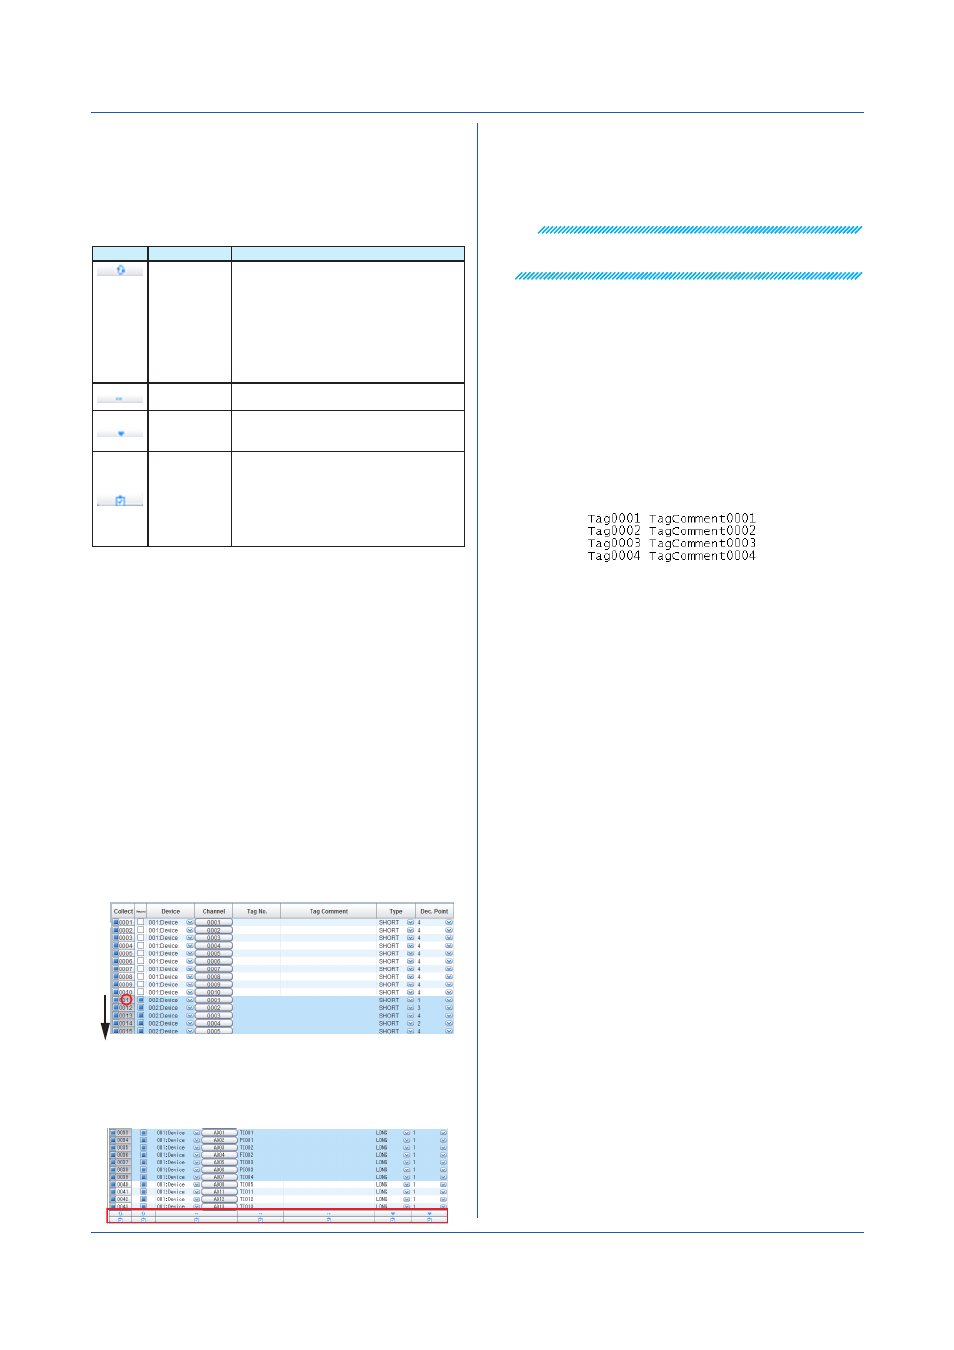
Collectively Editing Tags
To collectively edit setup data, you must select the target
setup data and then click a button on the action bar,
which is at the bottom of the window. The result varies
depending on the type of icon you click on the action bar
(see the following table).
Type
Name
Result
Enable or
disable
Switches the check box state between
selected and unselected.
If all the data values in the selected range are
the same, clicking this icon will switch all of
them in the same way.
If the data values in the selected range are
not all the same, clicking this icon will switch
all of them to match the first data value in the
selected range.
Increment
Assigns increasing channel numbers starting
with the first tag in the selected range
Copy
Copies the settings of the first tag in the
selected range to the other tags in the
selected range
Copy flag
Switches between selected and unselected
states for items to be pasted when copying
setup data. The items are normally selected
(pasted).
Clicking this button causes the corresponding
item to become unselected. The item will not
be pasted.
You can also copy and paste selected content using the Edit
menu.
To select the range of setup data, follow one of the
methods below.
• Select by dragging
Click the first line you want to select. Drag to the
last line you want to select and release the mouse
button.
• Select using the Shift key
After selecting the first line you want to select, hold
down the Shift key, and click the last line you want
to select.
• Select all lines
Click the title area of the
Collect column to select all
setup data.
Collective Editing
1
Select the rows that you want to edit collectively.
(1) Click the left edge of the first row.
(2) Drag and release.
2
Click an icon at the bottom for the column that you
want to edit.
The values in the selected range will be changed.
Chapter 3 Configuring and Starting Data Collection and Recording
Exporting and Importing Tags
Tag information can be converted (exported) to a TSV file
You can edit the TSV file using an appropriate software
application and load (import) it back into GA10.
Note
Only tag numbers and tag comments are exported and
imported.
• Export Procedure
1
Display the Tag Setting Page of the project whose
tag information you want to save.
2
On the
File menu, click Export tags.
3
Select the save destination, assign a name, and
save it.
The tag information file (.tsv extension) is saved to
the specified location.
Tag numbers and tag comments are exported in
pairs in separate lines as shown below.
• Import Procedure
1
Display the Tag Setting Page of the project whose
tag information you want to update.
2
On the
File menu, click Import tags.
An Open dialog box appears.
3
Select the file that you want to import, and click
Open.
The content of the imported tag information TSV file
is applied to the Tag Setting Page.