2 easy configuration (simple settings), 1 creating a project, 2 registering devices to connect – Yokogawa Data Logging Software GA10 User Manual
Page 26: Easy configuration (simple settings) -2, Creating a project -2, Registering devices to connect -2, Sec. 3.2, Sec. 3.2.2, 2 easy configuration (simple settings)
3-2
IM 04L65B01-01EN
Note
For details on where the Ethernet port is located and the
hierarchy of setting menus, see the user’s manual of the
relevant device.
3
Check that the PC and the device have been
connected.
You can check the connection using Windows De-
vice Manager or from the command prompt.
4
Register the DX on the network in GA10. Double-
click the project that you created in section 3.2.1.
The Simple Settings page opens.
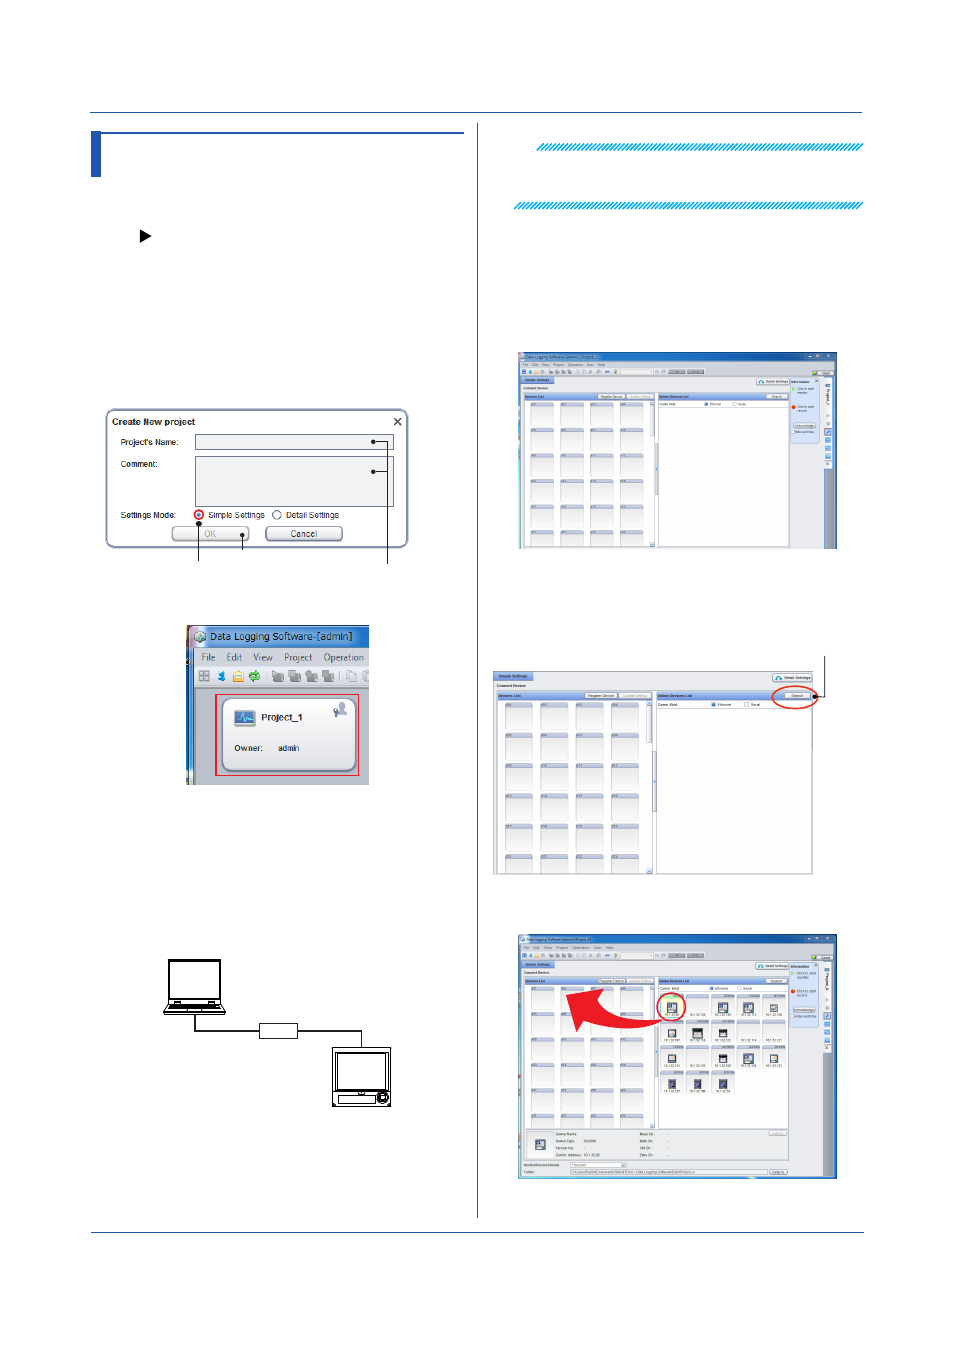
5
Click
Search in the Online Devices List on the right
side of the page.
Devices connected to the network are detected and
displayed.
Click Search.
6
Drag & drop the icon of the device that you want to
register to the
Device List on the left side of the page.
In the center of the page, a window appears showing
the details of the device that you are about to register.
Chapter 3 Configuring and Starting Data Collection and Recording
3.2 Easy Configuration (Simple
Settings)
This section explains how to configure the settings in Simple
Settings mode before starting data collection.
To customize the settings and start data collection:
3.2.1 Creating a Project
1
Start the client, and log in by typing the user name
and password.
2
On the
File menu, click New Project.
The Create New Project dialog box appears.
3.
Type the project name and comment. Leave
Settings Mode at
Simple Settings.
Type the project name
and comment.
Click OK.
Leave this at
Simple Settings.
A new project is created.
3.2.2 Registering Devices to Connect
To register devices to the new project, you must connect
the devices to the network.
Below is an example of connecting a DX to the PC
through the Ethernet interface.
1
Connect the device and the PC through a network
using LAN cables.
PC
Ethernet
HUB
* The figure shows a one-to-one connection.
2
Configure the Ethernet settings on the device. Set
the device’s IP address and subnet mask.
On the DX
Press MENU, hold down FUNC for 3 s (to switch
to basic setting mode), and select the Menu tab >
Communication (Ethernet).