4 starting data collection and recording, 5 closing a project, Starting data collection and recording -3 – Yokogawa Data Logging Software GA10 User Manual
Page 27: Closing a project -3, Sec. 3.2.3, Sec. 3.2.4
3-3
IM 04L65B01-01EN
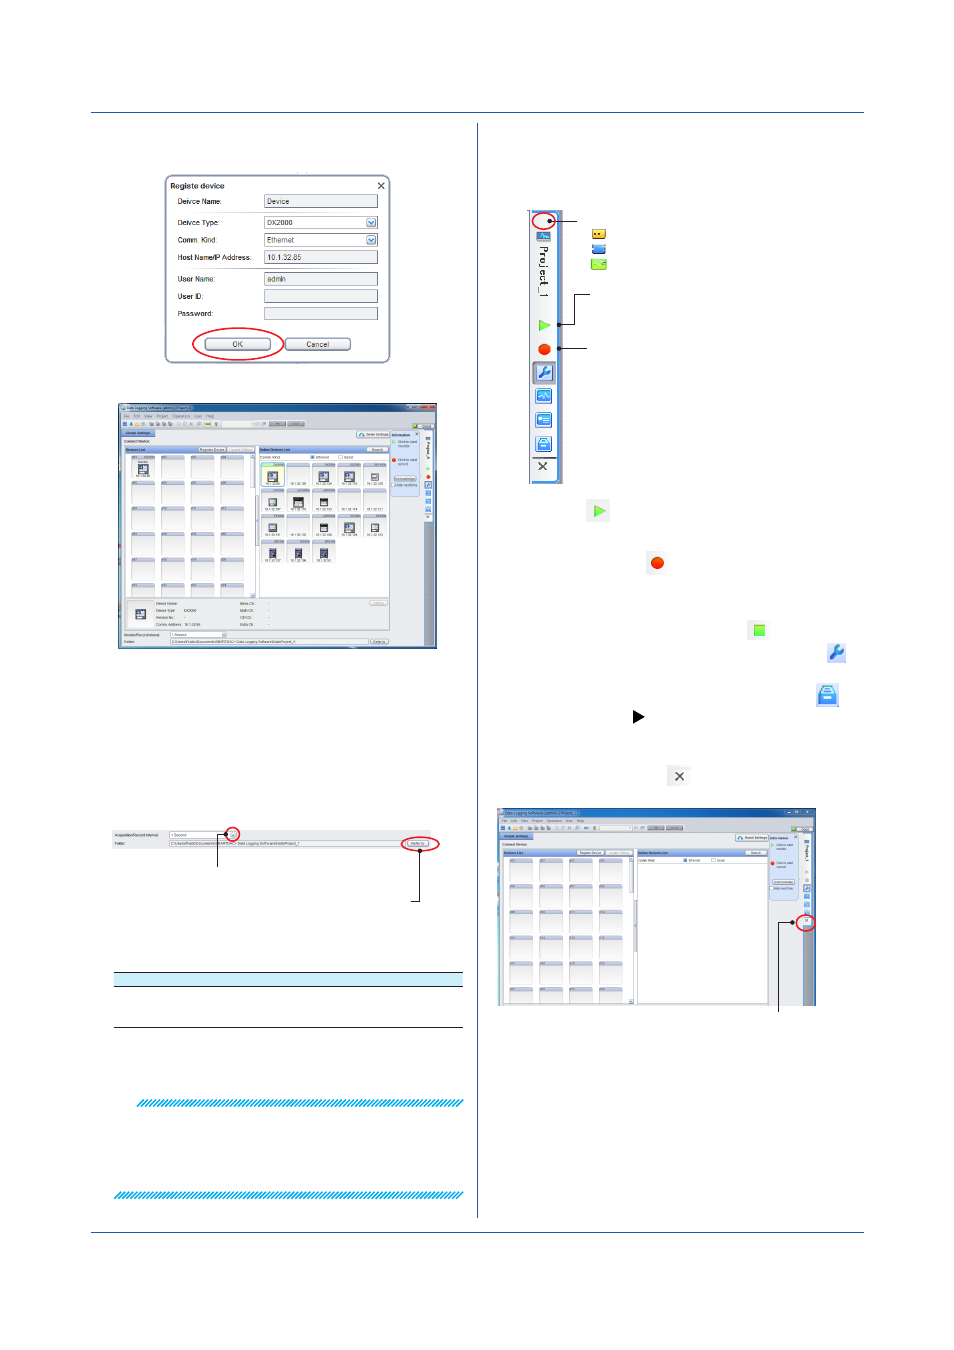
3.2.4 Starting Data Collection and Recording
Click the icons that are displayed on the tab on the right
side of the screen to collect or start and stop recording.
Starts and stops recording
Starts data monitoring and recording
to the data file at the same time.
Click again to stop only the recording.
Starts and stops data monitoring.
Starts data monitoring.
Click again to stop.
The status is displayed here.
Standby
Monitoring
Recording
1
Click the
icon to start data collection.
2
Click again to stop.
3
Likewise, click the
icon on the right to start
recording.
4
Click again to stop only the recording.
To also stop data monitoring, click
Stop
Monitoring. To return to the Setting Page, click
Setting Page.
Recorded data files are listed when you click
Data files Page.
3.2.5 Closing a Project
To close a project, click the
icon on the right edge of
the page.
Close the project.
• Note that clicking the close button in the upper right of
the window closes the software.
• An open project is locked (other users cannot edit it).
Display the Project List Page to view projects that are
locked.
Chapter 3 Configuring and Starting Data Collection and Recording
7
If the displayed information is correct, click
OK.
The DX is added to the Device List.
• To delete a registered device, click the device icon to
select it, and click
Delete on the Edit menu.
• You can also select the device icon and press the
Delete key.
3.2.3 Setting the Collection and Record Interval
and Save Destination
After registering the device, set the collection and record
interval and the measurement data save destination.
Click to select the interval.
Click to select the save destination.
1
Choose the interval from the
Monitor/Record
Interval list at the bottom of the page.
Name
Default Value Options
Acquisition/Record
Interval
1 s
100 msec, 200 msec, 500 msec,
1 s, 2 s, 5 s, 10 s, 20 s, 30 s,
1 min, 2 min, 5 min, 10 min
2
Click
Refer to, and select the directory for saving
recording files.
Note
• The Refer to button for specifying the save destination
folder is available only when the server and client are
installed in the same PC.
• We recommend you use the default setting for the
data save destination folder. (See “Folder” on