Yokogawa Data Logging Software GA10 User Manual
Page 29
3-5
IM 04L65B01-01EN
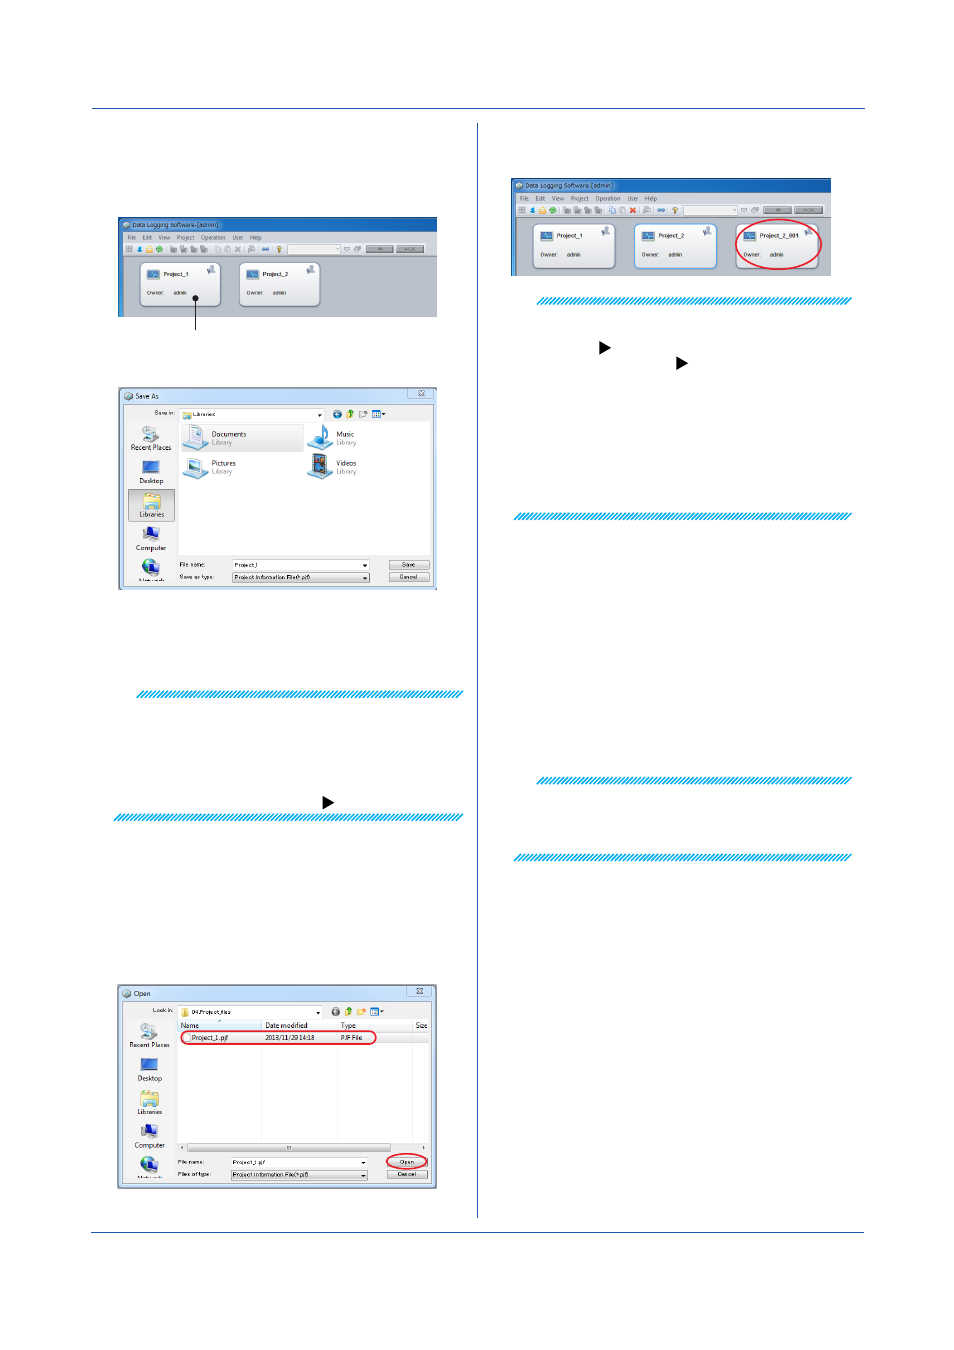
• Export procedure
1
From the list of projects, select the project that you
want to export.
Click to select.
2
On the
File menu, click Export Project.
3
Select the save destination, assign a name, and
save it.
The project information file (.pjf extension) is saved
to the specified location.
Note
• If you do not have access permission to the project,
you cannot export it.
• If the project contains Modbus device connections,
the register and channel information of the Modbus
devices are not exported. You must save the definition
files separately.
Modbus device definition file:
• Import procedure
1
On the
File menu, click Import Project.
An Open dialog box appears.
2
Select the file that you want to import (.pjf
extension), and click
Open.
The imported project is added to the list of proj-
ects.
Note
When you import a project, you become the project
owner.
Owner:
To modify the owner:
An error will occur in the following situations.
• If there are more tags in the imported project than
the number of tags that the server can handle
(If there are less tags, the insufficient tags are set to
default values.)
• If the server already has the maximum number of
project registrations
• If the server already has the maximum number of
device registrations
Copying and Pasting
You can easily copy and paste projects.
1
From the list of projects, select the project that you
want to copy.
2
On the
Edit menu, click Copy, or press Ctrl+c on
the keyboard.
The project is copied.
3
To paste the copied project, on the
Edit menu,
click
Paste, or press Ctrl+v on the keyboard.
The project is pasted in the list.
Note
• The copied project is retained until you log out.
• When you import or paste a project, if the original
file is on the list, a serial number starting with 001 is
added to the original project name.
Chapter 3 Configuring and Starting Data Collection and Recording