2 go to packet/transaction/transfer, 3 go to marker – Teledyne LeCroy USBTracer_Trainer - Users Manual User Manual
Page 140
Chapter 6: Searching Traces
USB Protocol Suite User Manual
126
LeCroy Corporation
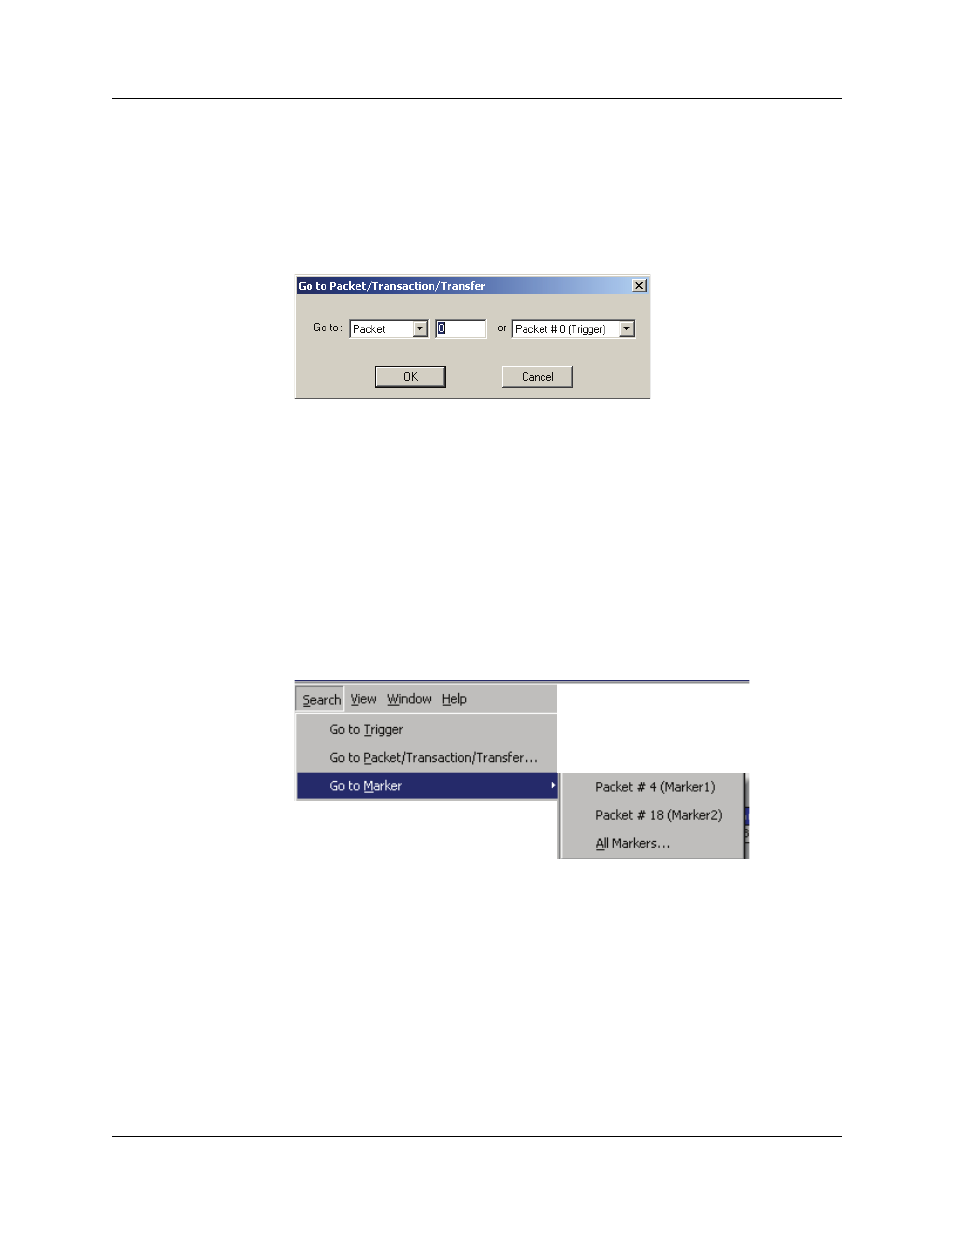
6.2 Go to Packet/Transaction/Transfer
To display a specific packet:
Step 1 From the menu bar, select the command
Search > Go to Packet/Transaction/Transfer
to display the Go to Packet/Transaction/Transfer window:
Step 2 Select the desired viewing level (packet, transaction etc.) from the drop-down
menu next to the words Go to.
Step 3 Enter the number of the packet you want to display.
Step 4 Click OK. The Trace View is repositioned with the selected packet at the top of
your screen. The resulting item will be shown as selected in the view.
6.3 Go to Marker
To instruct the Analyzer to display a marked packet:
Step 1 Select Go to Marker under Search on the Menu Bar.
You see a drop-down menu listing the marked packets in that Trace View:
Step 2 Select the desired packet from the displayed list. The Trace View is repositioned
with the selected packet at the top of your screen. The resulting item will be
shown as selected in the view.
Note: The Go to Marker feature functions in conjunction with the Set Marker
feature. The comments within the parentheses following each marked
packet are added or edited with the Set Marker feature. Please refer to “Set
Marker” on page 95.
You can use Ctrl+M to go immediately to the All Markers dialog.
Packet Selection works with Go to Marker.