Replacing the cooling fan, Figure 125 installing piggy-backed fans, Install new fan – Nortel Networks BCM1000 User Manual
Page 265
Chapter 18 Adding or replacing a cooling fan
265
Installation and Maintenance Guide
Replacing the cooling fan
To replace the fan in the BCM1000, follow these steps:
1
Place the new fan in the BCM1000 in the position from which you removed the failed fan.
2
Align the screw holes in the fan with the screw holes on the BCM1000.
3
Attach the fan to the BCM1000 using the four screws
(2.0 hardware) or plastic rivets (2.5 hardware). Refer to
.
Note:
Ensure the label of the new fan faces the back wall of the BCM1000.
Note:
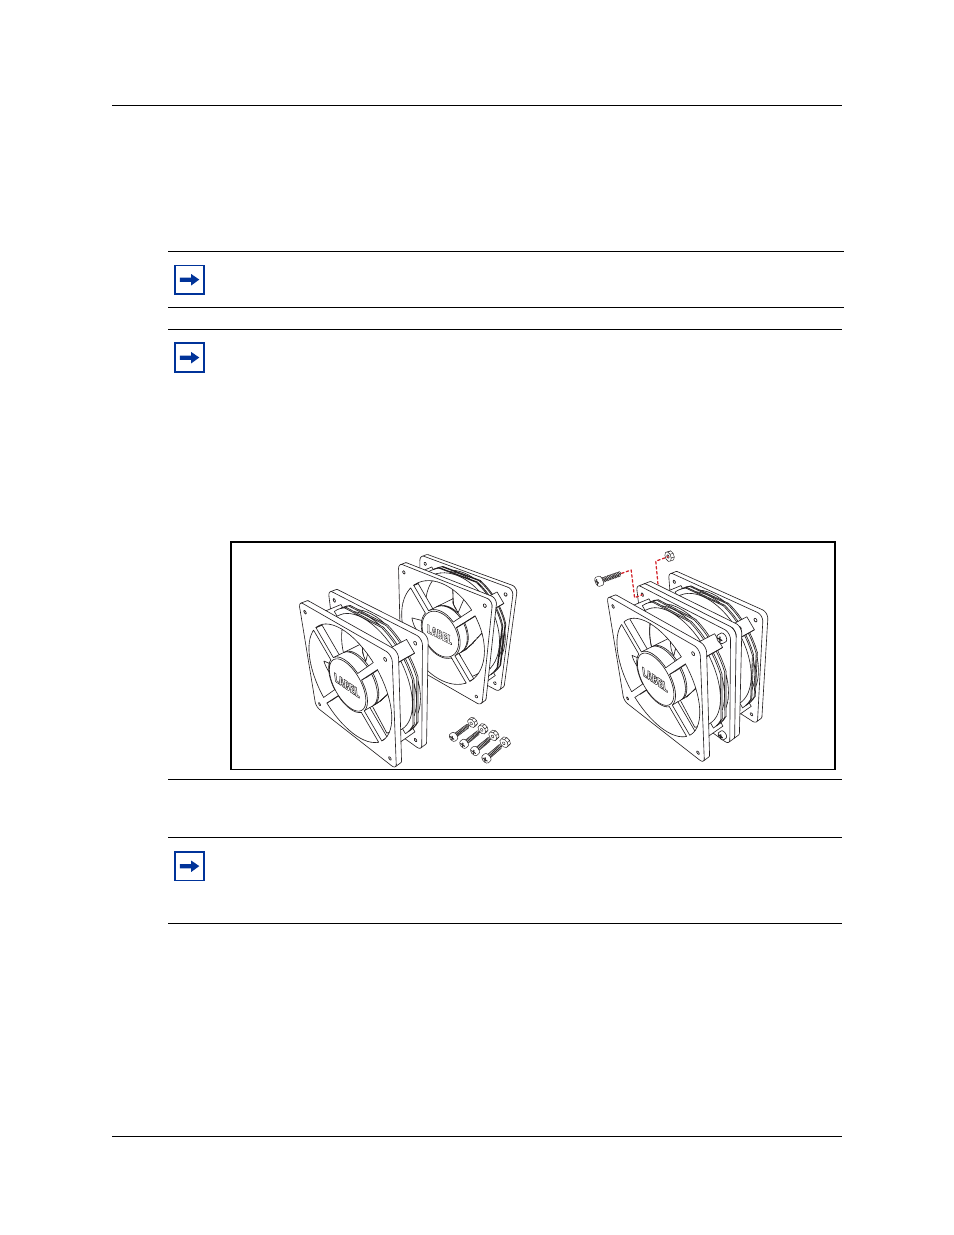
Piggy-backed redundant fan
If you are installing or replacing a piggy-back redundant fan in a version 2.0 BCM1000
that has been updated with a redundant power supply, place the redundant fan against the
existing fan. Ensure that the blades are positioned in the same direction as the existing fan
(fan labels both face in the same direction).
Use the four screws and nuts that are supplied with the redundant fan to attach the
redundant fan to the existing fan.
Figure 125
Installing piggy-backed fans
Note:
Side-by-side redundant fan
If you are installing a second fan in a 2.5-model BCM1000, you must remove the cover
label on the back of the server to expose the fan air holes and mounting holes.