Chapter 6, Installing the bcm1000e (expansion unit), Installing the bcm1000e into a rack – Nortel Networks BCM1000 User Manual
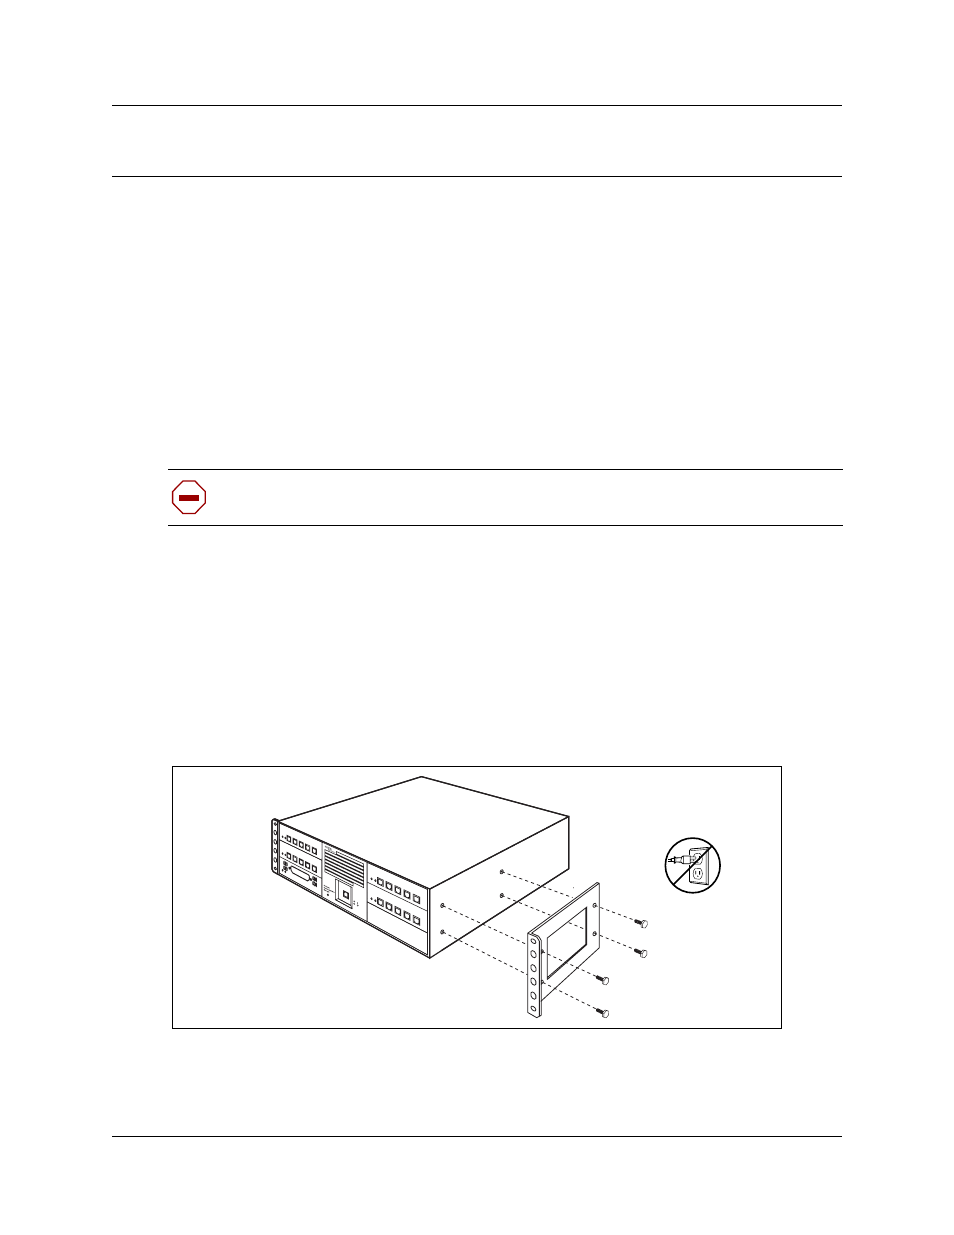
Page 129: Attaching the mounting brackets, Figure 44, Attach the rack mounting bracket to the bcm1000e
129
Installation and Maintenance Guide
Chapter 6
Installing the BCM1000e (expansion unit)
This chapter describes how to install the BCM1000e.
The BCM1000e must be installed close enough to the BCM1000 that the 5 m (16 ft) cable between
the two units can be connected to the BCM1000 without stress on the cable. The BCM1000e has
the same environmental and electrical requirements as the BCM1000. For more information about
these requirements, refer to
“Preparation checklist” on page 119
.
Installing the BCM1000e into a rack
The BCM1000e fits into a standard 19-inch equipment rack. You must install the unit in the same
rack as the BCM1000.
Attaching the mounting brackets
You must install two rack brackets on the BCM1000e to allow you to install the unit into the
equipment rack. These brackets are supplied with the unit.
1
Place the BCM1000e on a table.
2
Align the screw holes between the unit and the right rack mounting bracket. Refer to
Figure 44
Attach the rack mounting bracket to the BCM1000e
Caution:
When installing the BCM1000e in a rack, do not stack units directly on top of
one another. Fasten each unit to the rack with the separate mounting brackets.