Casio FX-CG10 User Manual
Page 377
9-26
u Procedure
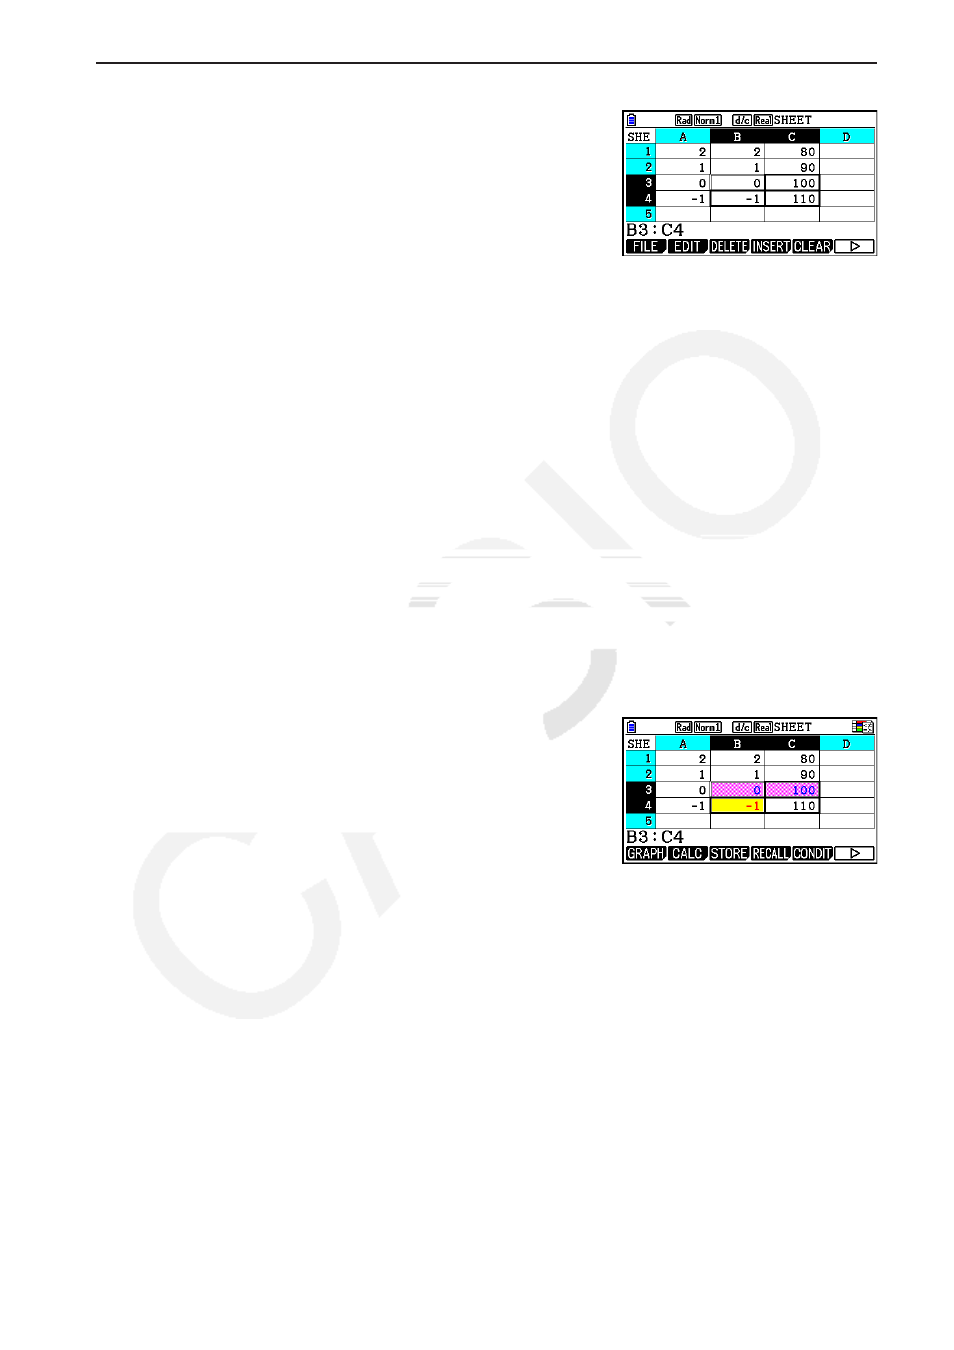
1. Select the range of cells B3:C4.
2. Press
6(g)5(CONDIT) to display the Condition screen.
• Condition1 appears first, so configure the first condition here.
3. Use
c to move the highlighting to “Expre” (Expression) and then press 6(g)1(C<䊐).
• Initially, “Cell < Value” is displayed in the Expre line.
4. Use
c to move the highlighting to “Value” and then press aw to input 0.
5. Use
c to move the highlighting to “Format” and then press 1(SETFORM).
• On the FORMAT dialog box that appears, configure the following settings:
Character Color: Red, Area Color: Yellow, Paint Style: Normal.
6. Use
f to move the highlighting to “Condition1” and then press 2(COND2) to display
Condition2.
7. Repeat steps 3 through 5 above to configure the Condition2 settings.
• Input
1(䊐≤C≤䉭) in the “Expre” line, aw in the “V1” line, and baaw in the
“V2” line.
• In the “Format” line, press
1(SETFORM) and then configure the following settings:
Character Color: Blue, Area Color: Magenta, Paint Style: Lighter.
8 Press
J.
• This returns to the screen in step 1 of this procedure
and applies the formatting you configured to each cell.
Note
• It may take some time to display calculation results when a large number of cells containing
conditional formatting are selected.
• Cell modification and recalculation may take some time to complete when there is a large
amount of conditional formatting.