4 set ting the d a tu m with a 3-d t o uc h pr obe – HEIDENHAIN iTNC 530 (340 49x-04) Touch Probe Cycles User Manual
Page 38
38
2 Touch probe cycles in the Manual and Electronic Handwheel modes
2.4 Set
ting the D
a
tu
m with a 3-D T
o
uc
h Pr
obe
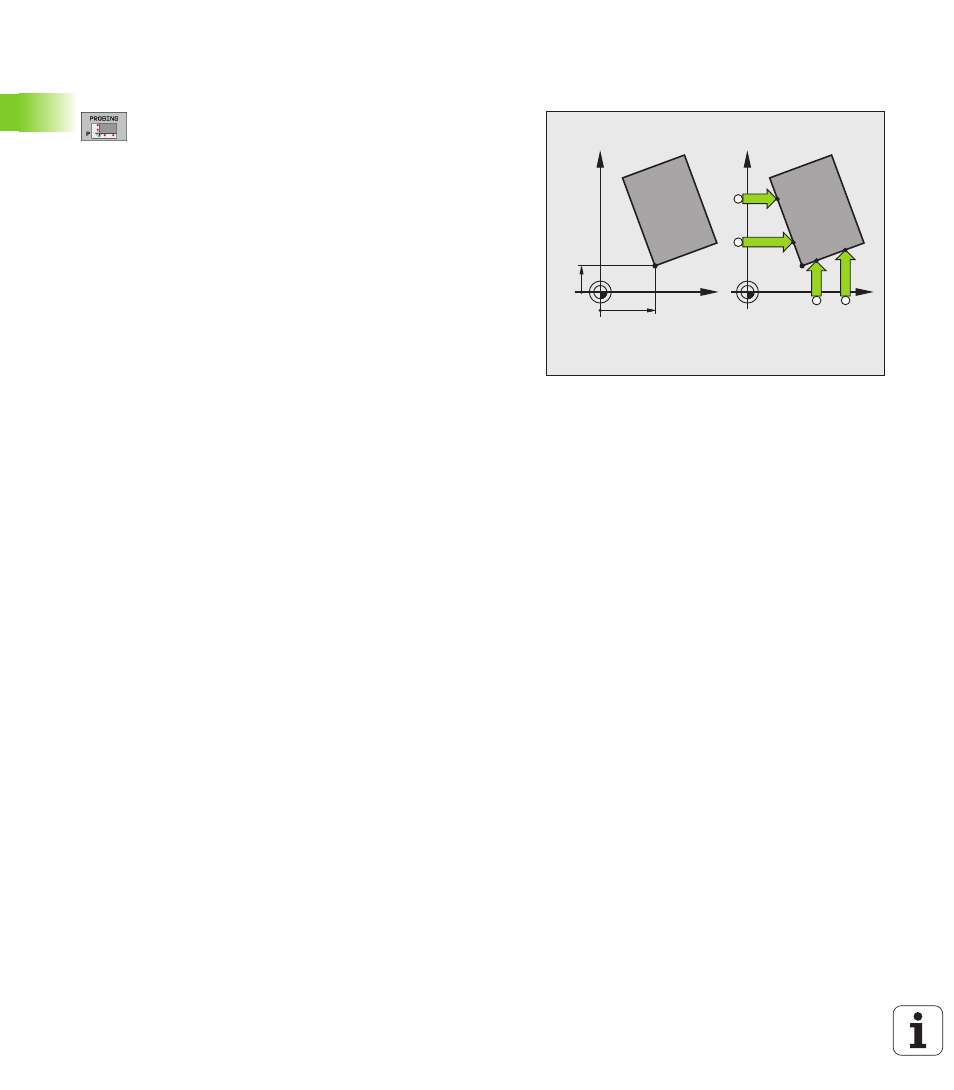
Corner as datum—using points that were
already probed for a basic rotation
Select the probe function by pressing the PROBING P
soft key.
Touch points of basic rotation ?
: Press ENT to
transfer the touch point coordinates.
Position the touch probe at a starting position near the
first touch point of the side that was not probed for
basic rotation.
Select the probe direction by soft key.
To probe the workpiece, press the machine START
button.
Position the touch probe near the second touch point
on the same side.
To probe the workpiece, press the machine START
button.
Datum:
Enter both coordinates of the datum in the
menu window, confirm with the SET DATUM soft
key, or write the values to a table (see “Writing the
measured values from touch probe cycles in datum
tables,” page 30, or see “Writing the measured
values from touch probe cycles in the preset table,”
page 31).
To terminate the probe function, press the END key.
Corner as datum—without using points that
were already probed for a basic rotation
Select the probe function by pressing the PROBING P soft key.
Touch points of basic rotation?
: Press NO ENT to ignore the
previous touch points. (The dialog question only appears if a basic
rotation was made previously.)
Probe both workpiece sides twice.
Datum:
Enter the coordinates of the datum and confirm your entry
with the SET DATUM soft key, or write the values to a table (see
“Writing the measured values from touch probe cycles in datum
tables,” page 30, or see “Writing the measured values from touch
probe cycles in the preset table,” page 31).
To terminate the probe function, press the END key.
P
X=?
Y=?
X
Y
P
X
Y