3 a u to matic w o rk piece measur ement – HEIDENHAIN iTNC 530 (340 49x-04) Touch Probe Cycles User Manual
Page 127

HEIDENHAIN iTNC 530
127
3.3 A
u
to
matic W
o
rk
piece Measur
ement
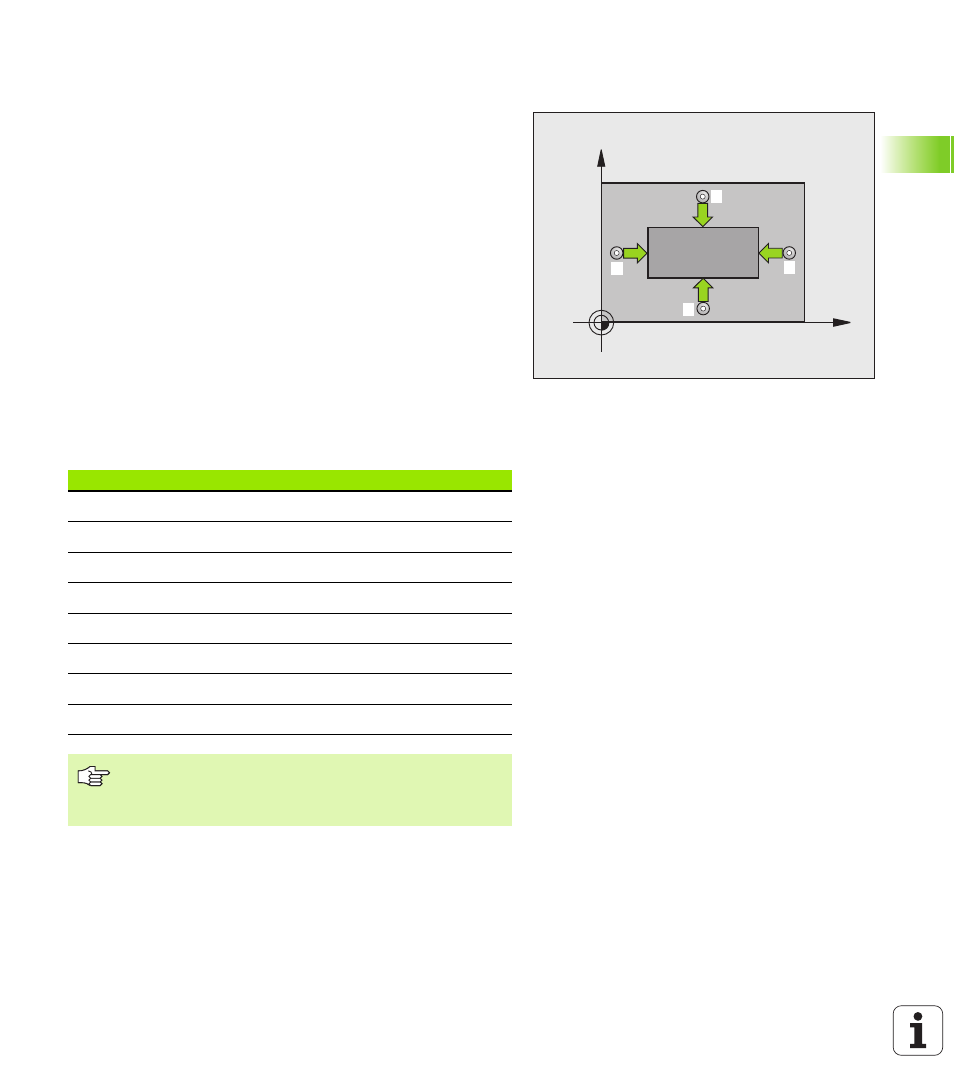
MEASURE RECTANGLE FROM OUTSIDE
(touch probe cycle 424, ISO: G424)
Touch probe cycle 424 finds the center, length and width of a
rectangular stud. If you define the corresponding tolerance values in
the cycle, the TNC makes a nominal-to-actual value comparison and
saves the deviation value in system parameters.
1
The TNC positions the touch probe to the starting points at rapid
traverse (value from MP6150 or MP6361) following the positioning
logic (see “Running touch probe cycles” on page 26) to the
starting point
1
. The TNC calculates the probe starting points from
the data in the cycle and the safety clearance from MP6140.
2
Then the touch probe moves to the entered measuring height and
probes the first touch point at the probing feed rate (MP6120 or
MP6360).
3
Then the touch probe moves either paraxially at the measuring
height or linearly at the clearance height to the next starting point
2
and probes the second touch point.
4
The TNC positions the probe to starting point
3
and then to starting
point
4
to probe the third and fourth touch points.
5
Finally the TNC returns the touch probe to the clearance height and
saves the actual values and the deviations in the following Q
parameters:
X
Y
1
2
3
4
Parameter number
Meaning
Q151
Actual value of center in reference axis
Q152
Actual value of center in minor axis
Q154
Actual value of length in the reference axis
Q155
Actual value of length in the minor axis
Q161
Deviation from center of reference axis
Q162
Deviation from center of minor axis
Q164
Deviation of length in reference axis
Q165
Deviation of length in minor axis
Before programming, note the following
Before a cycle definition you must have programmed a
tool call to define the touch probe axis.
