Quick reference, Quic k ref e rence quic k ref e rence, 5 index – KEYENCE LV-N10 Series User Manual
Page 107: Digital laser sensor lv-n10 series user's manual
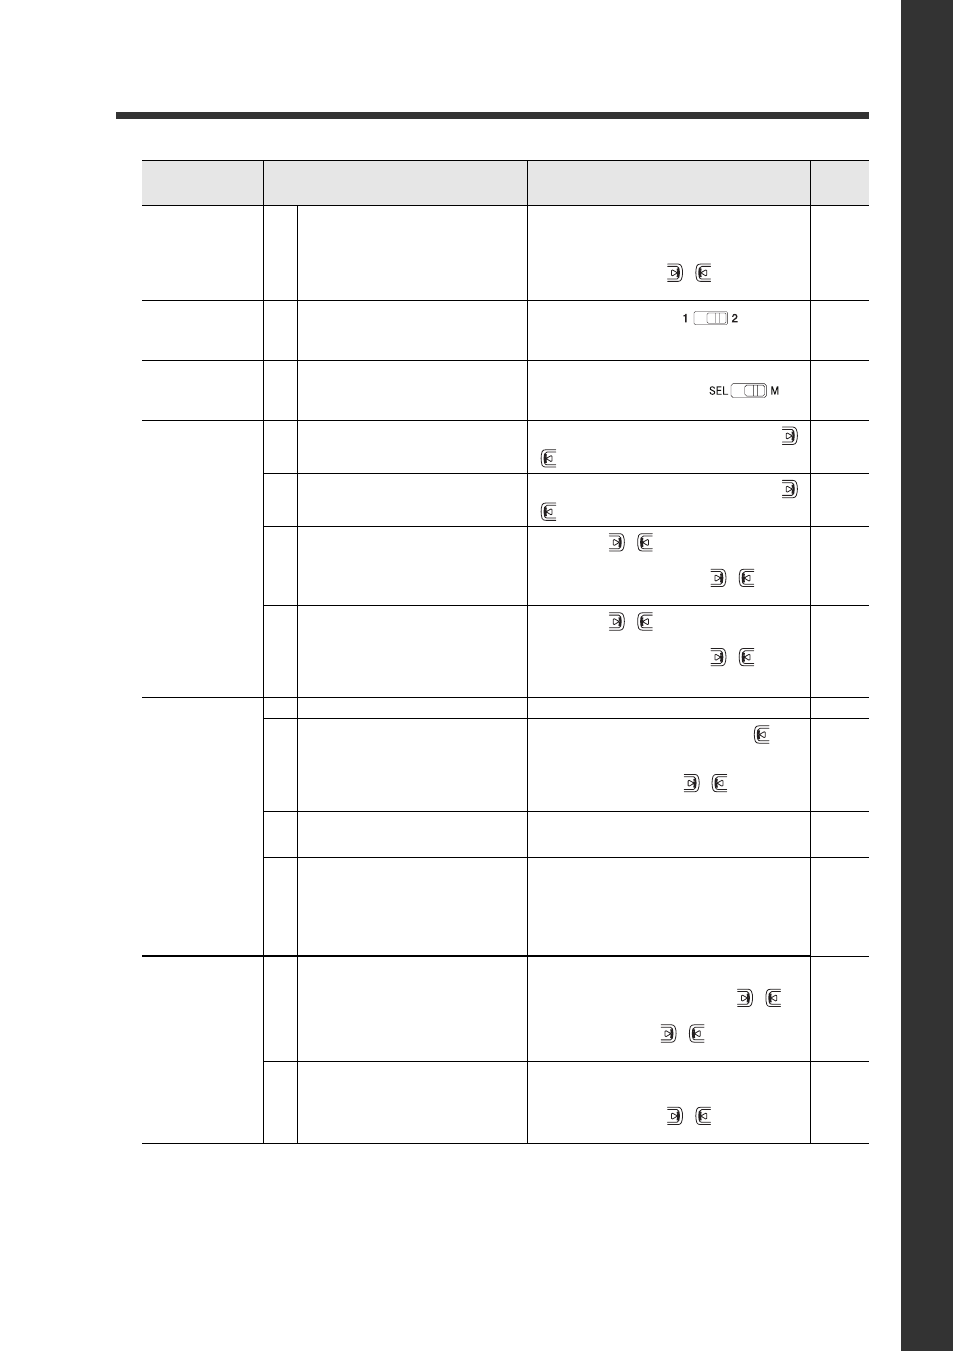
6-5 Index
6-13
- Digital Laser Sensor LV-N10 Series User's Manual -
Initializing the set-
tings
16
Initializing (Restore to factory default
settings)
1. Press and hold the [SET] button and [PRE-
SET] button.
2. Press the [MODE] button while on the rSt
screen.
3. Select init with the
(
) button.
4. Press the [MODE] button to execute.
Displaying the out-
put 2 display
screen with the
2-output type
17
Switch to the output 2 display screen.
Set the channel switch to
.
* The output 2 sensitivity and advanced set-
tings can be modified in this state.
Switching to the
maximum received
light intensity
power mode
18
Adjust the power mode to the MEGA
mode.
Set the power select switch to
.
Preventing
incorrect
operations
19
Activating the key lock
Press and hold the [MODE] button and the
(
) button simultaneously.
20
Deactivating the key lock
Press and hold the [MODE] button and the
(
) button simultaneously.
21
Activating the password-protected key
lock
1. Press the
(
) button 10 times while
holding down the [MODE] button.
2. Input the password with the
(
) button.
3. Press the [MODE] button to execute.
22
Deactivating the password-protected
key lock
1. Press the
(
) button 10 times while
holding down the [MODE] button.
2. Input the password with the
(
) button.
3. Press the [MODE] button to deactivate the
key lock.
Others
(Advanced
function settings,
etc.)
23
Setting the advanced functions
Press and hold the [MODE] button.
24
Setting to rescale at each preset exe-
cution so that analog output is "5 V"
output in respect to "100.0".
1. Press and hold the [MODE] button,
but-
ton and [SET] button simultaneously.
2. Press the [MODE] button once or twice.
3. Select "Pr-A PrST" with
(
) button, and
press the [MODE] button.
25
Switching the display to extended dis-
play or received light intensity hold
display, etc. (sub-display)
After setting the sub-display with the advanced
function settings, press the [MODE] button
twice.
26
Resetting the following values
* Received light intensity hold value
* Excess gain hold value
* Output when output 2 is in limit set-
ting detection mode
* Count value when output 2 is in
counter output mode
Press and hold the [MODE] button and [SET]
button.
Saving and
loading the
settings
27
Saving the settings (custom save)
1. Press and hold the [SET] button and [PRE-
SET] button.
2. Display the SAvE screen with the
(
)
button, and press the [MODE] button.
3. Select yES with the
(
) button.
4. Press the [MODE] button to execute.
28
Loading the settings (user reset)
1. Press and hold the [SET] button and [PRE-
SET] button.
2. Press the [MODE] button on the rSt screen.
3. Select USEr with the
(
) button.
4. Press the [MODE] button to execute.
Purpose
Description
Operation procedures
Reference
page
Quic
k Ref
e
rence
Quic
k Ref
e
rence