Wv-cu20 remote controller (option), One-touch dial buttons [one touch dial, 1 - 5, Switch site button[switch site, 3 – Panasonic WV-CU20 User Manual
Page 15: Video scanning mode button [video auto/manu, 4, Alarm acknowledge button [alm ack, 5, Dial button [dial, Quick dial button [quick, Call button [call, Redial button [redial, Set button [#, set
Attention! The text in this document has been recognized automatically. To view the original document, you can use the "Original mode".
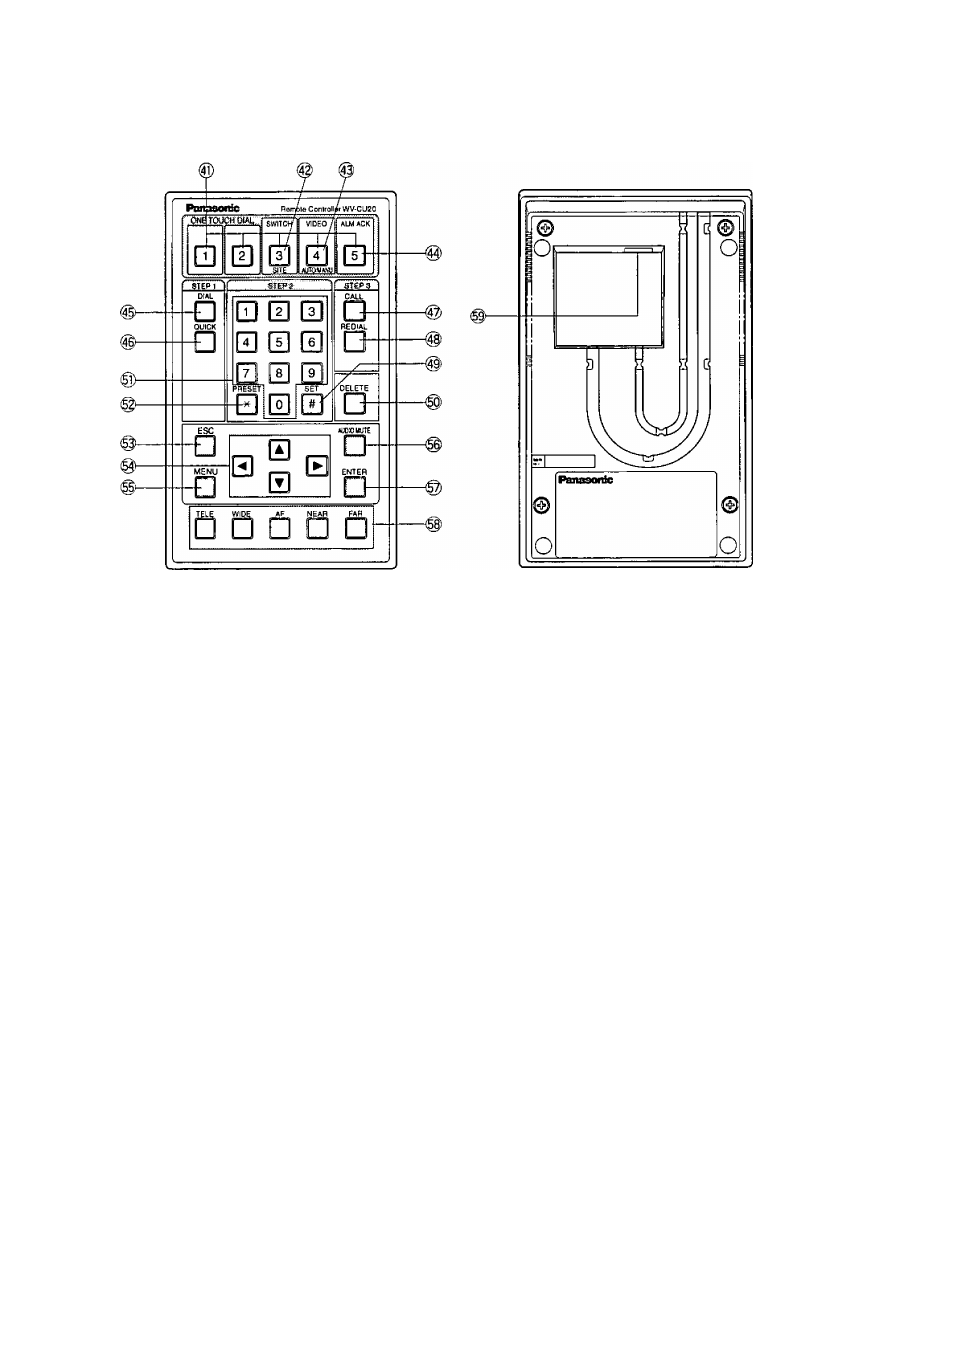
WV-CU20 Remote Controller (Option)
@ One-touch Dial Buttons [ONE TOUCH DIAL, 1 - 5]
These buttons are used to call the destinations preset
to the buttons. Press the DIAL, then any of them,
©
Switch Site Button[SWITCH SITE, 3]
This button is used to switch the site from the currently
communicating to another one when communicating
with more than one site. Highlight a site on the receiver
monitor with the direction button, then press this button.
® Video Scanning Mode Button
[VIDEO AUTO/MANU, 4]
This button is used on the receiver to toggle the scan
ning mode automatically and manually,
® Alarm Acknowledge Button [ALM ACK, 5]
This button is used on the receiver to acknowledge acti
vated alarms.
© Dial Button [DIAL]
This button is used to open the DIRECT DIAL window
where you can enter an IP address prior to start dialing.
After pressing this button, specify an IP address from
the registered directory or on the DIRECT DIAL window.
To terminate the call, hold down this button for 2 sec
onds,
@ Quick Dial Button [QUICK]
This button is used to select Quick (Short) Dial numbers
stored in the menu.
© Call Button [CALL]
This button is used to call the IP address that may be
picked up from the registered directory or may be
entered in the DIRECT DIAL window. After specifying
the IP address, then press this button.
© Redial Button [REDIAL]
This button is used to redial the last called destination if
the power of the unit has been tuned on after the call.
The last called number Is reset when the power of the
WJ-NT204 is turned off.
© # SET Button [#, SET]
For camera selection, enter a camera number 1 through
5, then press this button.
For preset position selection, press [* , PRESET],
[number], and this button.
This is also used to confirm the selected parameter in
the setup menus, or to reset all parameters in the cam
era setup.
® Delete Button [DELETE]
This button is used to correct any numeric or alphabetic
input in the menu.
Pressing this button will delete the character followed
immediately by the cursor.
@ Numeric Buttons [0 - 9]
These buttons are used to enter numeric characters for
phone numbers, passwords, and camera selection.
©
X PRESET Button [ X ^
preset
]
This button is used to specify a camera preset position.
Press this button, [number], and then [#, SET] button to
recall the camera preset position.
In the camera setup menu, pressing this button will
reset all parameters, or change the menu to SPECIAL.
15