Exploring the makerun screen – Dynojet WinPEP 7 User Manual
Page 48
WinPEP 7 User Guide
C H A P T E R 3
Exploring the MakeRun Screen
3-14
. . . . . . . . . . . . . . . . . . . . . . . . . . . . . . . . . . .
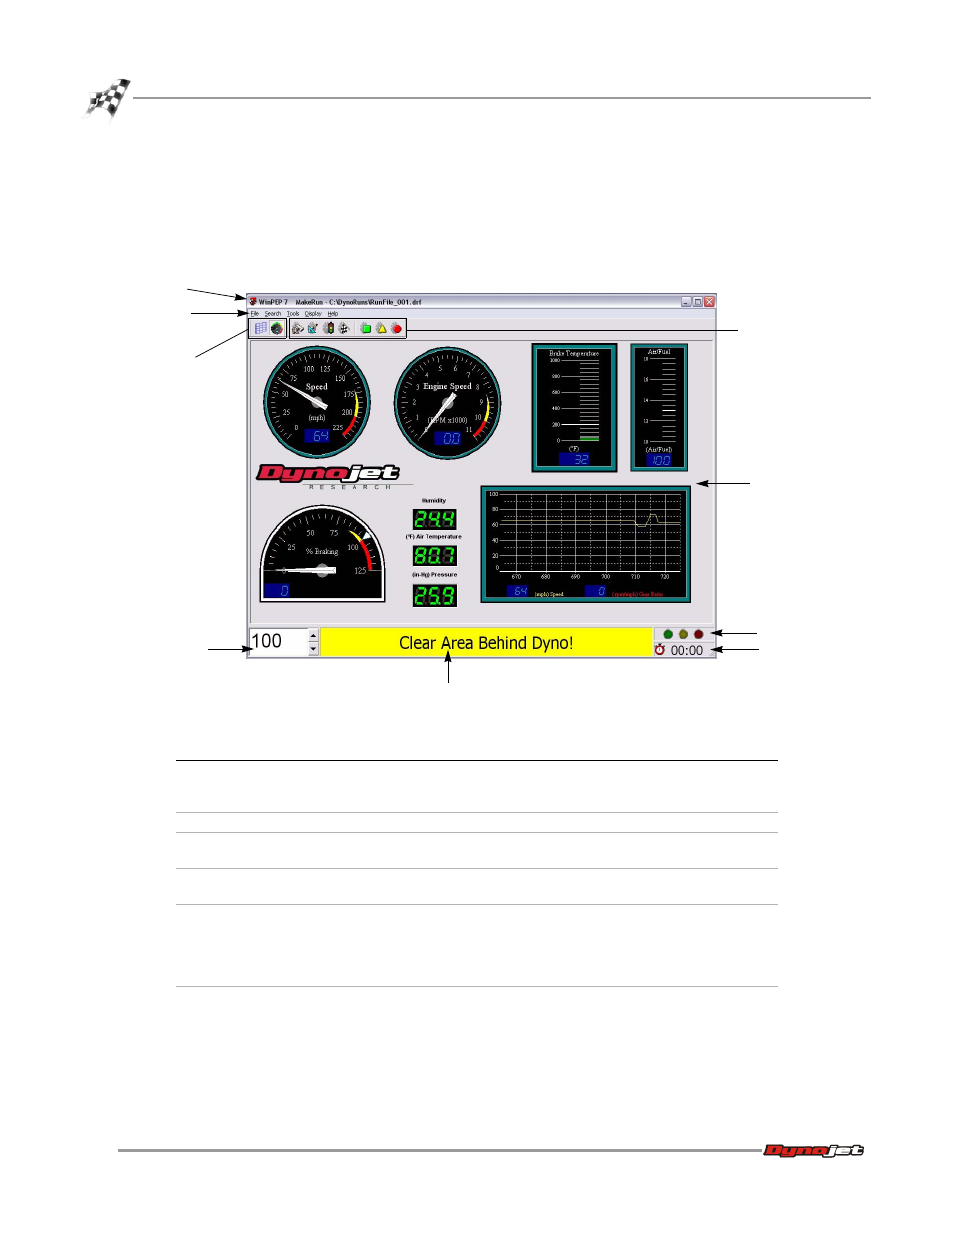
EXPLORING THE MAKERUN SCREEN
The MakeRun screen contains features that can be accessed from the menu choices at
the top of the MakeRun window, by clicking on the buttons in the toolbar, and even
through your pendant. A description of the functions and displays follows.
Figure 3-7: MakeRun Features
screen element
function
Title bar
The area displaying the name of the screen you are
currently working in, the current run directory, and
current run name.
Menu bar
The area containing drop down menu options.
Navigation Toolbar
A dockable toolbar that contains shortcuts for moving
between the Graph and MakeRun screens.
MakeRun Toolbar
A dockable toolbar that contains shortcuts to many of the
menu commands and commonly used features.
MakeRun Screen
The area in which you view the template. Templates allow
the user to save and restore specific views. Each view is a
combination of gauges, bars, trend line graphs, LEDs, and
digital displays. Each of these controls is associated with
one or more data channels.
Load Control Set Point Edit
The area in which you manually enter the
load control set
point
. Use the arrows to increase or decrease the
set point
by the current step size on the currently selected gauge or
click on the load control value edit field and enter a
specific value.
Edit the current step size (amount of increase/decrease in
the set point value) in the Gauge Property Editor.
title bar
menu bar
navigation
toolbar
load control
set point edit
status bar
sampling timer
indicator lights
MakeRun screen
MakeRun toolbar