AirLive RS-2500 User Manual
Page 101
15. Virtual Server
AirLive RS-2500 User’s Manual
96
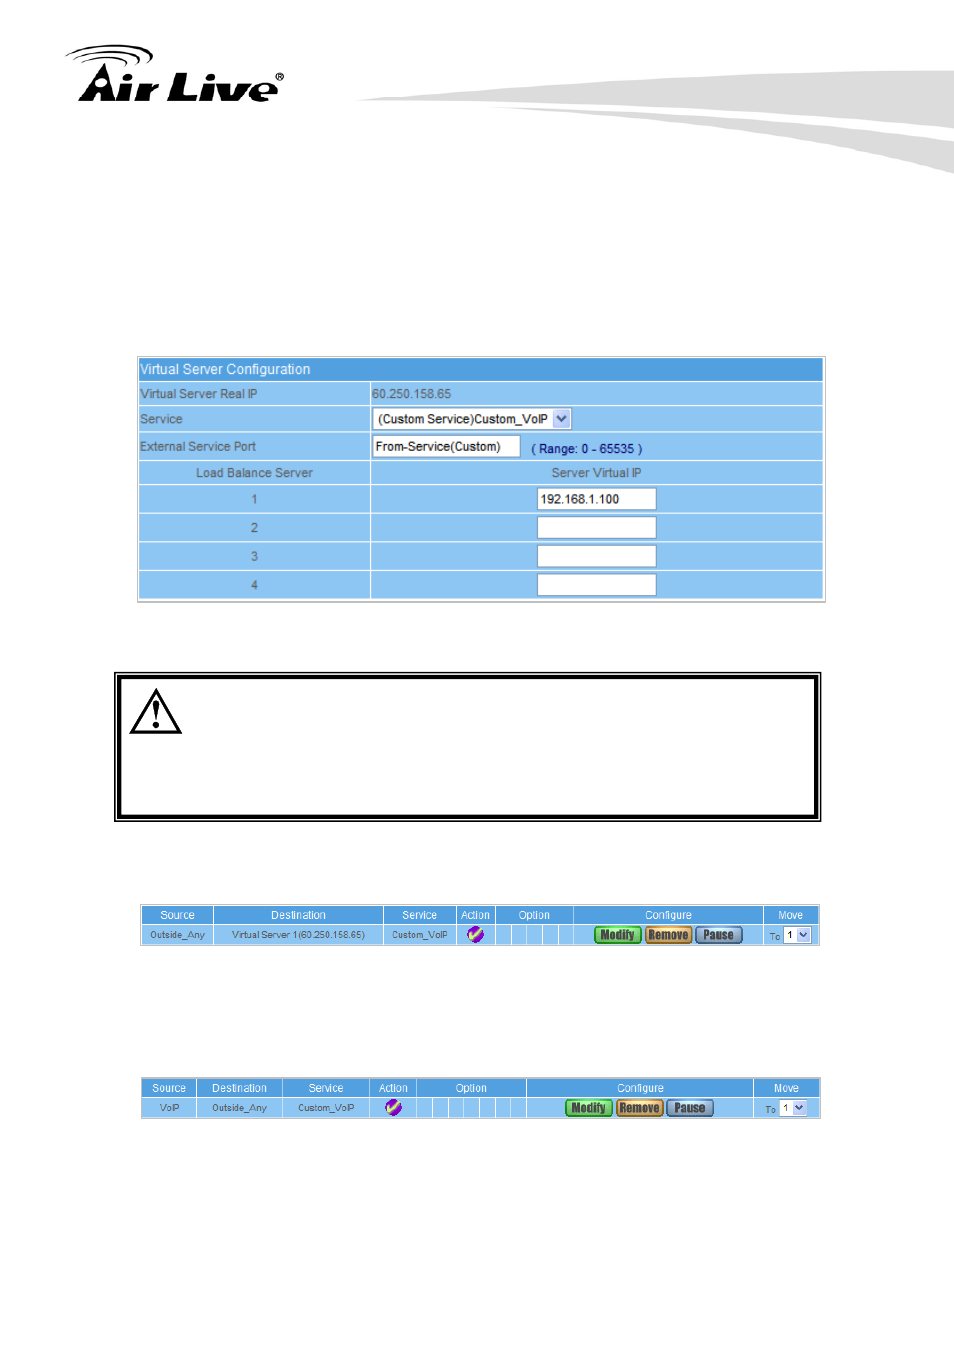
Click New Entry
Service: Select (Custom Service) VoIP_Service
External Service Port: From-Service (Custom)
Load Balance Server1: Enter 192.168.1.100
Click OK
Complete the setting of Virtual Server (Figure 15-13)
Figure 15-13 Virtual Server Configuration WebUI
When the custom service only has one port number, then the external
network port of Virtual Server is changeable; On the contrary, if the
custom service has more than one port network number, then the
external network port of Virtual Server cannot be changed.
STEP 5
﹒
Policy
Incoming: Add a new Incoming Policy, which includes the virtual
server that set by STEP4: (Figure 15-14)
Figure 15-14 Complete the Policy includes Virtual Server Setting
STEP 6
﹒
Policy
Outgoing: Enter the following setting of the internal users using VoIP to
connect with external network VoIP in Outgoing Policy (Figure 15-15)
Figure 15-15 Complete the Policy Setting of VoIP Connection
STEP 7
﹒
Complete the setting of the external/internal user using specific service to
communicate with each other by Virtual Server.