Creating and installing the skm server certificate, Propagating third-party certificates, Copying the certificates – HP Secure Key Manager User Manual
Page 40
5.
Add the first member’s CA to the Trusted CAs list.
a. In the Certificates & CA menu, click Trusted CA Lists.
b. Click on the Default Profile Name.
c. Click Edit.
d. Select the name of the CA from the list of Available CAs in the right panel. For example,
SKM Local CA.
e. Click Add.
f. Click Save.
6.
Join the appliance to the cluster.
a. Select the Device tab.
b. In the Device Configuration menu, click on Cluster.
c. In the Cluster, click on Join Cluster.
d. In the Join Cluster section of the window, leave Local IP and Local Port set to their defaults.
e. Type the original cluster member’s IP into Cluster Member IP.
f. Type the original cluster member’s port into Cluster Member Port. The default value of this port
is 9001. If this value was changed in
, step 4, use that value.
g. Click Browse and select the Cluster Key File you saved in
, step 6.
h. Type the cluster password into Cluster Password.
i.
Click Join.
7.
After adding all members to the cluster, delete the cluster key file from the desktop.
Creating and installing the SKM Server Certificate
To create and install the SKM Server Certificate, perform the following steps on each new appliance on
the cluster:
1.
Click the Security tab.
2.
In the Certificates & CAs menu, click Certificates.
3.
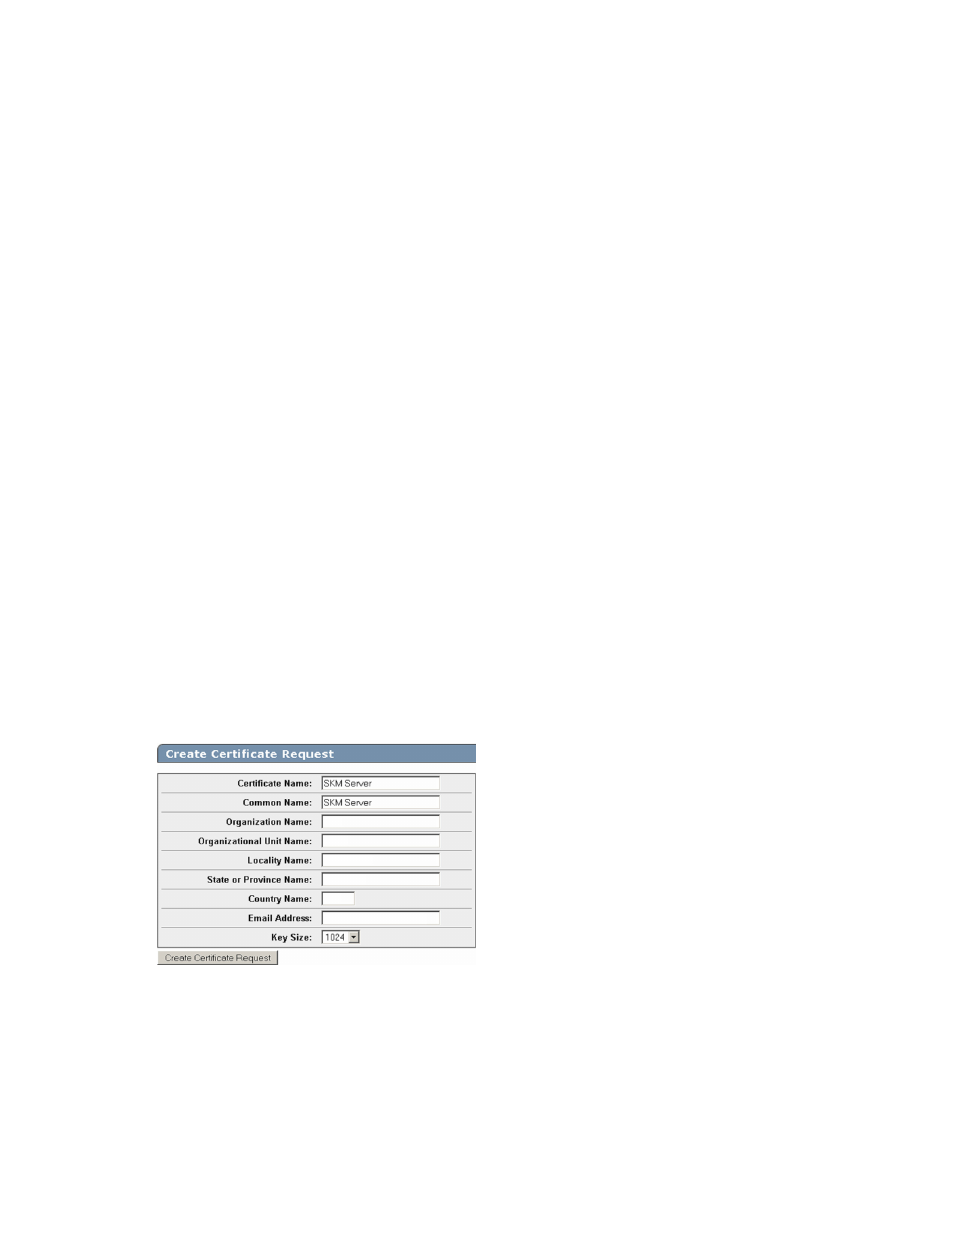
Enter information required in the Create Certificate Request section of the window as shown:
a. Fill in the Certificate Name and Common Name. The Certificate Name must match the name
used for the certificate created in
Creating the SKM server certificate
b. Type your organizational information.
c. Type the E-mail Address where you want messages to the Security Officer to go.
d. Select the Key Size. HP recommends using the default value: 1024.
40
Configuring the system