Creating the skm server certificate – HP Secure Key Manager User Manual
Page 35
6.
Add the Local CA to the Trusted CAs list.
a. In Certificates & CAs, click Trusted CA Lists to display the Trusted Certificate Authority List Profiles.
b. Click on the Default Profile Name (not the radio button).
c. In the Trusted Certificate Authority List, click Edit.
d. From the list of Available CAs in the right panel, select the CA you created in step 4. For
example, SKM Local CA.
e. Click Add.
f. Click Save.
7.
If appropriate, add known, third-party CAs to the Trusted CAs list.
a. In Certificates & CAs, click Trusted CA Lists to display the Trusted Certificate Authority List Profiles.
b. Click on the Default Profile Name.
c. In the Trusted Certificate Authority List, click Edit.
d. From the list of Available CAs in the right panel, select the third-party CA you require.
e. Click Add.
f. Click Save.
NOTE:
Repeat these steps any time another local CA is needed.
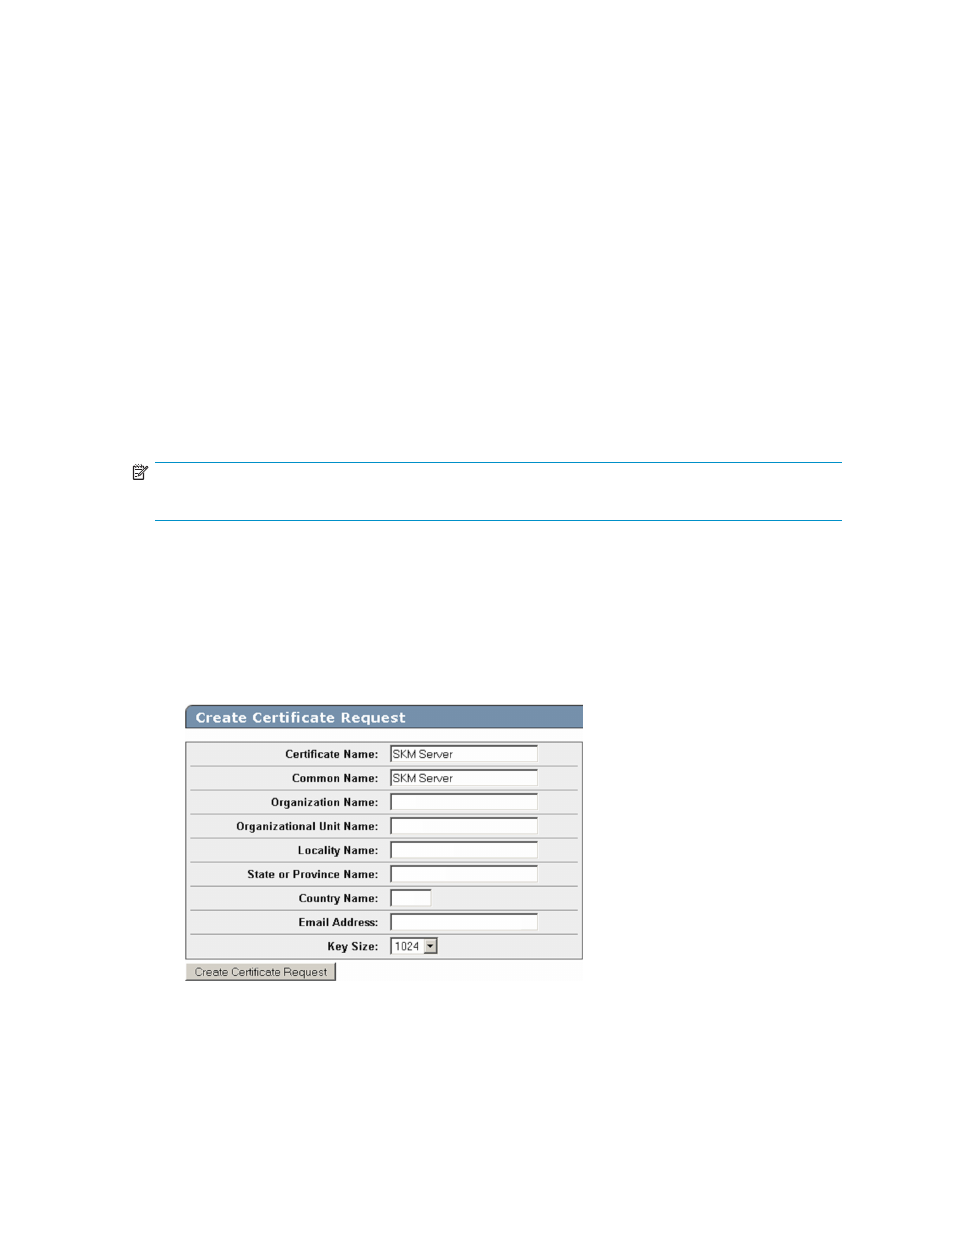
Creating the SKM server certificate
To create the SKM server certificate, perform the following steps:
1.
Click the Security tab.
2.
In Certificates and CAs, select Certificates.
3.
Enter information required by the Create Certificate Request section of the window to create the
SKM server certificate.
a. Enter a Certificate Name and Common Name, for example SKM Server.
b. Enter your organizational information.
c. Enter the E-mail Address where you want messages to the Security Officer to go.
d. Enter the Key Size. HP recommends using the default value: 1024.
Secure Key Manager
35