Configuring user authentication, Configuring user, Connecting to the nas target device on windows – HP StoreOnce Backup User Manual
Page 40
Connecting to the NAS target device on Windows
To access the NAS CIFS target device from a Windows server on the network, enter the following
in Windows Explorer:
•
\\
NOTE:
This is the Fully Qualified domain name or VIF IP address of the StoreOnce service
set.
Or \\
NOTE:
This information is also provided in the StoreOnce GUI for the share: Select a share under
NAS–Shares and on the Share tab look for the Network Path.
•
If User authentication was set for the CIFS server, a prompt will require a user name and
password, which will be:
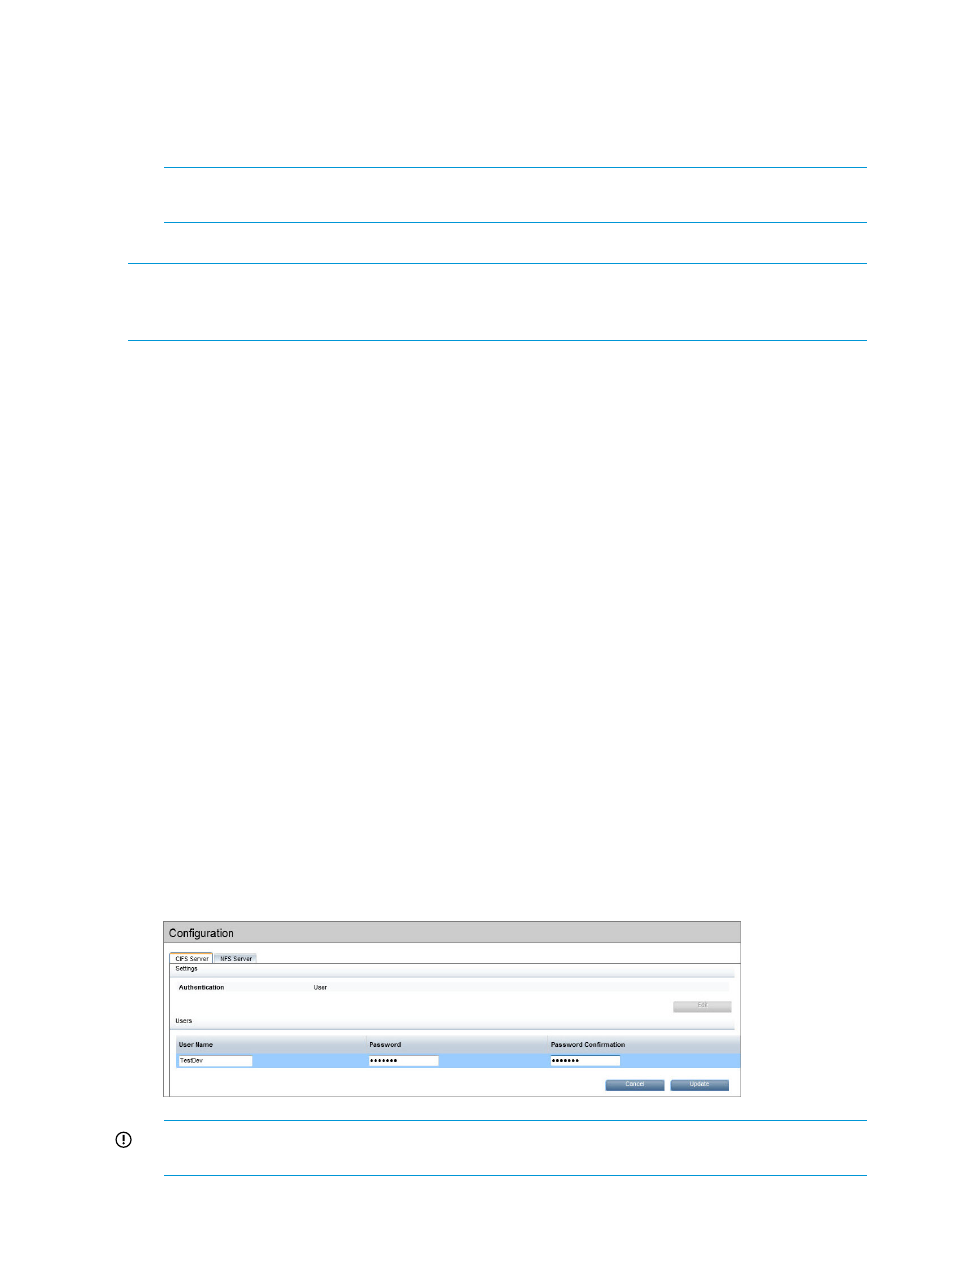
or address>\ . The share can also be mounted through the Map Network Drive utility in Windows or through net use z:\\192.168.2.1\Share_3 /user:192.168.2.1\User1 This command will mount Share_3 available from StoreOnce device 192.168.2.1 locally • If AD authentication was set for the CIFS server, a prompt will require a user name and /user:mydomainname\mydomainuser The share can also be mounted through the Map Network Drive utility in Windows or through net use z:\\192.168.2.1\Share_3 /user:192.168.2.1\User1 This will mount Share_3 available from StoreOnce device 192.168.2.1 locally on the server Configuring user authentication Once the server has been set to User mode, you can create new local users. On the CIFS Server tab select Create User. 2. Provide a username and password and click Update. IMPORTANT: The User Name must be unique to the couplet. Do not use the same User Name on both service sets within a couplet. 40 NAS functions
the Command Prompt utility with the net use command.
on the server on z: drive using local StoreOnce CIFS server User1 credentials.
password, which will be:
the Command Prompt utility with the net use command.
on z: drive using the ‘mydomainname’ domain user User1 and its credentials.
1.