Iv. q & a about accuracy, Bulletin f-68 – Dwyer PUX User Manual
Page 103

15 - 12
L
100
0
- 1
1
400 500
[%]
300
mm
φ
+ 1mm
- 1mm
200
Inside diameter
Flow error
IV. Q & A about accuracy
1.
What is the approximate accuracy of measurement ?
Specifications:
Formerly, the expression % of full scale was often used. But, in the recent age of digital systems, it is
more frequently expressed in % of the displayed value. Under the condition of low flow velocity, the
absolute value of error is used as a standard of accuracy in consideration of the threshold of device
performance.
2.
What about error factors ?
On the PUX, ultrasonic waves are emitted from the outside of the piping and the time is
measured while the waves are passing through the piping material - fluid - piping material.
The following points become the error factors to be considered when evaluating the measured values.
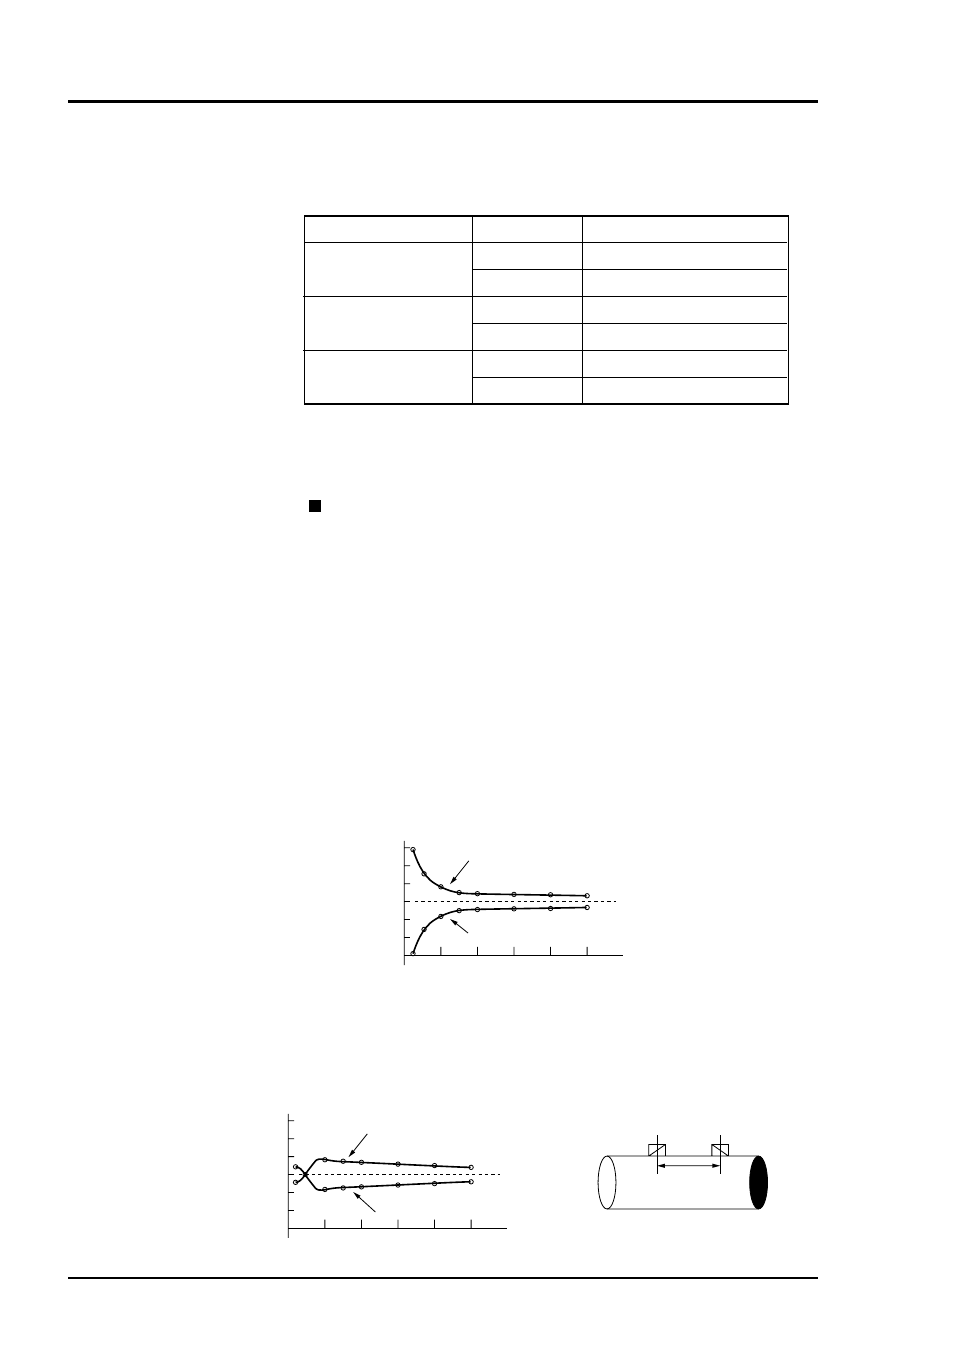
(1) Piping size
When the value set for piping size is different from the actual size of piping, and if the difference
from the inside diameter is about 1% in size, the error is about 3% of deviation obtained by flow
conversion.
(The following shows an example of 1mm deviation in inside diameter)
(2) Difference in sensor mounting length
As a general standard, when the error in mounting length is
±
1mm, the error of flow is within 1%.
100
6
- 6
- 2
0
- 4
4
2
400 500
[%]
300
mm
φ
+1mm
-1mm
200
Inside diameter
Flow error
Flow velocity
Inside diameter
*1: Example of calculation
Error at 2m/s?
→
– 0.03
×
100/2 = – 1.5%
Error at 1m/s?
→
– 0.03
×
100/1 = – 3.0%
φ
13 to
φ
50 or less
φ
50 to
φ
300 or less
φ
300 to
φ
6000
– 1.5% of measured flow
– 0.03m/s*
1
– 1.0% of measured flow
– 0.02m/s
– l.0% of measured flow
– 0.01m/s
2 to 32m/s
0 to 2m/s
2 to 32m/s
0 to 2m/s
1 to 32m/s
0 to 1m/s
Accuracy
BULLETIN F-68
