Caution, Important – Yokogawa YVP110 User Manual
Page 28
<3. Installing YVP110 on Actuator>
3-4
IM 21B04C01-01E
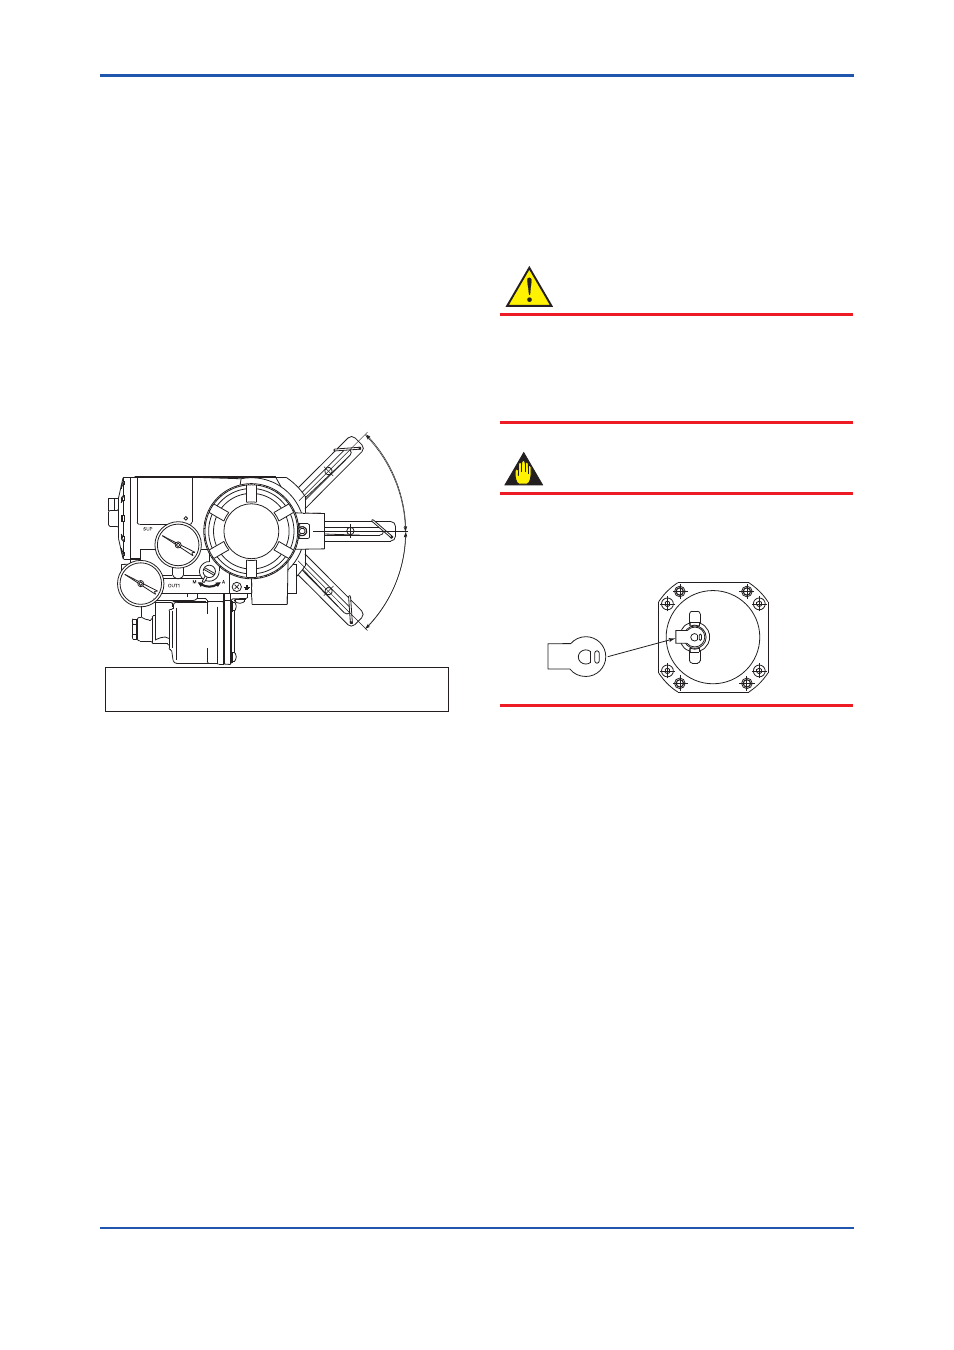
(1) Allowable Range of Rotation Angle of
Feedback Shaft
When combining a YVP110 with a rotary-
motion actuator, ensure that the rotation of the
feedback shaft by the position feedback meets
the following specifications:
• Range of rotation angle of shaft:
Within ±45 degrees from horizontal level
• Minimum span: 20 degrees
• Maximum span: 90 degrees
• Mechanically allowable rotation angle:
±55 degrees
If any one or more of the specifications above
are not met, the specified accuracy may not be
guaranteed, resulting in the YVP110 positioner
being damaged. An advance check is essential.
θ
Range of rotation angle of shaft:
Within ±45 degrees
Mechanically allowable rotation angle: Within ±55 degrees
F0308.ai
Figure 3.8
Allowable Range of Rotation Angle of
Feedback Shaft When Assembling with
Rotary-motion Actuator
(2) Fixing Bracket to YVP110
Use the four M8 bolts that come with the
YVP110 to tightly fix the mounting bracket to
the YVP110. (See “Part Names” on page 2.1)
The installation method is determined by the
combination of the control valve and positioner
as well as by the valve manufacturer who
performs the adjustment. For details, consult
the control valve manufacturer.
(3) Attaching Feedback Lever
For a rotary-motion actuator, since it is often
difficult to secure sufficient working space
between the positioner and actuator, attach the
feedback lever before fixing the YVP110 to the
actuator. Make sure that the stopper is located
on the side of the YVP110 as shown in Figure
3.9.
CAUTION
It is extremely likely that attaching the lever in the
wrong orientation will cause the feedback shaft
to rotate at an angle exceeding its mechanical
limits of ±55 degrees, resulting in the YVP110
being seriously damaged.
IMPORTANT
A stopper is attached to the feedback shaft to
prevent an over-rotation of the shaft as shown
below. When installing the lever, make sure that
you install it on the stopper.
F0311.ai
Stopper
Next, fix the lock screw.
(4) Fixing the YVP110 to Actuator with Bracket
Insert the pin attached to the valve spindle,
into the long hole of the feedback shaft of the
YVP110 positioner.
Before fixing the bracket to the actuator,
carefully position it so that the center of the
rotation axis of the valve plug and that of
the YVP110 poistioner’s feedback shaft are
aligned both horizontally and vertically. After
the alignment has been checked, tightly fix the
bracket to the actuator with the specified bolts.
Misalignment of these rotation axes decreases
the level of accuracy.