Figure 40: removing an fpc – Juniper Networks MX480 User Manual
Page 98
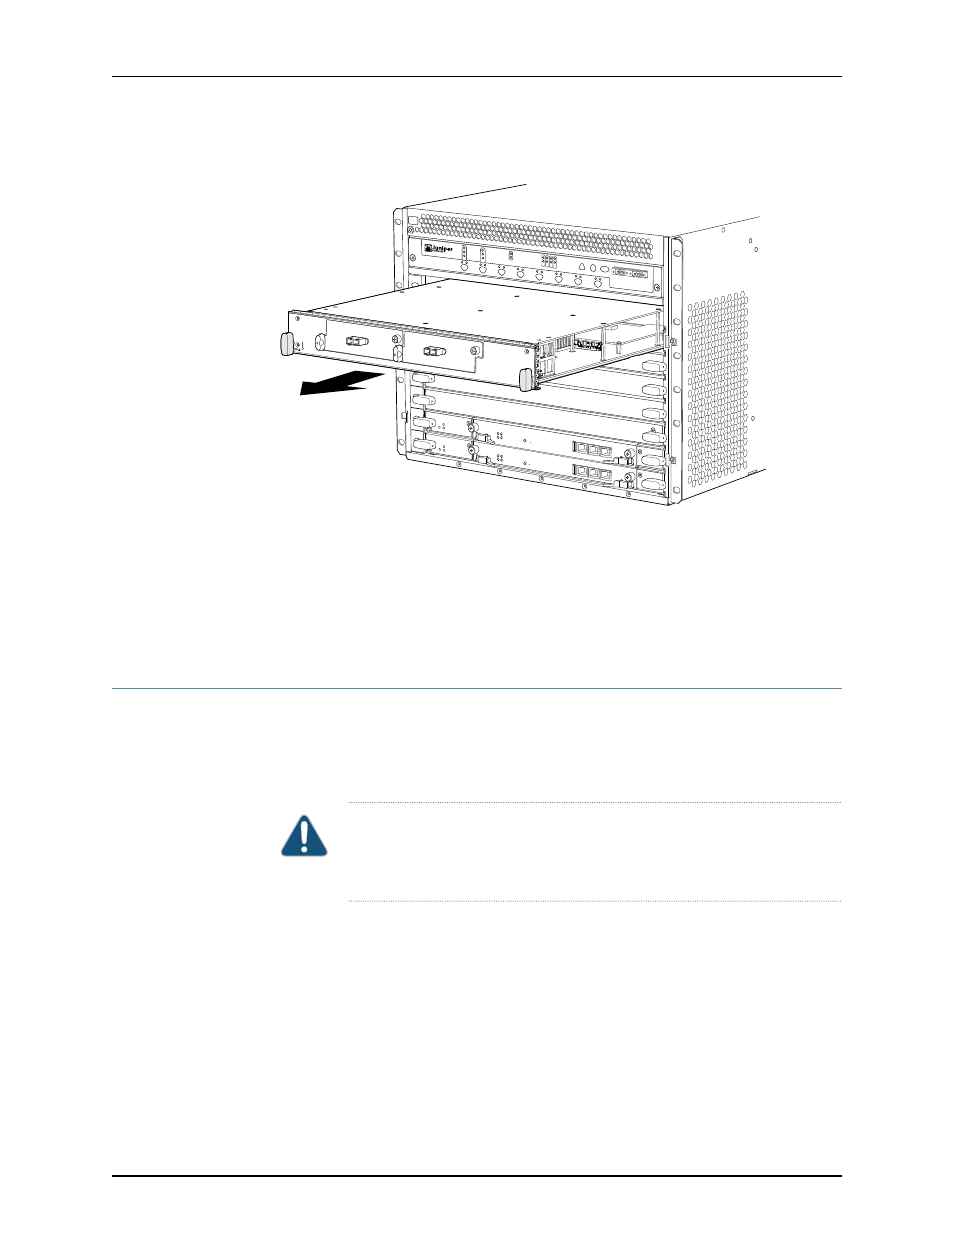
Figure 40: Removing an FPC
OK
MASTER
FAN
ONLINE
OFFLINE
0
1
1
0
FAIL
FAIL
PEM
FAIL
FAIL
FAIL
FAIL
FAIL
FAIL
ESD
OK
OK
OK
OK
OK
OK
OK
2
3
4
5
ACO/LT
YELLOWALARM
REDALARM
NC
NO
C
NC
NO
C
MX480
REO
RE1
0 1 2 3
g004408
Related
Documentation
Preventing Electrostatic Discharge Damage to an MX480 Router on page 248
•
•
Tools Required to Install the MX480 Router with a Mechanical Lift on page 69
•
Installing the MX480 Router Using a Mechanical Lift on page 74
•
Reinstalling Components in the MX480 Router After Installing It with a Lift on page 76
Installing the MX480 Router Using a Mechanical Lift
Because of the router's size and weight—up to 163.5 lb (74.2 kg) depending on the
configuration—we strongly recommend that you install the router using a mechanical
lift. To make the router light enough to install with a lift, you must first remove most
components from the chassis.
CAUTION:
Before front mounting the router in a rack, have a qualified
technician verify that the rack is strong enough to support the router's weight
and is adequately supported at the installation site.
To install the router using a lift (see
1.
Ensure that the rack is in its permanent location and is secured to the building. Ensure
that the installation site allows adequate clearance for both airflow and maintenance.
2.
Load the router onto the lift, making sure it rests securely on the lift platform.
3.
Using the lift, position the router in front of the rack or cabinet, centering it in front of
the mounting shelf.
4.
Lift the chassis approximately 0.75 in. above the surface of the mounting shelf and
position it as close as possible to the shelf.
Copyright © 2013, Juniper Networks, Inc.
74
MX480 3D Universal Edge Router Hardware Guide