Replacing the mx480 craft interface, Figure 80: installing the air filter – Juniper Networks MX480 User Manual
Page 189
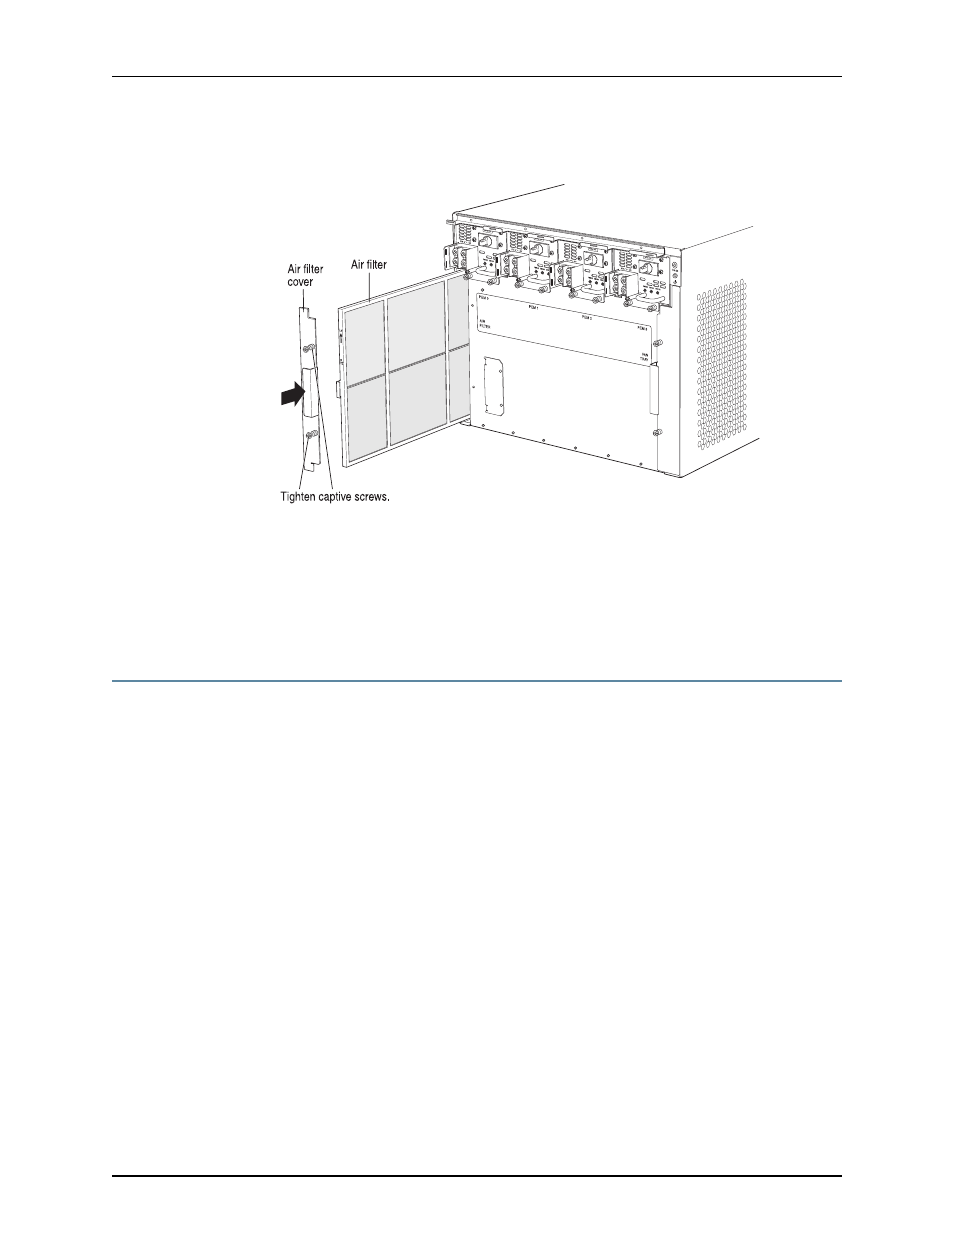
Figure 80: Installing the Air Filter
g004228
Related
Documentation
Preventing Electrostatic Discharge Damage to an MX480 Router on page 248
•
•
Maintaining the MX480 Air Filter on page 124
•
MX480 Cooling System Description on page 47
•
Troubleshooting the MX480 Cooling System on page 152
Replacing the MX480 Craft Interface
1.
Disconnecting the Alarm Relay Wires from the MX480 Craft Interface on page 165
2.
Removing the MX480 Craft Interface on page 166
3.
Installing the MX480 Craft Interface on page 166
4.
Connecting the Alarm Relay Wires to the MX480 Craft Interface on page 167
Disconnecting the Alarm Relay Wires from the MX480 Craft Interface
To disconnect the alarm relay wires from the router and an alarm-reporting device (see
):
1.
Disconnect the existing wire at the external device.
2.
Attach an electrostatic discharge (ESD) grounding strap to your bare wrist, and connect
the strap to one of the ESD points on the chassis.
3.
Using a 2.5-mm flat-blade screwdriver, loosen the small screws on the face of the
terminal block and remove the block from the relay contact.
4.
Using the 2.5-mm flat-blade screwdriver, loosen the small screws on the side of the
terminal block. Remove existing wires from the slots in the front of the block.
165
Copyright © 2013, Juniper Networks, Inc.
Chapter 14: Replacing MX480 Hardware Components