Replacing an mx480 as msc, Removing an mx480 as msc, Figure 112: installing an as mlc – Juniper Networks MX480 User Manual
Page 241: Ok master, Online offline, Aco/lt yellow alarm red alarm nc no c nc no c, Reo re1
You can also verify correct AS MLC and AS MSC or AS MXC functioning by issuing the
show chassis fpc
and
show chassis fpc pic-status
.
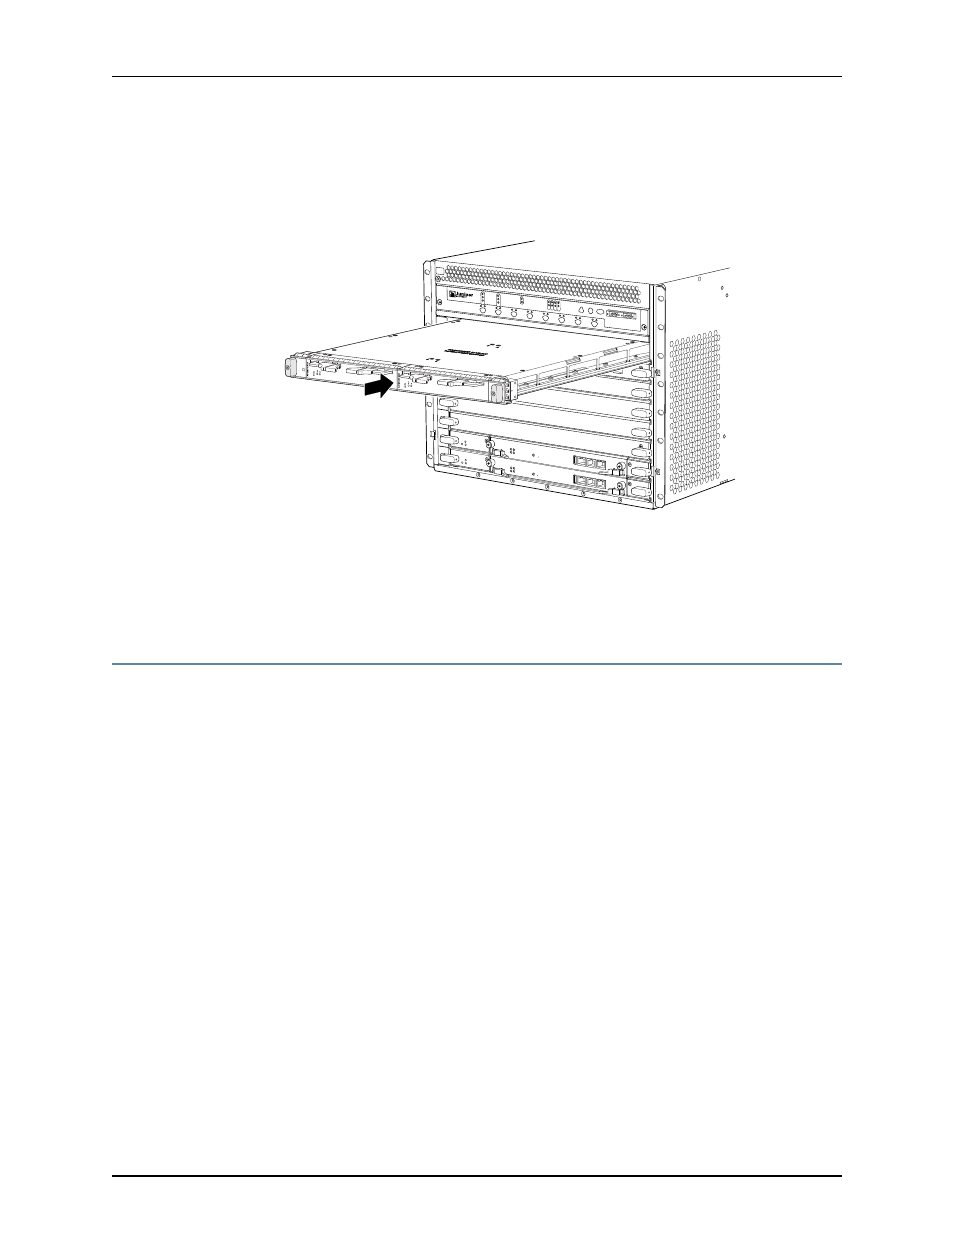
Figure 112: Installing an AS MLC
OK
MASTER
FAN
ONLINE
OFFLINE
0
1
1
0
FAIL
FAIL
PEM
FAIL
FAIL
FAIL
FAIL
FAIL
FAIL
ESD
OK
OK
OK
OK
OK
OK
OK
2
3
4
5
ACO/LT
YELLOW
ALARM
RED ALARM
NC
NO
C
NC
NO
C
MX480
REO
RE1
0 1 2 3
SCB
SCB
g007336
Related
Documentation
Preventing Electrostatic Discharge Damage to an MX480 Router on page 248
•
•
Replacing an MX480 AS MSC on page 217
•
Replacing an MX480 AS MXC on page 220
Replacing an MX480 AS MSC
1.
Removing an MX480 AS MSC on page 217
2.
Installing an MX480 AS MSC on page 218
Removing an MX480 AS MSC
AS MSCs are hot-insertable and hot-removable. When you remove an AS MSC, the router
continues to function.
The AS MSCs are located in the AS MLCs installed in the front of the router. An AS MSC
weighs 1.4 lb (0.6 kg).
To remove an AS MSC (see
1.
Place an electrostatic bag or antistatic mat on a flat, stable surface to receive the AS
MSC.
2.
Attach an electrostatic discharge (ESD) grounding strap to your bare wrist, and connect
the strap to one of the ESD points on the chassis.
3.
Use one of the following methods to take the AS MSC offline:
•
Press its online/offline button. Use a narrow-ended tool that fits inside the opening
that leads to the button. Press and hold the button until the AS MSC LED goes out
(about 5 seconds).
217
Copyright © 2013, Juniper Networks, Inc.
Chapter 14: Replacing MX480 Hardware Components