Juniper Networks SRX 210 User Manual
Page 94
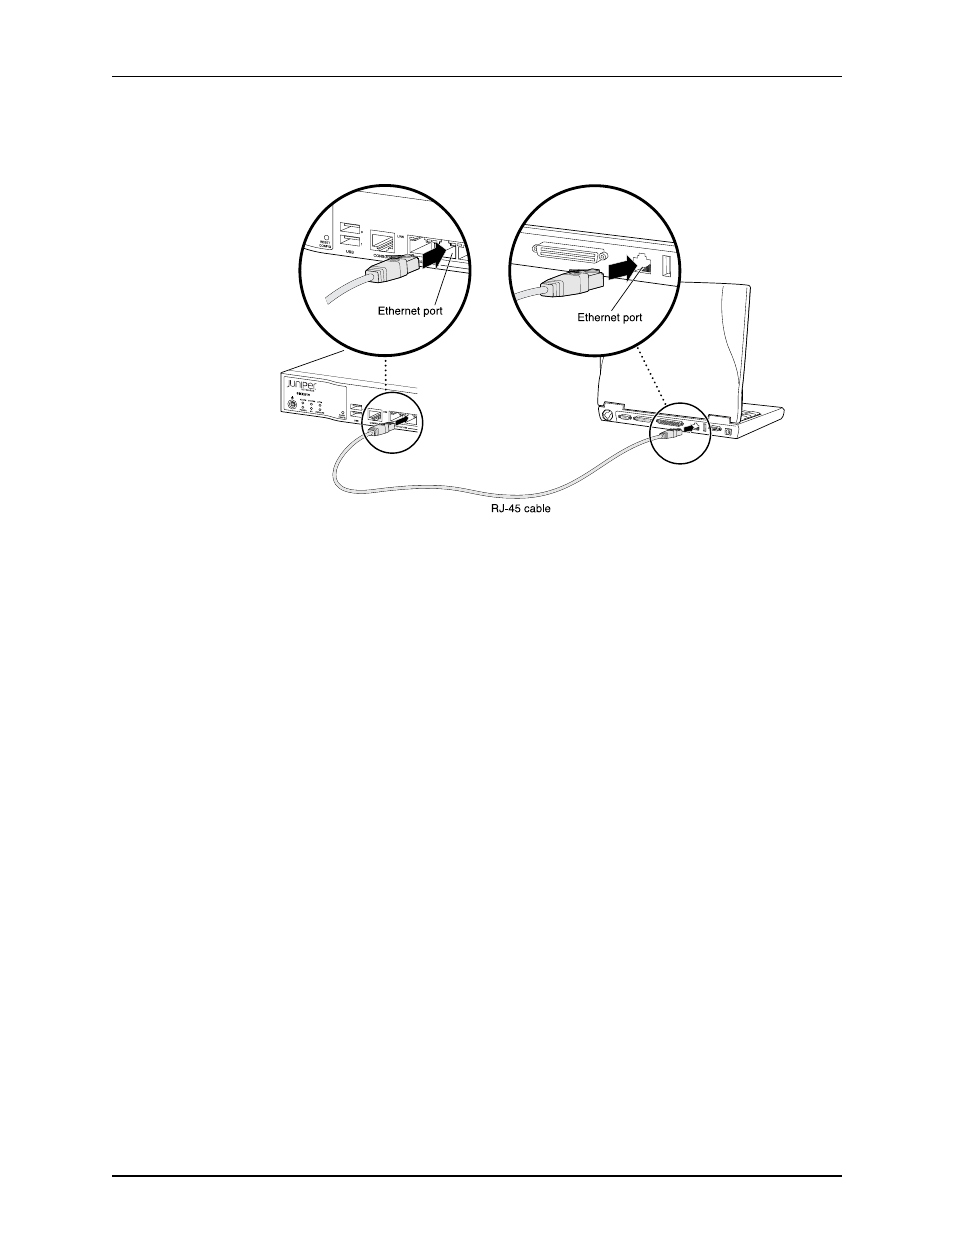
Figure 24: Connecting to the Ethernet Port on an SRX210 Services Gateway
g03
1
1
18
To enable communication between the management device and the services gateway,
ports 0/1 through 0/7 are preconfigured with the IP address
192.168.1.1
and use DHCP to
assign an IP address in the
192.168.1.0/24
network to any connected device.
To connect to the Ethernet port:
1.
Ensure that the IP address for the Ethernet port on the management device is
configured in one of the following ways:
•
The IP address is assigned by DHCP.
•
The IP address is in the
192.168.1.0/24
subnetwork (but is not
192.168.1.1
).
2.
Turn off the management device.
3.
Plug one end of the CAT-5e (Ethernet cable) into the Ethernet port on the management
device.
4.
Connect the other end of the Ethernet cable to any of the built-in Ethernet ports 0/1
through 0/7 on the services gateway.
If the services gateway has not already been powered on, power it on now.
5.
Wait until the Status LED on the front panel of the services gateway turns steady
green.
6.
Turn on the power to the management device. The services gateway assigns an IP
address to the management device within the
192.168.1.0/24
subnetwork if the
management device is configured to use DHCP.
7.
To access the setup wizard, open a Web browser on the management device and
enter the IP address
192.168.1.1
in the address field.
Related
Documentation
•
Copyright © 2013, Juniper Networks, Inc.
78
SRX210 Services Gateway Hardware Guide