Juniper Networks SRX 210 User Manual
Page 76
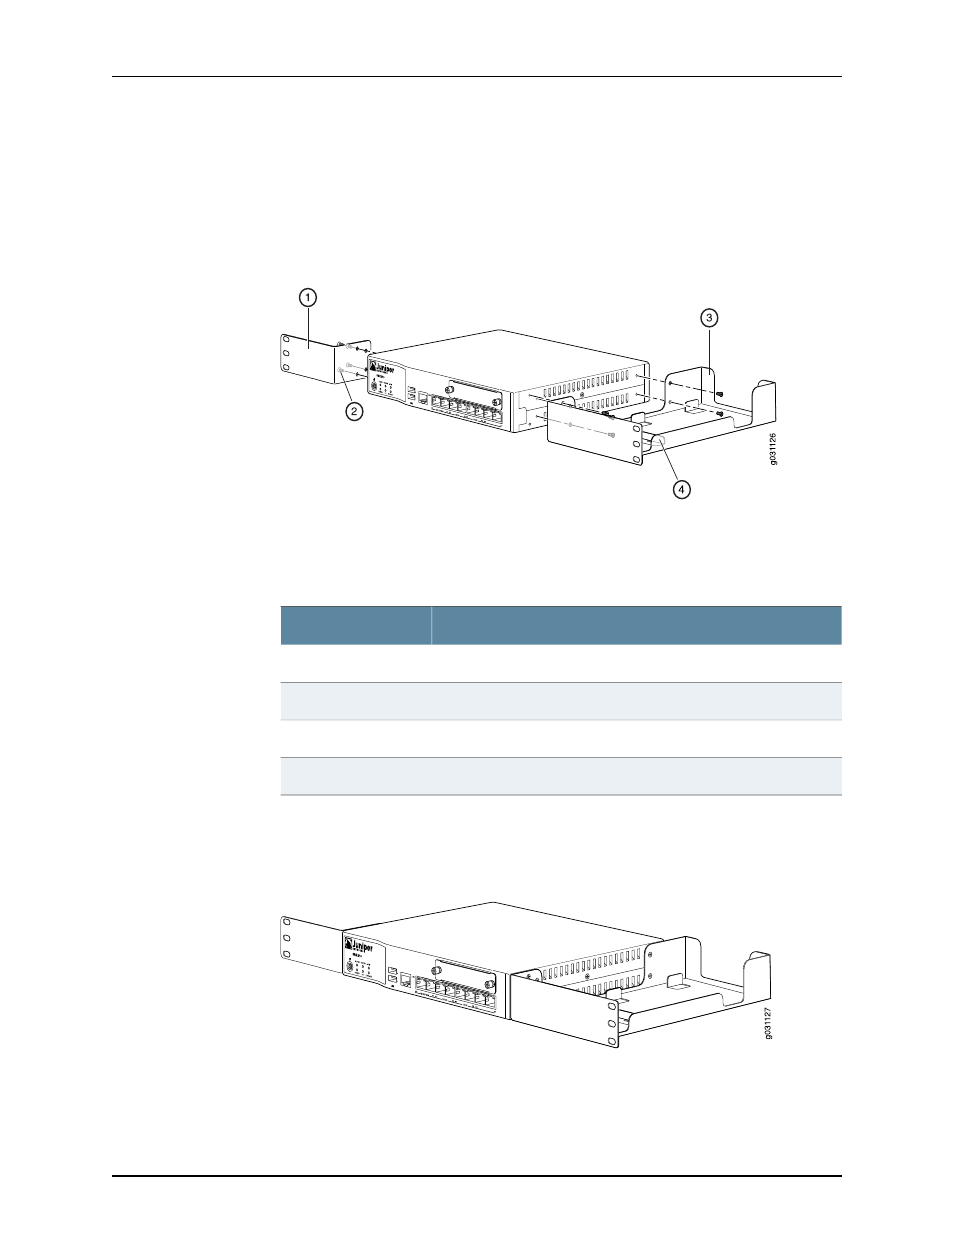
To install the device in a rack:
1.
Position a mounting bracket on each side of the chassis as shown in
.
Figure 14: SRX210 Services Gateway Installation in a Rack — Positioning
Mounting Brackets
lists the parts used for installing the SRX210 Services Gateway
on the rack. The numbers in
correspond to the numbers in
Table 27: SRX210 Services Gateway Rack Installation Parts
Part
Number
Mounting brackets
1
Screws (mounting bracket)
2
Power supply adapter tray
3
Adapter stopper bracket
4
2.
Use a number-1 Phillips screwdriver to install the screws that secure the mounting
brackets and power supply adapter tray to the chassis as shown in
Figure 15: SRX210 Services Gateway Rack Installation — Securing
Mounting Brackets and Power Supply Adapter Tray
3.
Place the power supply adapter in the tray as shown in
Copyright © 2013, Juniper Networks, Inc.
60
SRX210 Services Gateway Hardware Guide