Cycle run – HEIDENHAIN TNC 620 (34056x-04) Cycle programming User Manual
Page 389

MEASURE BOLT HOLE CIRCLE (Cycle 430, DIN/ISO: G430, software
option 17)
16.12
16
TNC 620 | User's Manual Cycle Programming | 5/2013
389
16.12
MEASURE BOLT HOLE CIRCLE
(Cycle 430, DIN/ISO: G430, software
option 17)
Cycle run
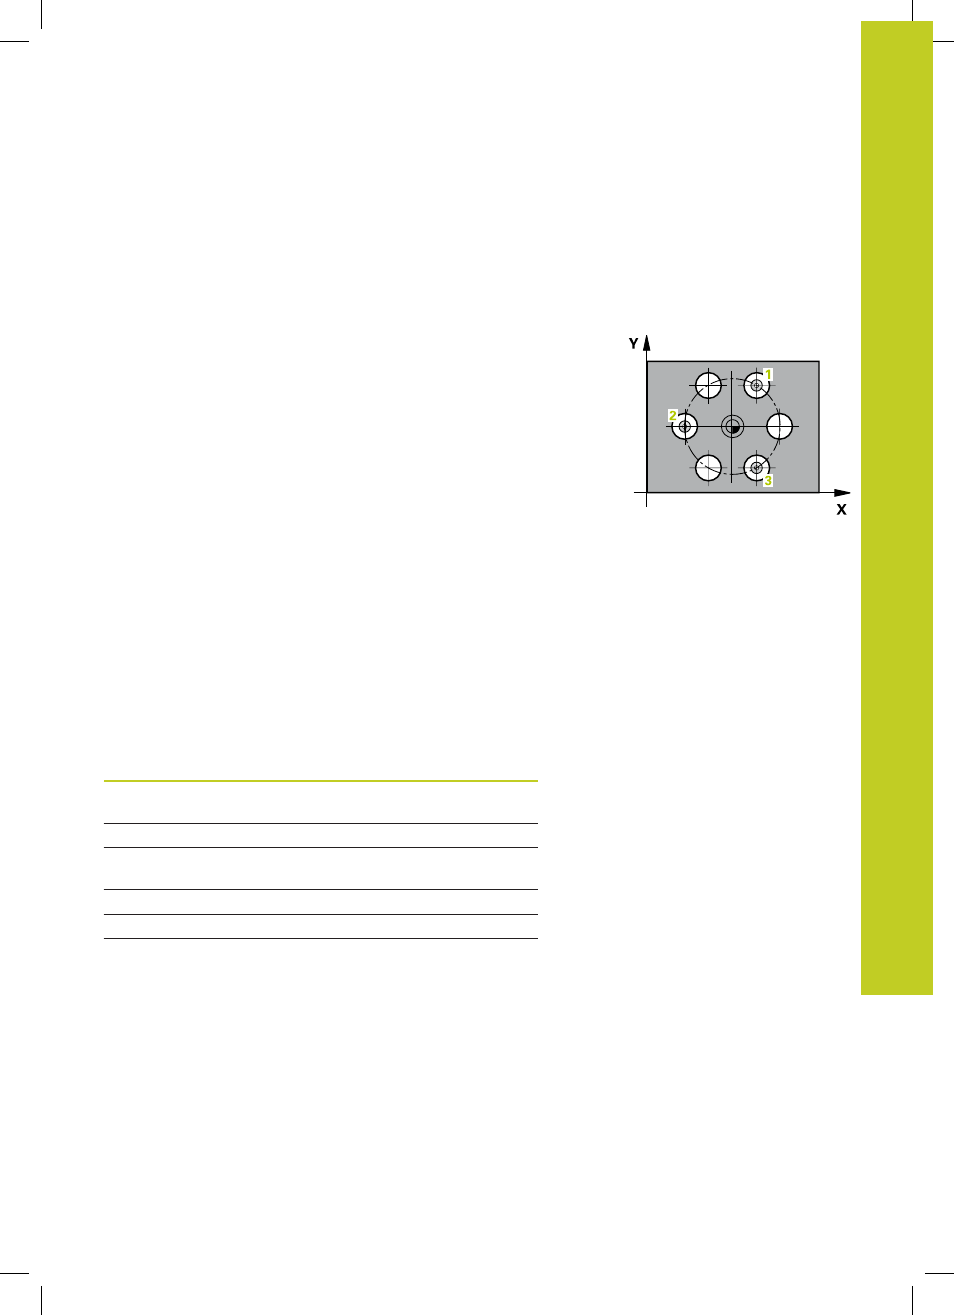
Touch Probe Cycle 430 finds the center and diameter of a bolt
hole circle by probing three holes. If you define the corresponding
tolerance values in the cycle, the TNC makes a nominal-to-
actual value comparison and saves the deviation value in system
parameters.
1 Following the positioning logic (See "Executing touch probe
cycles", page 280), the control positions the touch probe at rapid
traverse (value from column
FMAX) to the center of the first hole
1
.
2 Then the probe moves to the entered measuring height and
probes four points to find the first hole center.
3 The touch probe returns to the clearance height and then to the
position entered as center of the second hole
2
.
4 The TNC moves the touch probe to the entered measuring
height and probes four points to find the second hole center.
5 The touch probe returns to the clearance height and then to the
position entered as center of the third hole
3
.
6 The TNC moves the touch probe to the entered measuring
height and probes four points to find the third hole center.
7 Finally the TNC returns the touch probe to the clearance height
and saves the actual values and the deviations in the following
Q parameters:
Parameter number
Meaning
Q151
Actual value of center in reference
axis
Q152
Actual value of center in minor axis
Q153
Actual value of bolt hole circle
diameter
Q161
Deviation at center of reference axis
Q162
Deviation at center of minor axis
Q163
Deviation of bolt hole circle diameter
