Please note while programming, Cycle parameters – HEIDENHAIN TNC 620 (34056x-04) Cycle programming User Manual
Page 320

Touch Probe Cycles: Automatic Datum Setting
15.5 DATUM FROM OUTSIDE OF RECTANGLE (Cycle 411, DIN/
ISO: G411, software option 17)
15
320
TNC 620 | User's Manual Cycle Programming | 5/2013
Please note while programming:
Danger of collision!
To prevent a collision between touch probe and
workpiece, enter
high
estimates for the lengths of
the 1st and 2nd sides.
Before a cycle definition you must have programmed
a tool call to define the touch probe axis.
If you set a datum (Q303 = 0) with the touch probe
cycle and also use probe in TS axis (Q381 = 1), then
no coordinate transformation must be active.
Cycle parameters
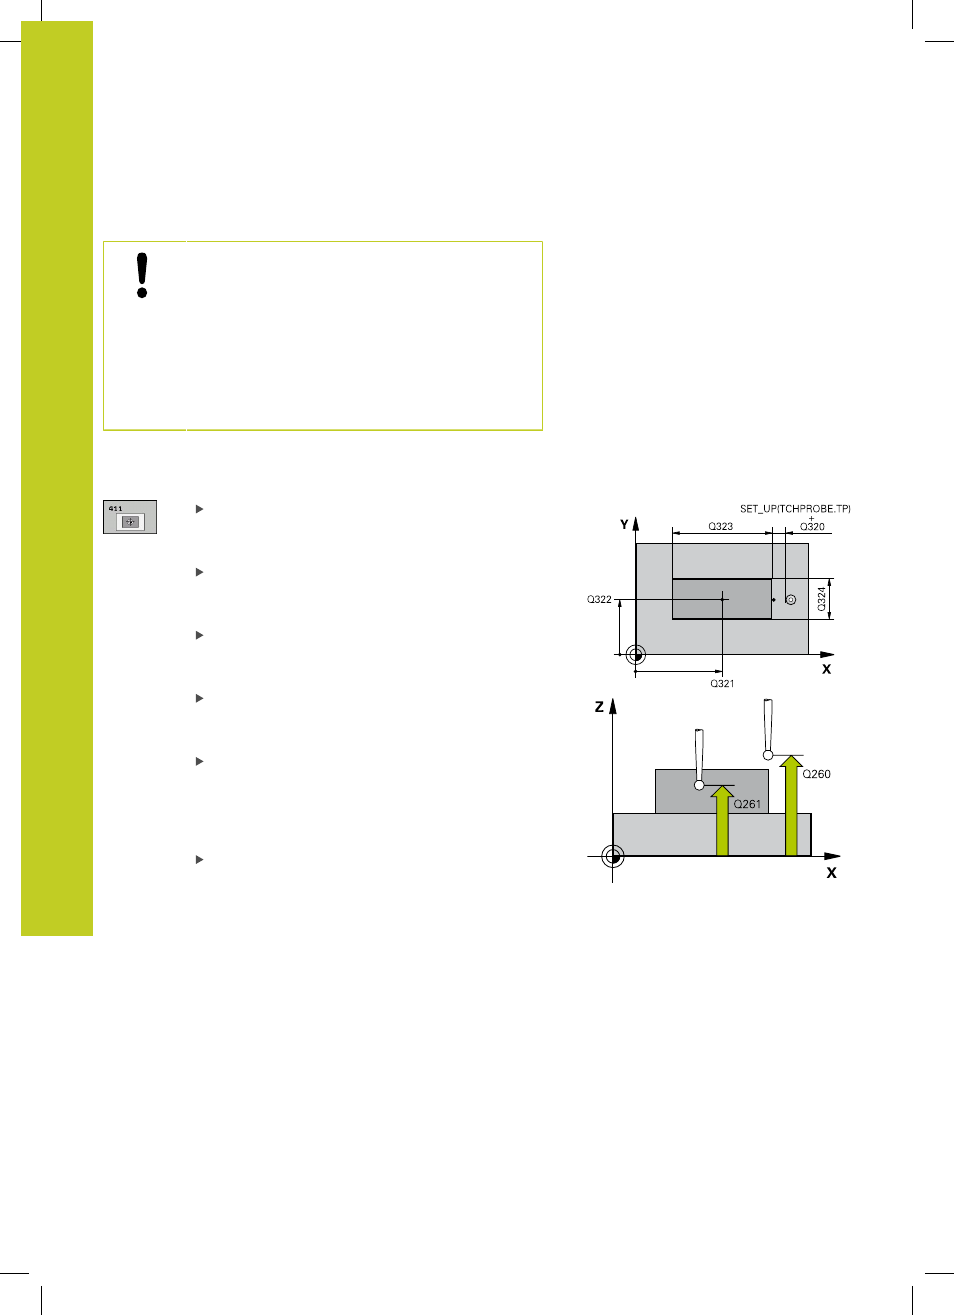
Center in 1st axis Q321 (absolute): Center of the
stud in the reference axis of the working plane.
Input range -99999.9999 to 99999.9999
Center in 2nd axis Q322 (absolute): Center of the
stud in the minor axis of the working plane. Input
range -99999.9999 to 99999.9999
1st side length Q323 (incremental): Stud length,
parallel to the reference axis of the working plane
Input range 0 to 99999.9999
2nd side length Q324 (incremental): Stud length,
parallel to the minor axis of the working plane. Input
range 0 to 99999.9999
Measuring height in the touch probe axis Q261
(absolute): Coordinate of the ball tip center (=
touch point) in the touch probe axis in which
the measurement is to be made. Input range
-99999.9999 to 99999.9999
Set-up clearance Q320 (incremental): Additional
distance between measuring point and ball tip.
Q320 is added to
SET_UP (touch probe table). Input
range 0 to 99999.9999
