Cycle run, Please note while programming – HEIDENHAIN TNC 620 (34056x-04) Cycle programming User Manual
Page 380

Touch Probe Cycles: Automatic Workpiece Inspection
16.9 MEASURE INSIDE WIDTH (Cycle 425, DIN/ISO: G425, software
option 17)
16
380
TNC 620 | User's Manual Cycle Programming | 5/2013
16.9
MEASURE INSIDE WIDTH (Cycle 425,
DIN/ISO: G425, software option 17)
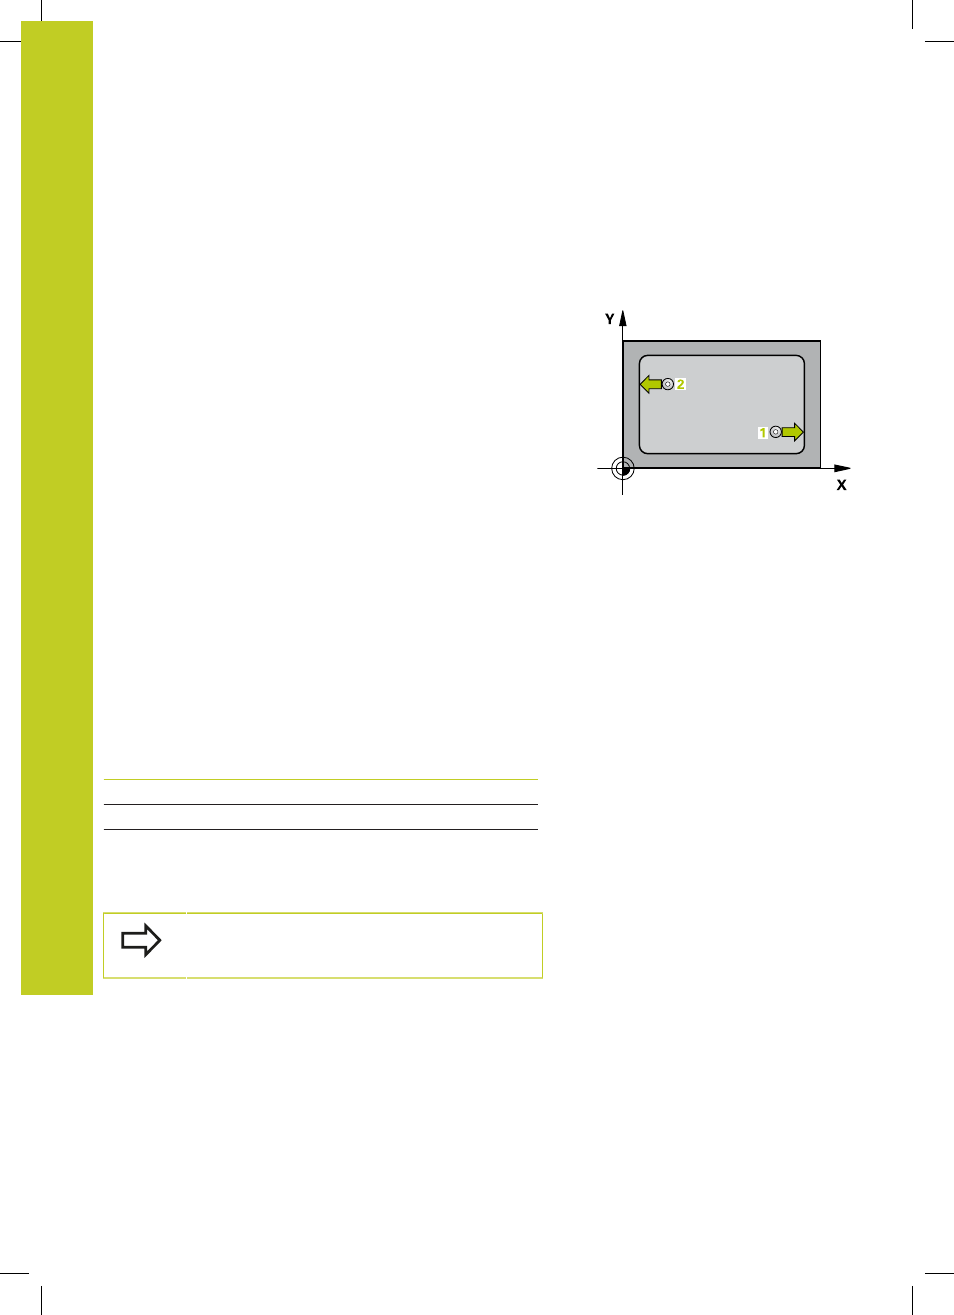
Cycle run
Touch Probe Cycle 425 measures the position and width of a slot
(or pocket). If you define the corresponding tolerance values in the
cycle, the TNC makes a nominal-to-actual value comparison and
saves the deviation value in a system parameter.
1 The TNC positions the touch probe at rapid traverse (value from
FMAX column) following the positioning logic (See "Executing
touch probe cycles", page 280) to the starting point
1
. The TNC
calculates the touch points from the data in the cycle and the
safety clearance from the
SET_UP column of the touch probe
table.
2 Then the touch probe moves to the entered measuring height
and runs the first probing process at the probing feed rate
(column
F). 1. The first probing is always in the positive direction
of the programmed axis.
3 If you enter an offset for the second measurement, the TNC
then moves the touch probe (if required, at clearance height)
to the next starting point
2
and probes the second touch point.
If the nominal length is large, the TNC moves the touch probe
to the second touch point at rapid traverse. If you do not enter
an offset, the TNC measures the width in the exact opposite
direction.
4 Finally the TNC returns the touch probe to the clearance height
and saves the actual values and the deviation value in the
following Q parameters:
Parameter number
Meaning
Q156
Actual value of measured length
Q157
Actual value of the centerline
Q166
Deviation of the measured length
Please note while programming:
Before a cycle definition you must have programmed
a tool call to define the touch probe axis.
