P. 50 – Toa M-864D Ver.2.2.0 User Manual
Page 50
50
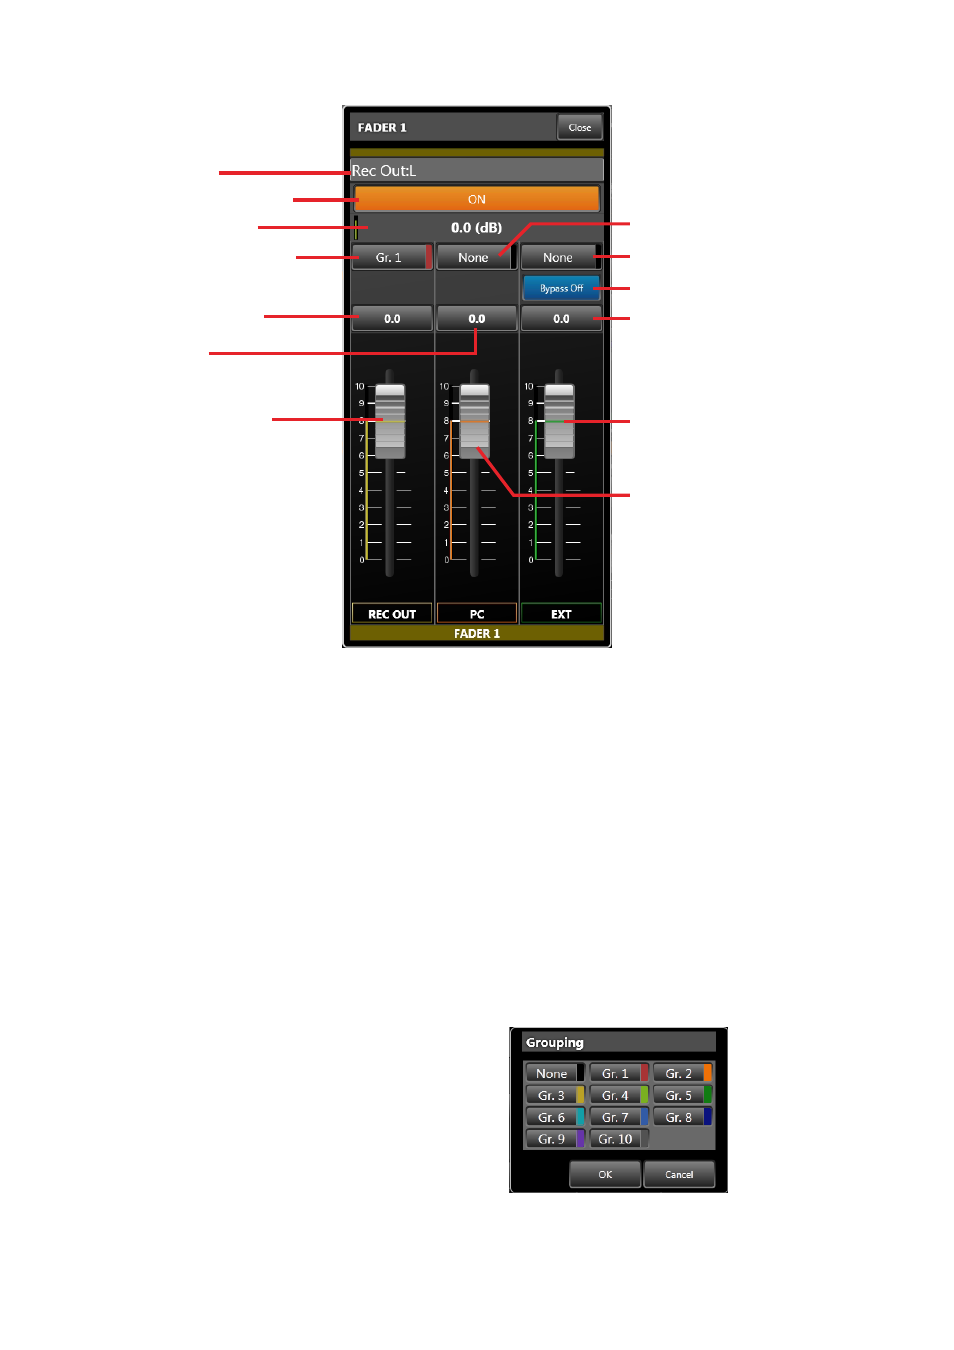
[recording output]
(1) Channel name
(2) Channel ON/OFF button
(7) PC VOL. grouping number
(3) Fader box total gain
(8) EXT VOL. grouping number
(14) REC OUT VOL. gain
(13) REC OUT VOL. grouping
number
(9) EXT VOL. bypass settings
(5) PC VOL. gain
(10) EXT VOL. gain
(15) REC OUT VOL. fader
(11) EXT VOL. fader
(12) PC VOL. fader
1. Channel Name
Displays the channel name.
Clicking the channel name indicator allows its
name to be changed.
2. Channel oN/off button
Switches the channel to ON or OFF.
This setting interlocks with the grouping setting for
EXT VOL.
3. fader Box total Gain
Displays total gain values set with the FRONT
fader, PC VOL. and EXT VOL. faders for monaural
and stereo inputs and monaural output.
Displays total gain values set with the REC OUT
VOL., PC VOL. and EXT VOL. faders for recording
output. The green bar at left indicates the total gain
value.
4. froNt fader gain
Displays the gain value set with the FRONT fader
(6). The gain value cannot be changed.
5. PC VoL. gain
Displays the gain value set with the PC VOL. fader
in dB. Clicking this button displays the dialog for
gain settings, allowing gains to be entered using
numerical values. This PC VOL. gain is interlocked
with the PC VOL. fader (12).
6. froNt fader
Displays the fader position corresponding to the
gain value set with the unit’s FRONT fader gain (4)
only while in online mode. (In this case, the fader is
displayed but cannot be operated.)
Even in online mode, however, the fader is not
displayed when set to “Disable” in the Fader
Settings on
The total gain (3) in offline mode is obtained as 0
dB of the FRONT fader gain.
7. PC VoL. Grouping Number
Displays the PC VOL. fader’s grouping number.
The color corresponding to the group is displayed
to the right of the grouping number. Clicking this
button opens the dialog for grouping number
selection.
After selecting the group to be set, click the [OK]
button, and the setting is enabled.