Operator’s manual, Headlands – Great Plains DICKEY-john AI-120 12-inch Virtual Terminal User Manual
Page 142
OPERATOR’S MANUAL
AI-120 Virtual Terminal
11001-1606B-201310
134 / AS APPLIED JOB SETUP
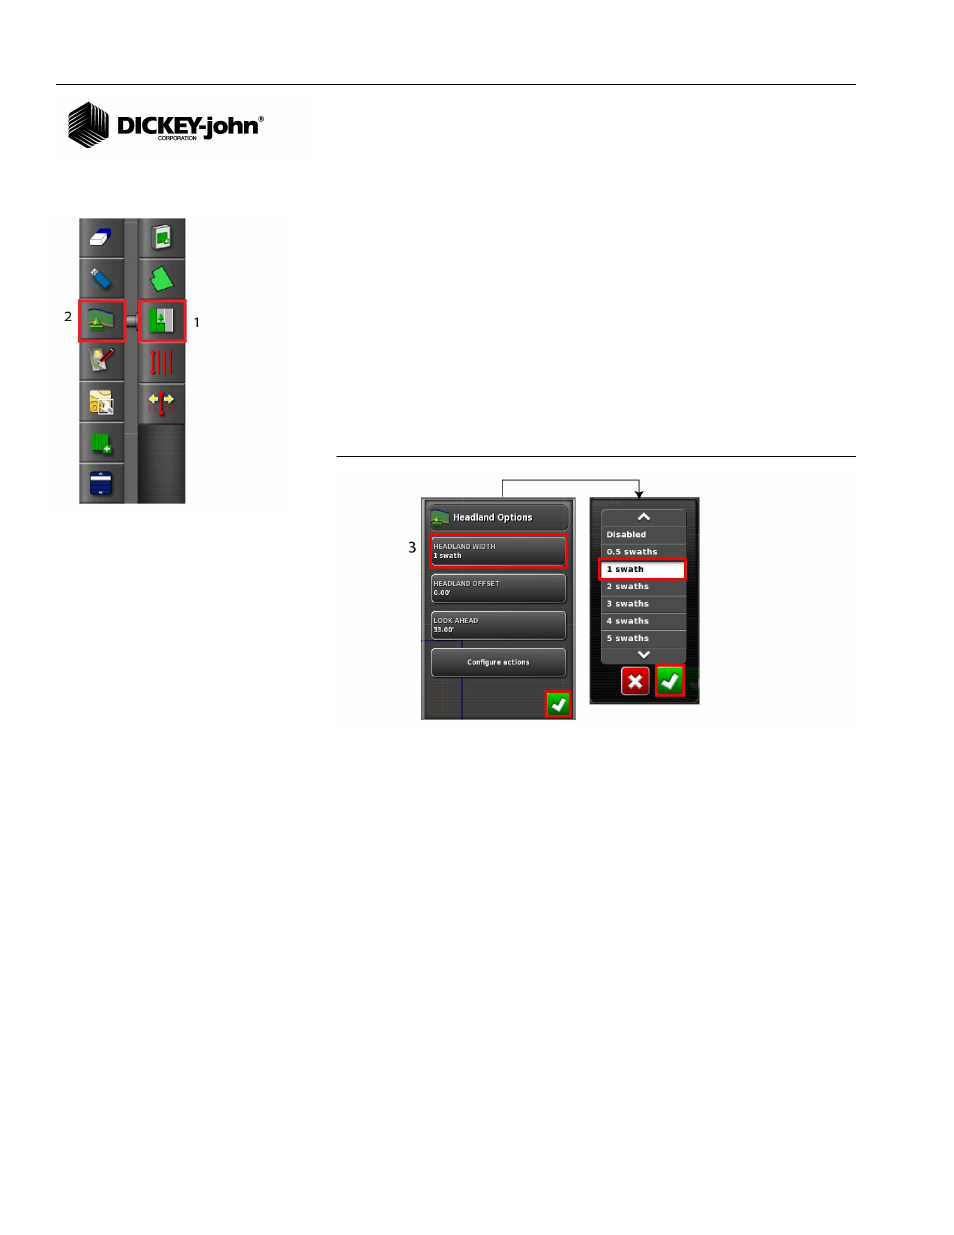
HEADLANDS
Identifying a headland is useful to shutoff sections on approach and turn on
sections upon exit. A headland can only be created after a boundary is
recorded.
Create a Headland:
1. Select the Job Menu button.
2. Press the Headlands button.
3. Enter a headland width and press the Check button to accept. This
entry determines the headland width displayed on the guidance
screen.
For example: A headland width set at 1 swath is the width of the
implement. Selecting a swath set at 2 would be equivalent to the width
of 2 implements.
Figure 195
Selecting a Headland Width
4. Enter a Headland Offset to increase the width of the headland, if
needed, and press the Check button to accept. This is useful to supply
a buffer zone for steering if the headland width is set so that the tip of
the implement would be touching the fence.
– If a field boundary is recorded so that the blue line is on top of the
fence line (the actual physical boundary of the field) then setting a
headland of 1 swath would require driving with the implement tip
touching the fence to fill this area with no overlap. To avoid this
scenario, adding an offset of 1 foot to the headland moves the
headland an extra 1 foot inside the boundary allowing a 1 foot gap
between the implement and fence.
5. Enter a Look Ahead Distance and press the Check button to accept.
This value determines what distance to initiate the headland action of
zooming or trigger an alarm when approaching or exiting a headland.
6. Press the Configure Actions button to adjust auto zoom and alarm
settings.