Operator’s manual, Create an exclusion zone – Great Plains DICKEY-john AI-120 12-inch Virtual Terminal User Manual
Page 134
OPERATOR’S MANUAL
AI-120 Virtual Terminal
11001-1606B-201310
126 / AS APPLIED JOB SETUP
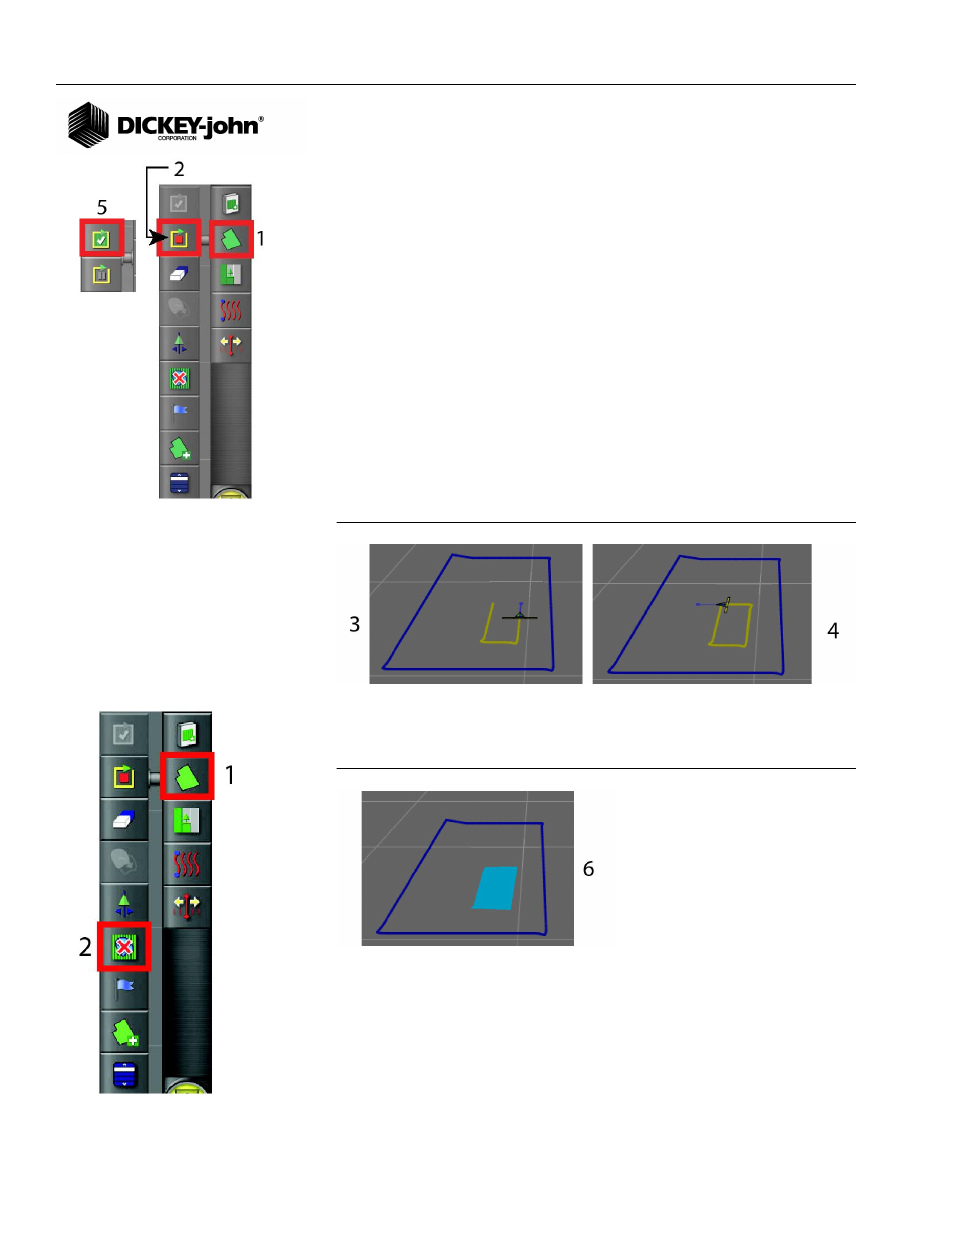
CREATE AN EXCLUSION ZONE
Exclusion zones are used with auto section control and allows the system to
automatically turn sections off when an exclusion zone is detected.
IMPORTANT: Exclusion zones can only be established after a field
boundary is created and must be contained within that
field boundary.
1. Press the Field menu button
2. Select the Start Exclusion Zone button.
3. Drive along the area perimeter of the exclusion zone. A yellow line
trails behind the vehicle marking the exclusion area.
– The Exclusion Zone button and Boundary button are similar with
the difference being yellow identifying exclusion and blue
identifying blue).
4. Drive around the perimeter of the exclusion zone until the lines are
almost closed.
5. Press the Complete button to close off the exclusion zone.
Figure 183
Create an Exclusion Zone
NOTE:
Once a new exclusion zone is
created, the previous exclusion
zone for that field is overwritten
and cannot be reloaded.
6. The exclusion zone will appear shaded onscreen. The exclusion zone
file name is saved with the same name as the field name.
Figure 184
Completed Exclusion Zone
CLEAR AN EXCLUSION ZONE
1. Select the Field menu button.
2. Clear exclusion zone from the screen by pressing the Exclusion Zone
button that appears with an X.