HP 9000 rp5400 Servers User Manual
Page 30
3.
Make the top of the server accessible for service.
4.
Loosen the captive T-15 screws on the air baffle. Grasp the two handles on the baffle, and
lift the baffle remove it.
CAUTION:
Observe all ElectroStatic Discharge (ESD) precautions Do not touch internal
components. Failure to observe ESD precautions can cause damage to components.
5.
Observe Electrostatic Discharge (ESD) precautions.
6.
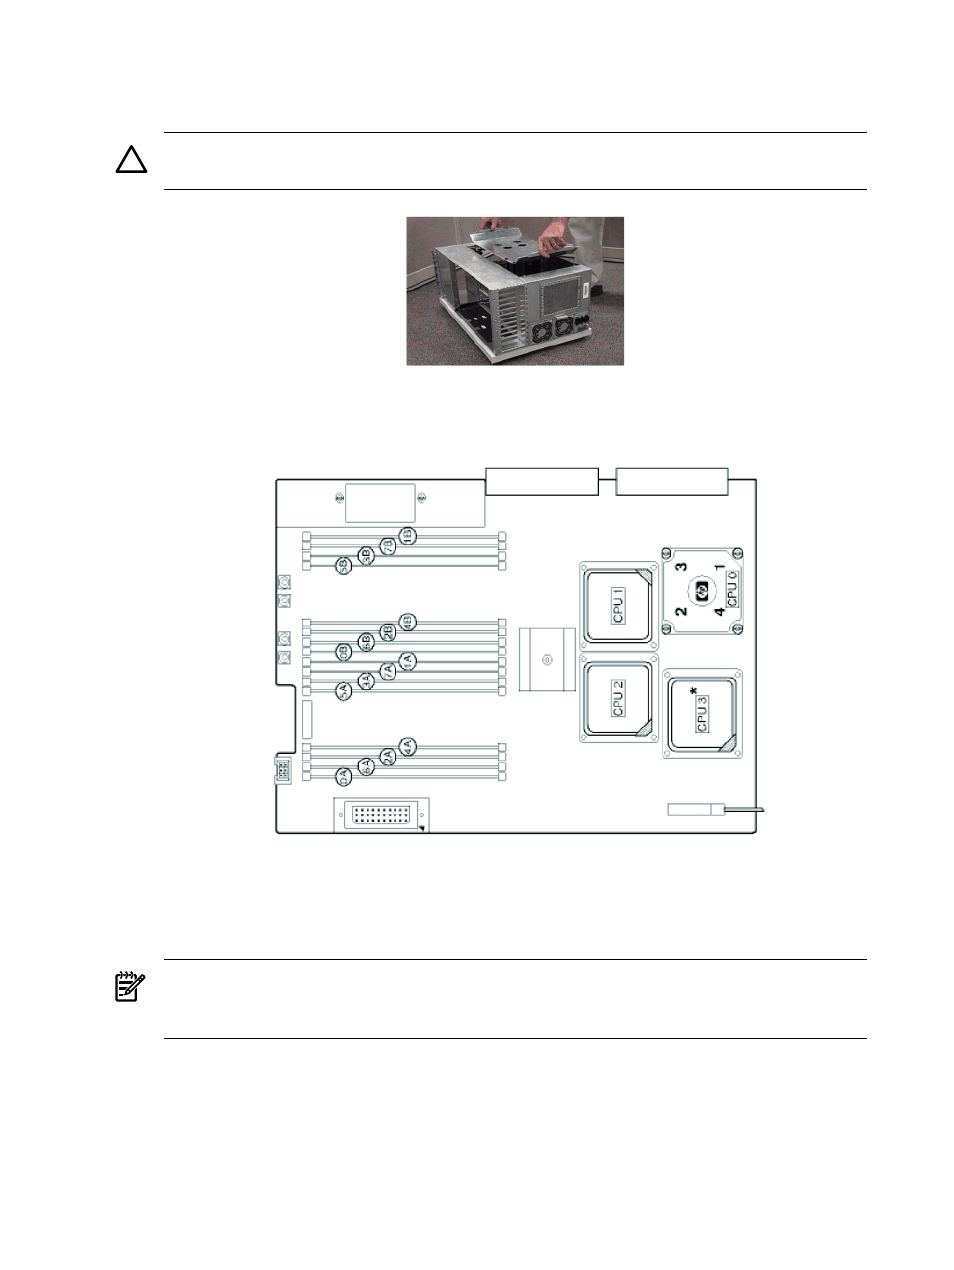
Refer to the following graphic for memory slot locations.
Locate the correct DIMM pair slots. Insert the DIMM connectors into the guides until the
card snaps firmly in place. It may be necessary to apply downward force using the palm of
your hand on the DIMM. Observe the top of the DIMM to make sure one side is not higher
than the other.
NOTE:
It may be necessary to remove PSM 1 when installing a DIMM in slot 0a and PSM
0 when installing a DIMM in slot 1b. If either PSM is removed to install memory, ensure it
is re-installed.
7.
Replace the air baffle. Tighten the four captive screws to secure the air baffle in place.
30
Installing Additional Components
- xt1500 (58 pages)
- LaserJet 4700 (68 pages)
- ProLiant BL460c Gen8 Server Blade (67 pages)
- ProLiant DL360 Server (16 pages)
- ProLiant BL460c Gen8 Server Blade (65 pages)
- ProLiant DL388p Gen8 Server (128 pages)
- ProLiant BL465c Server Blade (87 pages)
- ProLiant DL388p Gen8 Server (47 pages)
- ProLiant BL40p Server series (73 pages)
- ProLiant DL140 G2 Server (81 pages)
- ProLiant ML115 Server (63 pages)
- Servidor HP ProLiant ML370 G4 (20 pages)
- Servidor HP ProLiant ML370 G4 (30 pages)
- Servidor HP ProLiant DL160 G5p (84 pages)
- Servidor HP ProLiant DL980 G7 (143 pages)
- Servidor HP ProLiant DL380 G5 (137 pages)
- Integrity rx2620 Servers (42 pages)
- Integrity rx2620 Servers (48 pages)
- Integrity rx2620 Servers (53 pages)
- Integrity rx2620 Servers (24 pages)
- Integrity rx2620 Servers (33 pages)
- Integrity rx2620 Servers (100 pages)
- Integrity rx2620 Servers (37 pages)
- Integrity Superdome sx1000 Server (53 pages)
- Integrity rx2620 Servers (37 pages)
- Integrity rx2620 Servers (58 pages)
- Integrity rx2620 Servers (77 pages)
- Integrity rx2620 Servers (107 pages)
- Integrity rx2620 Servers (55 pages)
- 9000 rp3440 Servers (36 pages)
- Servidor HP ProLiant DL360p Gen8 (129 pages)
- Servidor HP ProLiant DL120 G6 (133 pages)
- ProLiant DL580 Gen8 Server (91 pages)
- ProLiant MicroServer Gen8 (95 pages)
- ProLiant MicroServer (94 pages)
- ProLiant BL685c G5 Server Blade (99 pages)
- ProLiant Firmware Maintenance CD (87 pages)
- ProLiant BL10e Server Blade (232 pages)
- ProLiant BL40p Server series (30 pages)
- Serveur lame HP ProLiant BL680c G5 (90 pages)
- Serveur lame HP ProLiant BL465c Gen8 (578 pages)
- ProLiant DL320e Gen8 Server (96 pages)
- ProLiant ML110 G7 Server (113 pages)
- 9000 rp8420 Servers (38 pages)
- Integrity Superdome sx1000 Server (19 pages)