Getting started – Ocean Optics NanoCalc User Manual
Page 8
Ocean Optics Germany GmbH Thin Film Metrology
7
4
Getting started
After installation of your hardware and software you should be ready to make your first measurements.
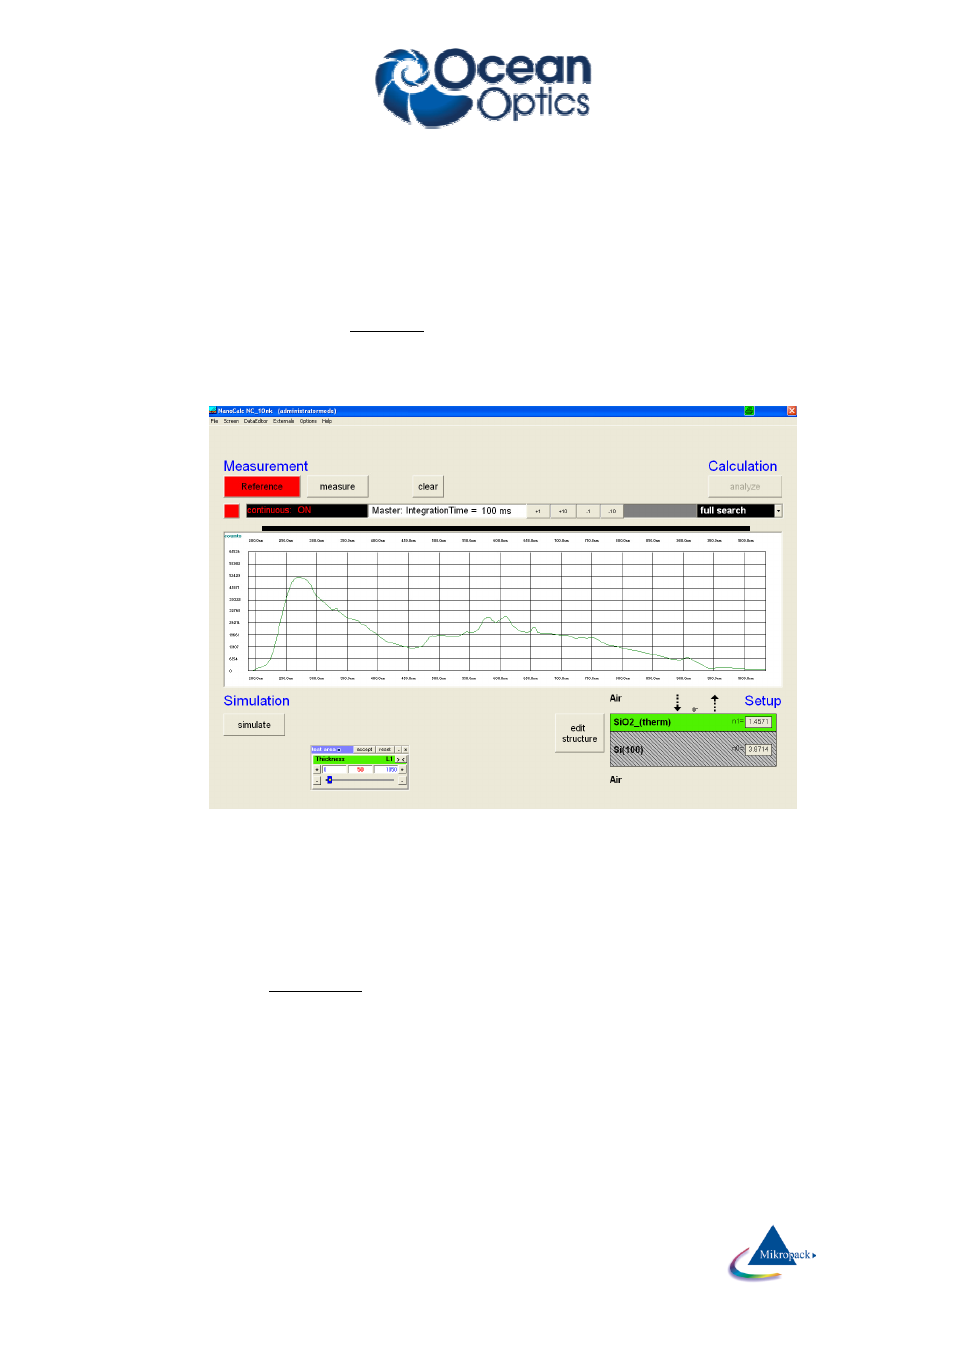
First example = without SCOUT-software:
1.
You need a blank silicon wafer as a reference and a wafer with a thin layer (e.g. 495 nm SiO
2
on Si). It
is a good idea to use a special “step wafer” with different oxide thickness as a first test or for calibration
purposes. Please ask your hardware supplier for information about step wafers.
Choose an experimental setup with a fiber or a microscope.
2.
Then insert your reference wafer, switch on your lamp, start NanoCalc and click on the button
„continuous mode“.
This button turns
RED
. Then click on the button
“reference”
(this button turns
RED
as well) and you
should see the spectrum of your lamp as it measured repeatedly in short time intervals.
You should observe a spectral region comparable to the data of your spectrometer (e.g. 250 -1100 nm,
depending on your grating).
It is important to use a “good” amplitude of this signal = not too high and not too low. This means:
a. there should be no saturation of the CCD-detector (=a flat region) in the signal.
b. try to get a signal height of about 50-90% of the scale height for oxide samples (and similar) and
about 20% for metallic samples. The exact value is of no concern as long as your signal in the
measurement of the real sample does not cause saturation.
There are several possibilities to get a “good” signal amplitude:
a. increase or decrease integration time (with the buttons ±1 ms or ±10 ms) to adjust the signal
between 20-90%.
b. or adjust the lamp intensity (e.g.NanoCalc-VIS), if this is possible
3.
Then click on the button „continuous mode“ again to turn off the continuous mode. Both buttons turn to
BLACK again. The last reference measurement is saved internally and you can see it on the screen.