Ocean Optics NanoCalc User Manual
Page 37
Ocean Optics Germany GmbH Thin Film Metrology
36
e. mapping positions
measuring position:
If you press one of the position buttons (Home, Scan, Center, Reference), the mapping stage will immediately go to
this point and a
red circle
is displayed on the screen. Additionally the coordinates of this point are displayed. If
option "measure on each click" in Tab2 is activated, a measurement will be performed.
You may reach any point by clicking with the
LEFT
mouse button or by entering the coordinates and pressing the
xy-button.
You may move up and down or left and right by pressing the appropriate arrow buttons. If you press the arrow
buttons with the
left
mouse button the cursor will move in increments of xSteps. If you press the arrow buttons with
the
right
mouse button the cursor will move in smaller increments of xSteps/10
f. position buttons:
1. home position
Usually this is in the right lower corner of the xy-stage. The hardware of the stage will define this point at the
beginning of the mapping experiment (and it can be changed manually in the ini-File in section [mapping],
HomepositionX/Y=.... The numbers mean the percentage compared to wafersize (0.05 =5% of wafersize)
2. scan position
this is the origin of the scanning coordinate system
3. center position
this is the center of the (round) wafer stage
4. reference position
this is the position where the reference measurement has to be done.
this point (=the black circle) may be chosen by clicking with the
RIGHT
mouse button or by changing the
numbers
The wafer plot shows what you are doing.
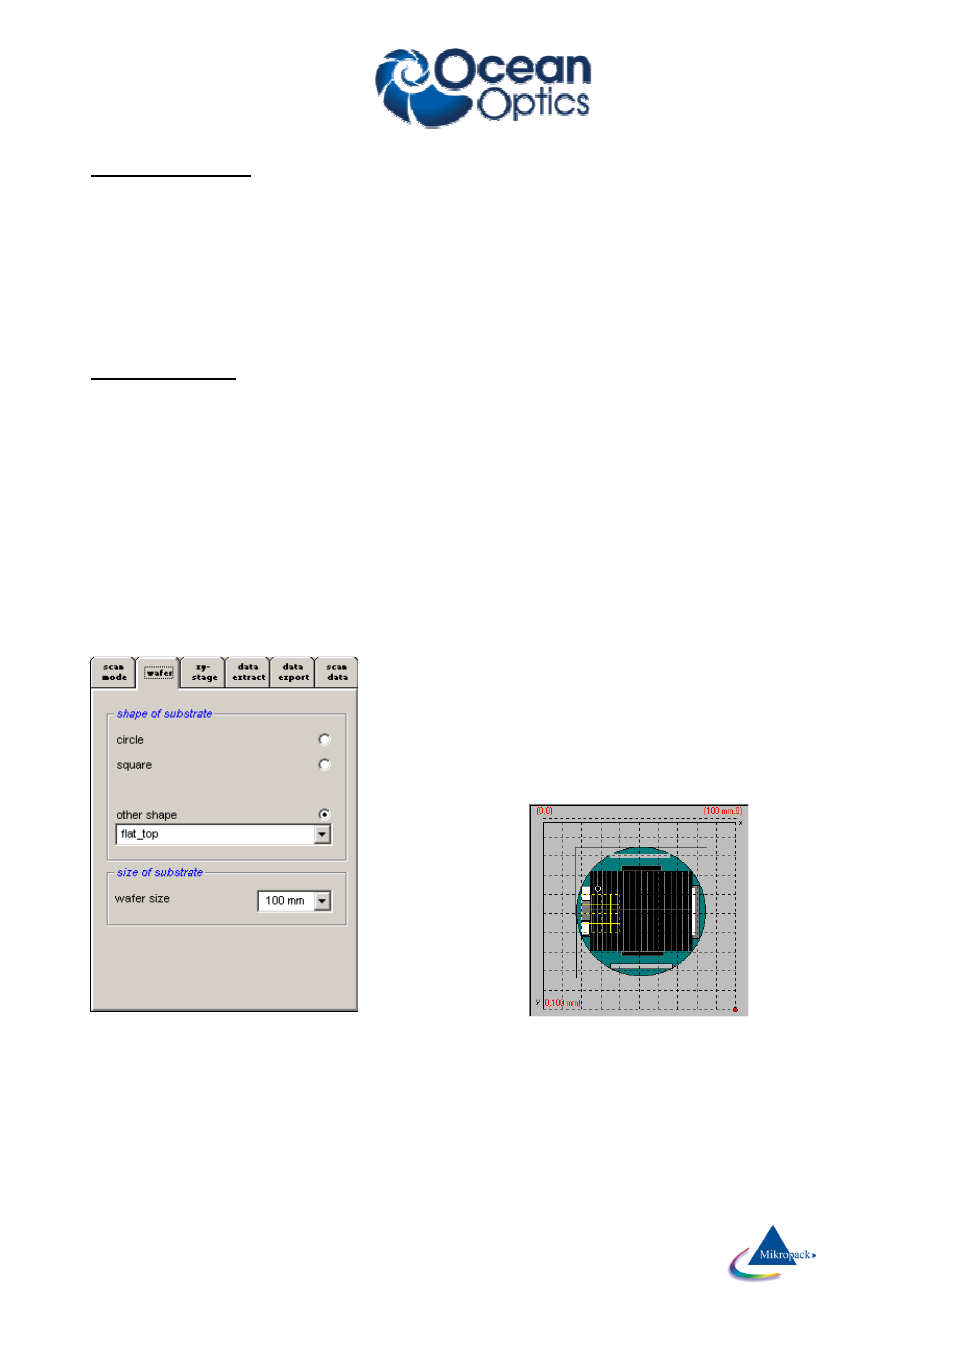
wafer:
The shape of the substrate may be:
a. circular (between 50 and 300mm)
b. square (between 50 and 300 mm)
c. your own design (change file "OwnDesign.bmp" with any drawing
software)
example:
Wafer size may be changed between 50 mm (= 2'' ) and 300 mm (= 12” ).