Checkline TI-CMXDLP User Manual
Page 7
– 7 –
2.2 Auto Probe Recognition
When the TI-CMXDLP is initially powered up, the gauge will automatically check to
see if the transducer plugged into the gauge can be recognized. The steps that follow
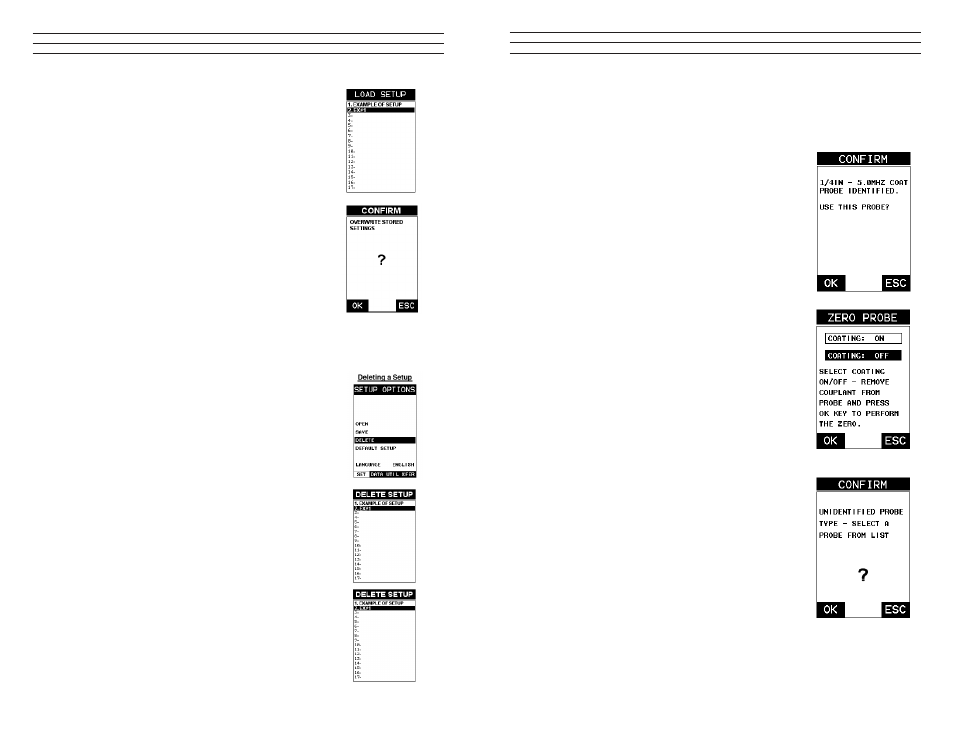
assume the TI-CMXDLP recognized the probe type:
1. Press the OK key once to use the identiied probe,
or ESC to display a list of optional transducers.
NOTE: If the TI-CMXDLP recognizes a speciic transducer,
the user should always select OK to use the identiied probe.
The only time an alternative probe should be selected from a
list is if the user switched probes following initial power up
and recognition
2. Assuming the TI-CMXDLP recognized the probe and
the OK key was pressed, the TI-CMXDLP will advance
to a Zero Probe menu. If the transducer was identiied
as a special transducer capable of measuring coating
thickness, a menu will be displayed giving the user the
ability to toggle the coating thickness display on/off as
follows:
3. Press the UP and DOWN arrow keys to toggle the
coating option on/off.
4. Wipe all couplant from the transducer face and advance
to the Probe Zero & Calibration section.
2.3 Selecting the Transducer Type
If the TI-CMXDLP does not identify a speciic transducer
type on initial power up, the user will be required to select
a type from a predeined list of types by diameter and
frequency. By selecting a transducer type from a predeined
list, the TI-CMXDLP can recall speciic properties about the
transducer.
NOTE: Once the transducer has been selected, the
TI-CMXDLP will store and recall this transducer type every
time the TI-CMXDLP is powered on/off. The type will only
change if the user physically selects another transducer type
from the list, or selects a previously saved setup. However,
the TI-CMXDLP will continue to take you through these
steps each time the gauge is powered up. You’ll notice that
the probe type previously selected will be highlighted every
time the probe type screen is displayed. Use the following
steps to select your transducer type:
– 98 –
7. Press the OK key to return to the Save Setup
Parameters List Box.
8. If both parameters will be edited, repeat steps 4 – 7.
9. Use the UP and DOWN arrow keys to scroll to and
highlight SAVE SETUP.
10. Press the ENTER key to activate the Setup List
Box.11) Use the UP and DOWN arrow keys to scroll
through the setups until the target location to save the
Setup is highlighted.
12. Press the OK key to activate the conirmation screen.
13. Press the OK key to save the Setup, or ESC to cancel
saving the Setup.
14. Finally, press the MEAS key to return to the
measurement screen.
NOTE: The Name and Comments of the Setup can
be edited at any time by simply repeating the Save Setup routine described above.
Therefore, the Save Setup function can also be considered an Edit Function.
12.4 Deleting a Saved Setup
This option allows a user to delete setup iles that were
previously saved and no longer needed. It’s a simple
feature to allow the user to do a bit of “house cleaning”.
1. Press the MENU key once to activate the menu items
tab. Press the MENU key multiple times to tab right
and the ESC key multiple times to tab left until the
SETUP menu is highlighted and displaying the
submenu items.
2. Use the UP and DOWN arrow keys to scroll through
the sub menu items until DELETE is highlighted.
3. Press the ENTER key to display the Setups List.
4. Press the UP and DOWN arrow keys to scroll to the
Setup Name.
5. When the Setup Name is highlighted, press the
ENTER key to display the conirmation screen.
6. Press the OK key to delete the Setup File.
7. Finally, press the MEAS key to return to the
measurement screen.