Checkline TI-CMXDLP User Manual
Page 12
– 12 –
2.6 Coating Calibration
The TI-CMXDLP has been preset to a default coating velocity of 0.0850 in/μsec
(2159m/sec). This will be very close to the most common coating material velocities
used in the ield. If the velocity of the coating is known, and different than the above
default setting, the user can simply enter the coating velocity into the TI-CMXDLP.
However, if the velocity is unknown, the TI-CMXDLP can also be calibrated to a
speciic coating sample/type using the 1pt calibration option in PECT (pulse-echo
coating)mode, or a two point calibration is CT (coating only) mode. For the purpose
of this quick start section only the 1pt option PECT (pulse-echo coating) mode will
be covered. Refer to the calibration section of the manual for a complete explanation
on the coating calibration options. The following steps below outline the necessary
steps to either set the velocity of the coating, or perform a one point calibration to
calculate the coating velocity:
Known Coating Velocity
If the coating velocity is known, the user may wish to
simply enter the velocity number into the TI-CMXDLP,
rather than have the TI-CMXDLP calculate the velocity
value using a known thickness on a coating sample. The
steps for entering the velocity are outlined below:
1. Press the MENU key once to activate the menu items
tab. Press the MENU key multiple times to tab right and
the ESC key multiple times to tab left until the CAL
menu is highlighted and displaying the submenu items.
2. Use the UP and DOWN arrow keys to scroll through
the sub menu items until COATING VEL is highlighted.
3. Press the ENTER key to display the Digits Edit Box.
4. Press the UP and DOWN arrow keys to scroll the
highlighted value.
5. Press the LEFT and RIGHT arrow keys to scroll the
digit locations.
6. Repeat steps 4 & 5 until the velocity number is correctly
displayed.
7. Press the OK key to set the coating velocity and return
to the menu screen,or ESC to cancel entering the
coating velocity.
8. Finally, press the MEAS key to return to the
measurement screen and begin taking readings.
– 93 –
4. Press the OK key to delete All Files from memory, or the ESC key to abort.
5. Press the MEAS key to return to the measurement screen.
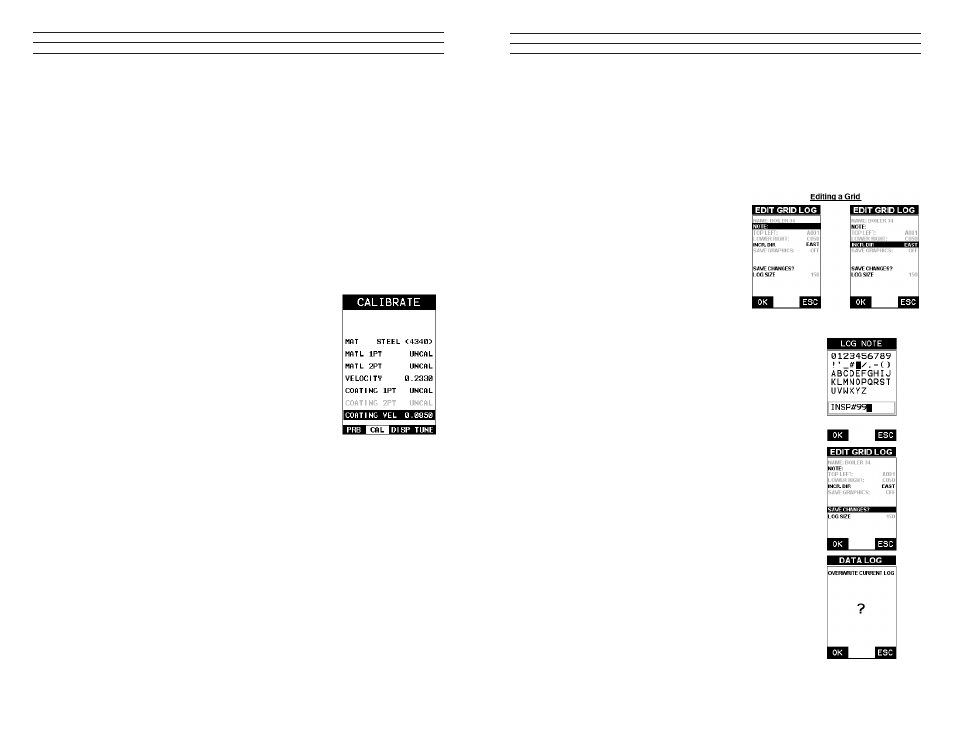
11.6 Editing a Grid (File)
Once a grid has been created and saved to memory, the user can edit the Comments or
Increment Direction at a later time. The following procedures outline this process
1. Press the MENU key once to activate
the menu items tab. Press the MENU
key multiple times to tab right and the
ESC key multiple times to tab left until
the DATA menu is highlighted and
displaying the submenu items.
2. Use the UP and DOWN arrow keys to
scroll through the sub menu items until
EDIT is highlighted.
3. Press the ENTER key to display the Edit List Box.
4. Use the UP and DOWN arrow keys to scroll through
the Edit options until NOTE or INCR. DIR is
highlighted.
NOTE: If editing the INCR. DIR, simply use the LEFT
or RIGHT arrow keys to scroll NONE, NORTH, EAST,
SOUTH, WEST for a Grid, or INC, DEC for a SeqLog.
Proceed to step 10.
5. Press the ENTER key to activate the Alpha Edit box –
Only used when editing the NOTE.
6. Use the UP, DOWN, LEFT, & RIGHT arrow keys to
highlight the appropriate alpha characters.
7. Press the ENTER key to select a character and
advance to the next ield of the Comments.
8. Use the CLR key to backspace if necessary.
9. Repeat steps 6 - 8 until the Comments are completed
10. Press the UP or DOWN arrow key to highlight
SAVE CHANGES, and the OK key to activate the
conirmation screen.
11. Press the OK key to save the changes or the ESC key
to cancel editing the ile parameters.
12. Press the MEAS key to return to the measurement screen.