Checkline TI-CMXDLP User Manual
Page 6
– 6 –
E. Digital Material Thickness Value: Extra large font size for viewing ease.
F. Scan Bar: Another view of material thickness in a delection style horizontal bar.
This visual tool enables the user the ability to see thickness changes during high
speed scans from laws and pits.
G. Units: The current measurement units being used (English, Metric)
H. Digital Material Thickness Value: Smaller font size when the B-Scan display
view is enabled.
I. Coating Thickness Value: Displays the actual thickness of any coating adhered
to a metallic material surface (PECT Mode), or a coating adhered to anon-metallic
surface (CT Mode).
J. Minimum Material Thickness: Part of the Alarm feature. Displays the minimum
thickness value found during a scan.
K. Maximum Material Thickness: Part of the Alarm feature. Displays the maximum
thickness value found during a scan.
L. B-Scan Display: Cross section view of the material. Provides a graphical view
of the opposite/blind surface (i.e. inside pipe wall surface), to give some idea of the
condition, or integrity of the material being tested.
M. RF A-Scan Display: The actual sound wave relection returned from the detection
of the opposite surface of the material being measured. In this view, the entire
sine wave is displayed, showing both the positive and negative half cycles from the
detection/relection. This view is commonly used to “see the big picture” and make
ine adjustments to the scope settings, prior to selecting another view option.
N. Hot Menu items: Items in this menu section are the most commonly adjusted
features. They can be displayed and scrolled by pressing the MEAS key at anytime.
The ESC key is used in conjunction with MEAS key to reverse the direction
scrolled.
O. Reference Note: When the “hot menu” items are displayed/activated, the base
material thickness value shown at reference point “O”. However, when the “hot
menu” items have been deactivated, the current base material velocity value is
displayed, as shown in reference point “P”. When the “hot menus” are deactivated,
the entire “hot menu” section becomes a multiple measurement display area,
allowing the user to simultaneously view: base material, coating,and base material
minimum/maximum thickness values dynamically, as shown in reference point “R”
P. Reference Note: Please refer to “O”, for a detailed explanation.
Q. RECT A-Scan Display: The actual sound wave relection that is returned from the
detection of the opposite surface of the material being measured. In this view, only
half of the sine wave is being displayed (positive or negative). This view is comonly
used as a “law detection” mode, once the user made all the necessary adjustments
using the RF mode (refer to M).
– 99 –
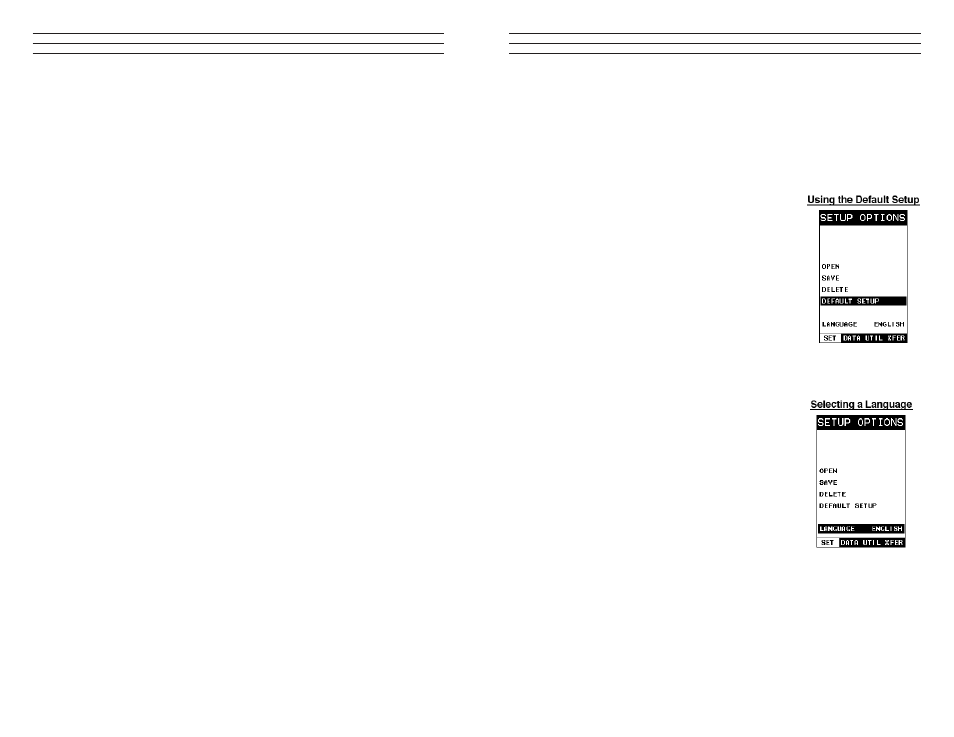
12.5 Using the Default Setup
The default setup feature was added to the TI-CMXDLP to use, as a last resort, if
there are no setups stored in the gauge –factory or otherwise. The only time this might
possibly occur is if the setup ile in the TI-CMXDLP was somehow corrupted, and
the user does not have access to a computer to re-load the factory setups back into the
TI-CMXDLP. This gives the user the ability to load and modify a basic setup as follows:
NOTE: The default ile contains no probe zero data.
Therefore, a zero must be performed after loading. Also,
the default setup can be loaded when using the law mode
feature, to eliminate the probe zero delay value, and start
at the initial pulse or zero.
1. Press the MENU key once to activate the menu items
tab. Press the MENU key multiple times to tab right
and the ESC key multiple times to tab left until the
SETUP menu is highlighted and displaying the
submenu items.
2. Use the UP and DOWN arrow keys to scroll through
the sub menu items until DEFAULT SETUP is
highlighted.
12.6 Selecting a Language
The TI-CMXDLP is equipped with a language option.
Currently, the only languages supported are English,
Spanish, and German.
1. Press the MENU key once to activate the menu items
tab. Press the MENU key multiple times to tab right
and the ESC key multiple times to tab left until the
SETUP menu is highlighted and displaying the
submenu items.
2. Use the UP and DOWN arrow keys to scroll through
the sub menu items until LANGUAGE is highlighted.
3. Press the LEFT and RIGHT arrow keys to toggle the
language options.
4. Once the desired language is displayed, press the
MEAS key to return to the measurement screen.