Checkline TI-CMXDLP User Manual
Page 39
– 39 –
At some point there may become a requirement for improved accuracy over a smaller
measurement range. In this case, a two point calibration would be most suited for the
job. For example, if the measurement range was .080” (2.03mm) to .250”(6.35mm), the
user would perform a one point calibration on a known thickness sample close to .250”
(6.35mm), followed by a two point calibration close to .080”(2.03mm). When a two
point calibration is performed, the TI-CMXDLP calculates the zero and the velocity.
The following steps outline this procedure:
Two Point Calibration
1. Physically measure an exact sample of the material or a location directly on the
material to be measured using a set of calipers or a digital micrometer.
2. Apply a drop of couplant on the transducer and place the transducer in steady
contact with the sample or actual test material. Be sure that the reading is stable and
the repeatability indicator, in the top left corner of the display, is fully lit and stable.
Press the MENU key once to activate the menu items tab. Press the MENU key
multiple times to tab right and the ESC key multiple times to tab left until the CAL
menu is highlighted and displaying the submenu items.
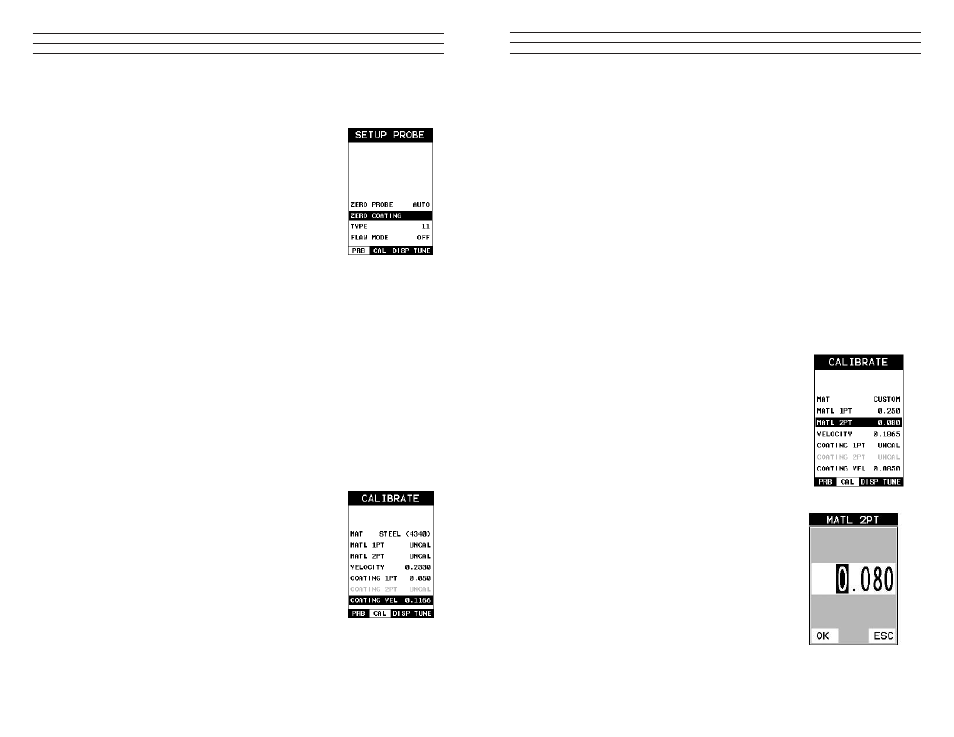
3. Use the UP and DOWN arrow keys to scroll through
the sub menu items until MATL 2PT is highlighted.
4. Press the ENTER key to display the Digits Edit Box.
5. Press the UP and DOWN arrow keys to scroll the
highlighted value.
6. Press the LEFT and RIGHT arrow keys to scroll the
digit locations.
7. Repeat steps 5 & 6 until the known thickness value is
correctly displayed.
8. Press the OK key to calculate the velocity and return
to the menu screen, or ESC to cancel the one point
calibration.
9. Finally, press the MEAS key to return to the
measurement screen and begin taking readings.
NOTE: CHECK YOUR CALIBRATION! Place the
transducer back on the calibration point. The thickness
reading should now match the known thickness. If the
thickness is not correct, repeat the steps above.
– 66 –
NOTE: The coating measurement displayed will potentially be a value greater or less
than 0.
5. Press the MENU key once to activate the menu items tab.
Press the MENU key multiple times to tab right and the
ESC key multiple times to tab left until the PRB menu is
highlighted and displaying the submenu items.
6. Use the UP and DOWN arrow keys to scroll through the
sub menu items until ZERO COATING is highlighted.
7. Press the ENTER key to display the conirmation screen.
8. Press the OK key to zero the coating and return to the
PRB menu, or ESC to cancel the coating zero process.
9. Press the MULTI MODE key once to activate the
measurement mode options.
10. Use the UP and DOWN arrow keys to scroll through
the sub menu items until Coating On (PECT) is
highlighted.
11. Press the ENTER key to select the measurement mode
and return to the measurement screen, and begin taking
readings. Proceed to the coating calibration section.
9.4 Coating Calibration (PECT)
Known Velocity
If the coating velocity is known, the user may wish to simply enter the velocity number
into the TI-CMXDLP, rather than have the TI-CMXDLP calculate the velocity value
using a known thickness on a coating sample(s). The steps for entering the velocity are
outlined below:
1. Press the MENU key once to activate the menu items
tab. Press the MENU key multiple times to tab right and
the ESC key multiple times to tab left until the CAL
menu is highlighted and displaying the submenu items.
2. Use the UP and DOWN arrow keys to scroll through the
sub menu items until COATING VEL is highlighted.
3. Press the ENTER key to display the Digits Edit Box.
4. Press the UP and DOWN arrow keys to scroll the
highlighted value.
5. Press the LEFT and RIGHT arrow keys to scroll the digit locations.