Checkline TI-CMXDLP User Manual
Page 34
– 34 –
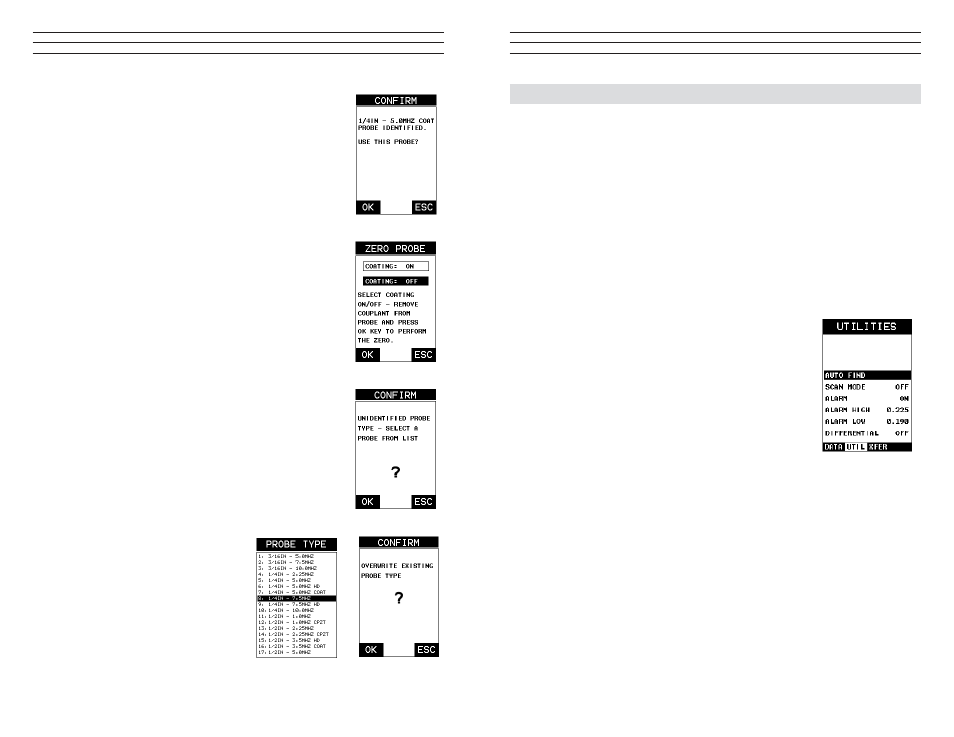
Probe Automatically Recognized
1. Press the OK key once to use the identiied probe, or
ESC to display a list of optional transducers. Note: if the
TI-CMXDLP recognizes a speciic transducer, the user
should always select OK to use the identiied probe. The
only time an alternative probe should be selected from a list
is if the user switched probes following initial power up and
recognition, or the TI-CMXDLP has somehow identiied the
probe in error..
2. Assuming the TI-CMXDLP recognized the probe and the
OK key was pressed,the TI-CMXDLP will advance to
a Zero Probe menu. If the transducer was identiied as a
special transducer capable of measuring coating thickness,
a menu will be displayed allowing the user the ability to
toggle the coating thickness display on/off as follows :
3. Press the UP and DOWN arrow keys to toggle the coating
option on/off.
4. Wipe all couplant from the transducer face and proceed to
the Probe Zero section.
Selecting the Transducer Type
1. Press the OK or ESC keys to display the factory list of
transducer types (by diameter and frequency).
2. Press the UP and DOWN arrow keys to scroll through the
transducer list until the appropriate type is highlighted.
3. Press the ENTER key to select the transducer type and
display overwrite existing probe screen.
4. Press the OK key to overwrite the existing probe type with
the newly selected probe type.
The zero probe screen will be
displayed. Proceed to the Probe
Zero section.
– 71 –
10.0 ADDITIONAL FEATURES OF THE TI-CMXDLP
10.1 Auto Find
The TI-CMXDLP is equipped with a very handy feature for locating the detection point
of a back wall echo that is not currently in the viewable region of the display. Suppose
the TI-CMXDLP is currently setup with a delay of 0.0” and a width of 1.0”, and the
user is measuring material thickness of 2.5”. The TI-CMXDLP will make the correct
measurement and display it digitally. However, the waveform will not show up at all
in both A-Scan views, and incorrectly in the B-Scan view without adjusting the range
of the Delay and Width accordingly. The AUTO FIND feature is a convenient way to
let the TI-CMXDLP ind the detection point and bring the waveform signal into view
automatically. The user can then make small adjustments to the range once the signal
is displayed on the screen. The procedure to use the AUTO FIND feature is outlined
below:
Using Auto Find
1. Press the MENU key once to activate the menu items
tab. Press the MENU key multiple times to tab right, and
the ESC key multiple times to tab left, until the UTIL
menu is highlighted and displaying the submenu items.
2. Use the UP and DOWN arrow keys to scroll through the
sub menu items until AUTO FIND is highlighted.
3. Place the transducer on the test material and obtain a
reading.
4. Press the ENTER key to automatically adjust the display
settings and bring the waveform into view.
5. Once the signal is displayed, press the MEAS key to return to measurement mode.