Checkline TI-CMXDLP User Manual
Page 36
– 36 –
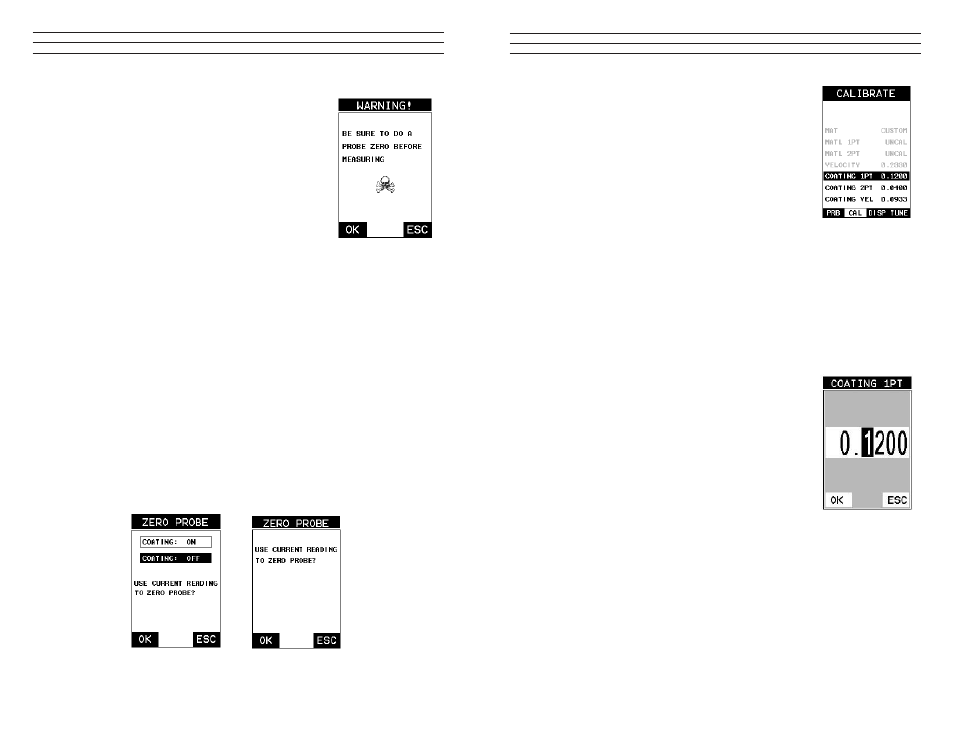
Coating Probe
Identified
Coating Probe
Not Identified
Performing a Manual Probe Zero (On Block)
NOTE: When the zero probe option is set to manual, the
Probe Zero Disk(battery cap) located on the top of the
gauge will be used as a zero standard and the warning
screen illustrated above will be displayed.
1. Press the OK or ESC keys to enter the main
measurement screen and begin the manual zero process.
2. Apply a drop of couplant on the transducer and place
the transducer in steady contact with the Probe Zero
Disk and obtain a steady reading.
3. Press the MENU key once to activate the menu items tab. Press the MENU key
multiple times to tab right and the ESC key multiple times to tab left until the PRB
menu is highlighted and displaying the submenu items.
4. Press the UP and DOWN arrow keys to scroll through the sub menu items until
ZERO PROBE is highlighted.
5. Press the ENTER key to display the conirmation screen.
6. If a coating transducer was identiied use the UP and DOWN arrow keys to toggle
coating on/off.
7. Press the OK key to complete the probe zero function, or ESC key to cancel the
probe zero function.
8. Remove the transducer from the Probe Zero Disk, and proceed to the calibration
section.
NOTE: The value that is displayed will change depending on the current velocity
setting. Disregard the number that is displayed. It is not important. What is important
is accurately performing the steps outlined above to insure reliability of the probe zero
calculation.
–69 –
One Point Calibration
NOTE: Use the maximum coating sample for the one point
calibration irst.
1. Physically measure the thicker of the two samples of
coating, as close as possible to the maximum expected
coating measurement range, using a set of calipers or a
digital micrometer.
VERY IMPORTANT: If coating measurements will be
made with the coating applied to a metal surface, the
calibration must be done in the same manner,with the
samples coupled to a metal surface. However, if the coating
will be measured as a stand alone material, the calibration
must be performed the same way.
2. Apply a drop of couplant on the transducer and place the transducer in steady
contact with the thicker of the two coating and samples ist. Be sure that the reading
is stable and the repeatability indicator, in the top left corner of the display, is fully
lit and stable. Press the MENU key once to activate the menu items tab. Press the
MENU key multiple times to tab right and the ESC key multiple times to tab left
until the CAL menu is highlighted and displaying the submenu items.
3. Use the UP and DOWN arrow keys to scroll through the
sub menu items until COATING 1PT is highlighted.
4. Press the ENTER key to display the Digits Edit Box.
5. Press the UP and DOWN arrow keys to scroll the
highlighted value.
6. Press the LEFT and RIGHT arrow keys to scroll the
digit locations.
7. Repeat steps 5 & 6 until the known thickness value is
correctly displayed.
8. Press the OK key to calculate the velocity and return to
the menu screen, or ESC to cancel the coating one point
calibration.
9. Finally, press the MEAS key to return to the
measurement screen and begin taking readings