Checkline TI-CMXDLP User Manual
Page 46
– 46 –
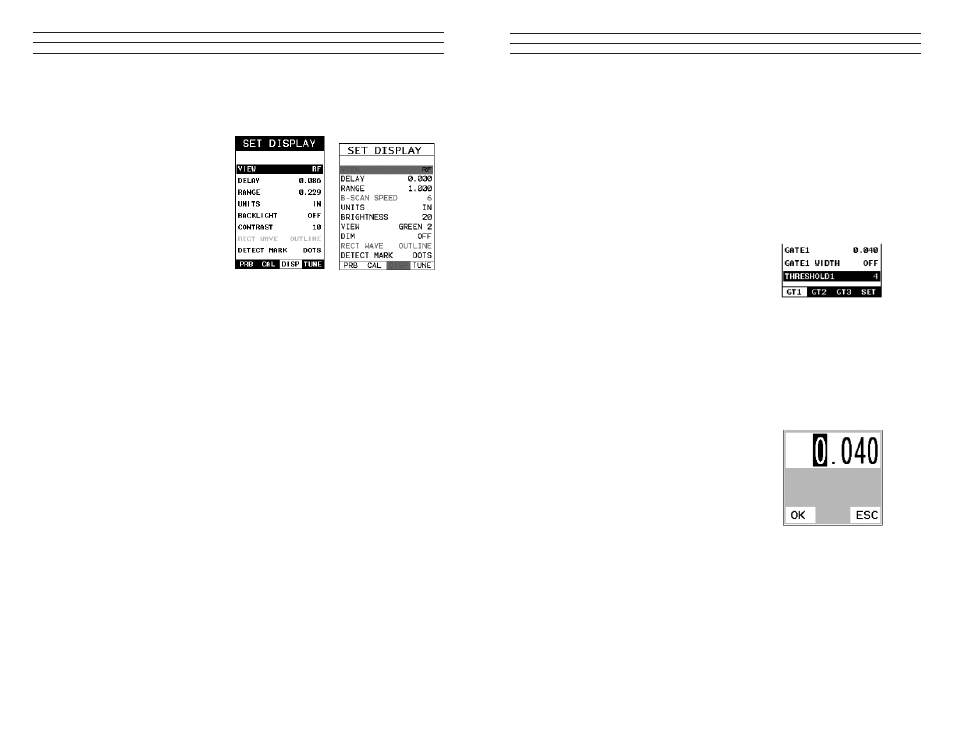
7.2 Changing Display Options
The following procedure outlines how to select or toggle display options:
1. Press the MENU key once
to activate the menu items
tab. Press the MENU key
multiple times to tab right,
and the ESC key multiple
times to tab left,until the
DISP menu is highlighted
and displaying the submenu
items.
2. Use the UP and DOWN
arrow keys to scroll through
the sub menu items until
VIEW is highlighted.
3. Use the LEFT and RIGHT arrow keys to scroll the view options. Once the
appropriate view is displayed, press the MEAS key to return to the measurement
screen and begin taking measurements.
7.3 Adjusting the display
This section will cover the procedures for adjusting the viewable range, or area, of the
display, in terms of thickness. A basic overview of this section would be as follows:
Suppose we had a 50” wide screen television set. Assume that you’re watching the
television for rest of this explanation. The left side of the television screen is considered
the Delay for all view options other than B-Scan. In B-Scan view, it’s called B-Start.
Therefore, Delay (B-Start) are identical, with the exception of the terminology used, and
represent the left side of the television screen.
The right side of the television screen is considered the Range + Delay, in all view
options with the exception of B-Scan, once again. In B-Scan view, it would be
considered B-Depth + B-Start. Therefore, the following should be considered: Delay
(B-Start) + Range (B-Depth) = right side of the screen, depending on what view option
is active.
Now, by adjusting the left and right side of the television screen, to control the viewable
area/range, we can zoom in and out of any part of the 50” screen we’d like,and focus on
only the speciic areas of the screen we need to. Therefore, if I am measuring a part, and
am only interested in viewing the thickness range/area from .500” – 1.0”, and I’d like to
zoom in a bit to get a close up look at things, I’d set my Delay (B-Start) to .500” and my
Range (B-Depth) to .500”. This would make the left side of my screen start at .500”, and
the right side of the screen at 1.0”.
– 59 –
6. Press the UP, DOWN, LEFT, and RIGHT arrow keys to scroll the highlighted value.
7. Repeat steps 3-6 until all the (?) values are correctly adjusted.
The user can also access and adjust the (?) from the tabbed menus. However, this
method is more tedious than making the adjustments using the Hot Menus. The
procedure for using the tabbed menus is outlined below:
Adjusting the Features of the Gates using the Tabbed Menus
1. Press the MENU key once to activate the
menu items tab. Press the MENU key
multiple times to tab right, and the ESC
key multiple times to tab left, until the
(?) menu is highlighted and displaying
the submenu items.
2. Use the UP and DOWN arrow keys to
scroll through the sub menu items until
(?) is highlighted
3. Press the LEFT and RIGHT arrow keys
to scroll the value. When the correct (?)
is being displayed, proceed to step 8.
4. Alternatively, press the ENTER key to
display the Digits Edit Box.
5. Press the UP and DOWN arrow keys to
scroll the highlighted value.
6. Press the LEFT and RIGHT arrow keys
to scroll the digit locations.
7. Repeat steps 5 & 6 until the (?) number
is correctly displayed.
8. Press the OK key to set the (?) and return
to the menu screen, or ESC to cancel
entering the (?).
9. Repeat steps 1-8 to set any additional (?)
level.
10. Finally, press the MEAS key to return to
the measurement screen and begin taking
readings.