Adjustment template with bracket, 7commissioning, 2 initial commissioning – Pilz PSENvip RL D P User Manual
Page 93: 2 adjustment template with bracket
Pilz GmbH & Co. KG, Felix-Wankel-Straße 2, 73760 Ostfildern, Germany
Telephone: +49 711 3409-0, Telefax: +49 711 3409-133, E-Mail: [email protected]
7-11
7.2
Initial commissioning
7
Commissioning
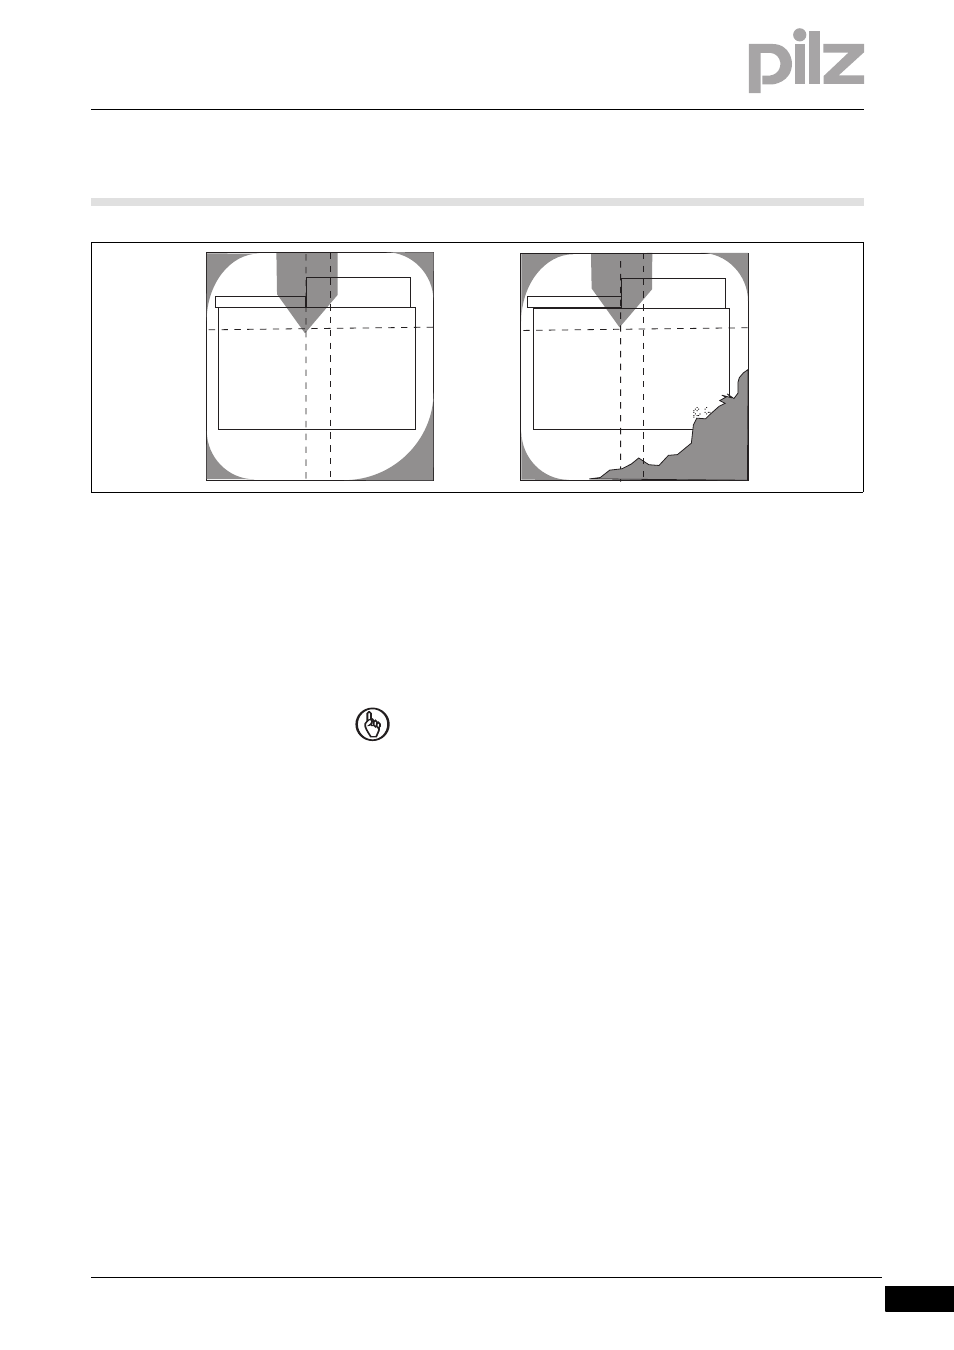
Fig. 7-10:
Checking the adjustment image with superimposed guide
frame
Inbetriebnahme_Erstinbetriebnahme_Empfaenger_ausrichten_6
You can switch to the adjustment image without guide frame by
pressing
Exit the adjustment using the
The transmitter and receiver are now mechanically aligned.
7.2.2
Adjustment template with bracket
Adjustment template with bracket
7-
Inbetriebnahme_Erstinbetriebnahme_Justageschablone_mit_Traeger
An adjustment template screwed to a suitable bracket is also available
as an accessory. This bracket is not supplied with the system.
Fasten the template to the bracket using half length taper-grooved
dowel pins and cylinder head bolts (see illustration).
NOTICE
After you have aligned the transmitter and receiver you will still
need to carry out the step for "Adjustment during tool change"
(see section entitled "Adjustment during tool change").
Out of range