Making a recording on the sastracer analyzer, Stopping a recording, Making a recording on the sas tracer analyzer – Teledyne LeCroy SAS Suite User Manual User Manual
Page 28
Version 6.25
SASSuite User Manual
18
LeCroy Corporation
Making a Recording on the SASTracer Analyzer
After installation, the software is configured to make a 16 or 32 MByte snapshot recording
of your Serial Attached SCSI traffic (16 MByte for SASTracer, 32 MByte for Avalanche).
To make this recording, follow these steps:
Step 1 Connect a cable to each of the two connectors on the analyzer
module, then connect the other ends to the Serial Attached
SCSI device under test and Serial Attached SCSI host system.
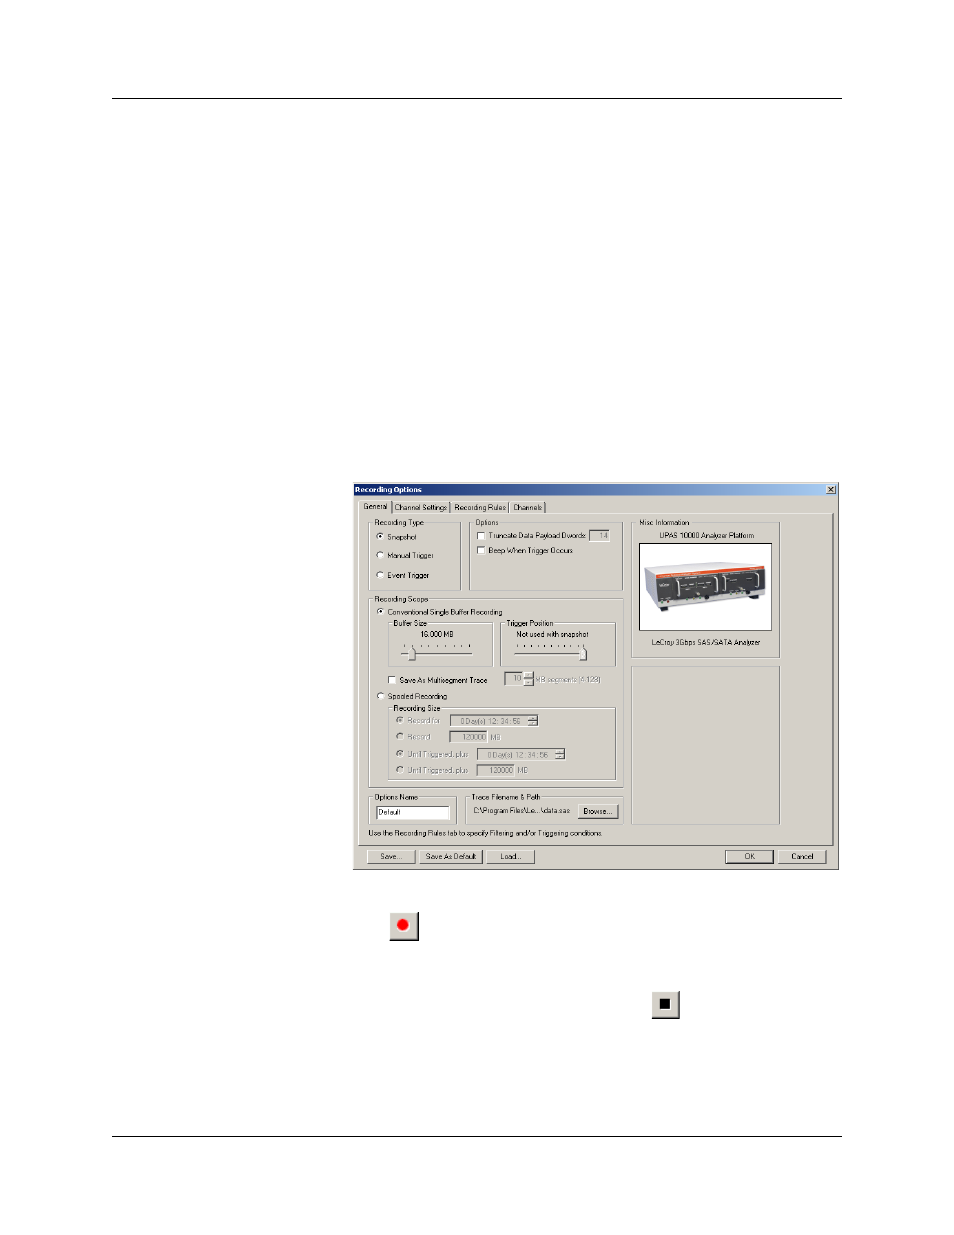
Step 2 From the Setup menu, select Recording Options.
Step 3 Select the General tab.
The following window displays the factory default settings such as
“Snapshot” and 16 or 32 MBytes buffer size are displayed. For your first
recording, you can leave these settings unchanged. The window
displayed below is for the SASTracer system, the Avalanche window is
virtually identical except for the default buffer size and the image of the
system.
Step 4 Click OK to close the Recording Options window.
Step 5 Click
on the Tool Bar. After 16 (or 32) MBytes of traffic is
recorded, the analyzer uploads the data and displays the
Frames.
Stopping a
Recording
You can stop the recording process at any time by pressing
. Afterwards, the trace
will automatically upload from the analyzer to the PC.