Adjusting the circular blade and the clock wheel – QuickLabel Plexo! 653 User Manual
Page 79
CU4/CU6 Cutter Accessory
Plexo! 453 / Plexo! 653 User Guide
67
Note: Attend on an accurate position of the bearing plate (15) to the profile (7) of the
cutter. A bad positioning could cause undefined cutting edges.
13
Tighten the bearing plate (15) with the screws (8) at the profile (7). Keep the
bearing plate in position and push it slightly to the profile (7) during tightening.
14
Tighten the screw set (4) of the gear-wheel circular blade at the rear of the printer.
15
Grease the circular blade.
Caution: Before mounting the cutter the circular blade has to be repositioned as described
in section Adjusting the Circular Blade and the Clock Wheel.
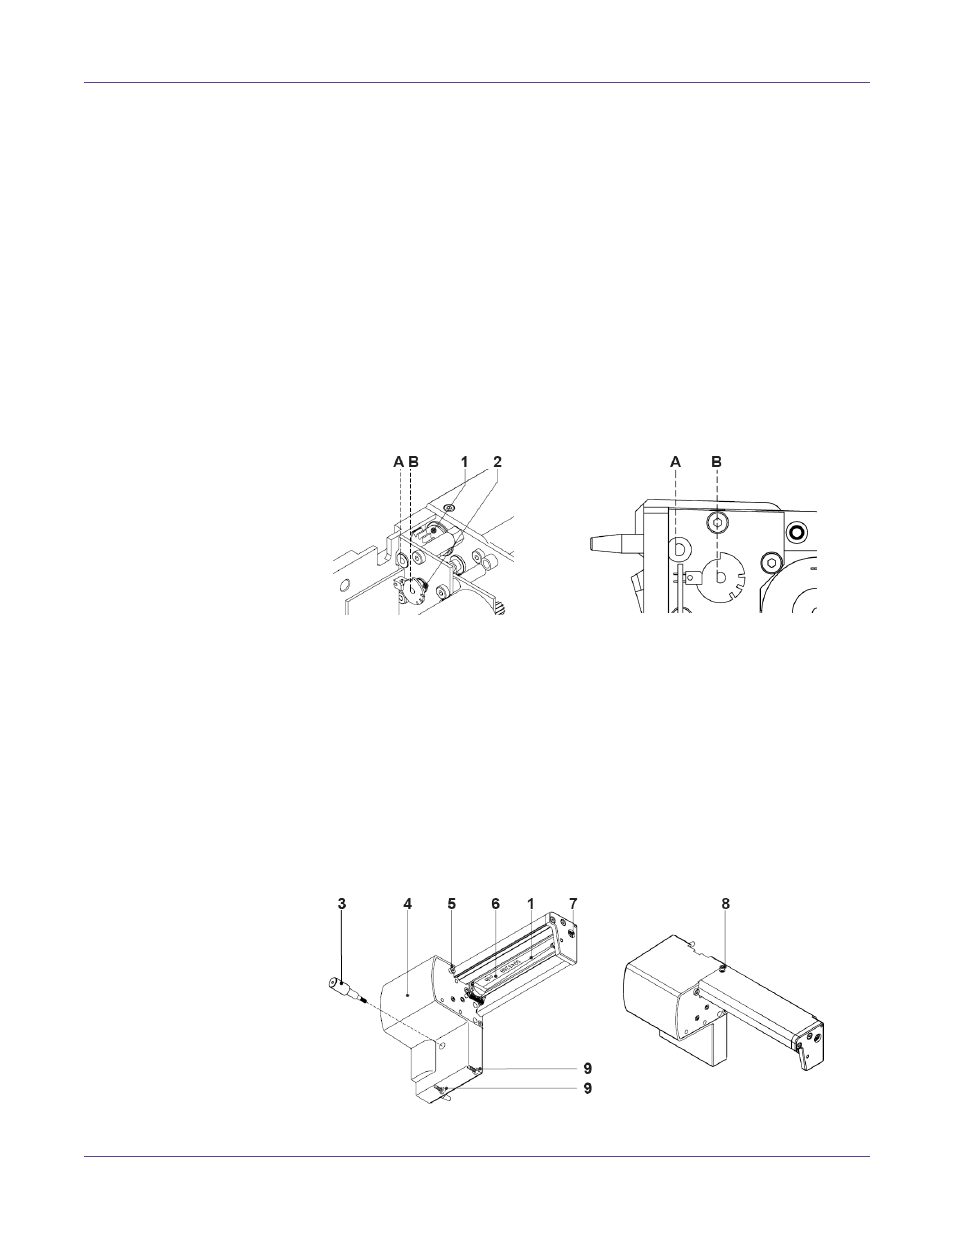
Adjusting the Circular Blade and the Clock Wheel
To operate the cutter correctly after cleaning or after changing the blades you have to
adjust the circular blade (1) and the clock wheel (2) to another.
1
Unscrew the cover (4) by loosening the screws (3), (5) and (9, at the rear).
2
Loosen the screw (8) about 5 mm from the profile of the cutter.
3
Turn the axle (7) of the circular blade with a screwdriver for slotted head screws
(slot width 7 mm) so that the inscription (4) of the blade points downward.
4
On the axles of the circular blade (1) and the clock wheel (2) you can find a planar
area (A, B). Now or after one or two more full turns of the circular blade the axles
(1, 2) are justified and the areas (A, B) both are pointing to the rear of the cutter.
5
Tighten the screw (8) for arresting the circular blade.
Note: If you overtighten screw (8), you could damage the screw thread.