Printer configuration, Cut position – QuickLabel Plexo! 653 User Manual
Page 74
CU4/CU6 Cutter Accessory
62
Plexo! 453 / Plexo! 653 User Guide
3
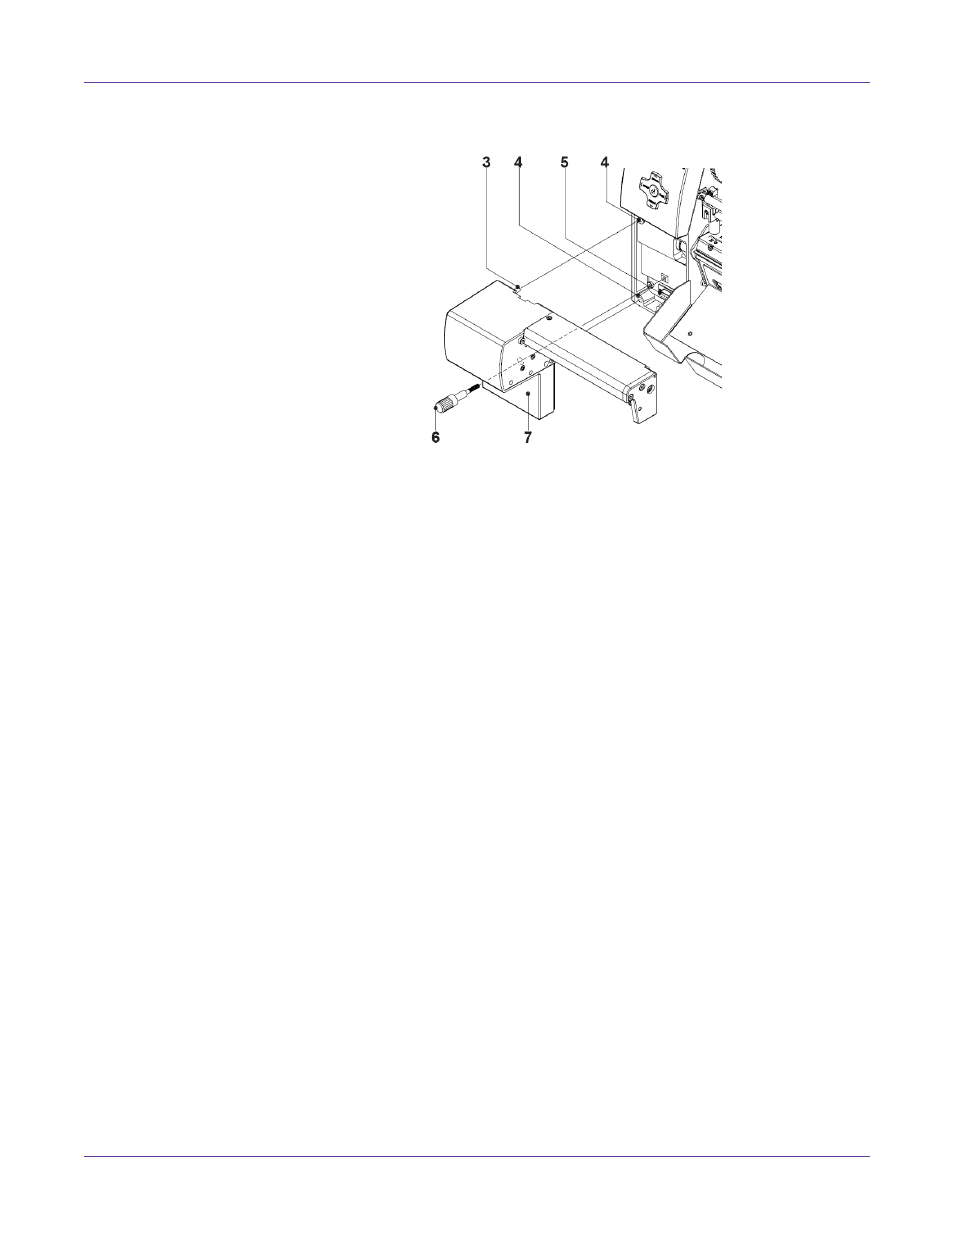
Remove the front cover (1).
4
Insert the pins (3) of the cutter (7) into the holes (4) of the printer.
5
Press the cutter against the printer. That way the plug of the cutter will be
connected to the peripheral port (5) of the printer.
6
Secure the cutter (7) with the screw (6).
Printer Configuration
Once the cutter is connected to the printer, the printer will automatically recognize it
on turn on. Once the cutter is recognized, the printer can be operated in cut mode. The
printer can be configured to suit the individual requirements of cut mode in the Setup
menu. When the cutter is installed, the Cutter menu will appear.
For setting the cutter parameters select Setup > Machine param. > Cutter.
Cut Position
The Cut position parameter allows to adjust the distance between the cut position and
the rear edge of the label. Cut position with the initial offset value of "0" causes to cut
in the middle of the gap between two labels. If the real cut position deviates from the
middle of the gap, the amount of the cut offset can be altered in the range from -9.9mm
to +9.9mm. If the cut position value is positive, the media will be advanced before it is
cut, that means the distance between the cut edge and the rear edge of the label
increases.
The setting should be made when first operating the printer and cutter, or when
changes that will effect all print jobs sent to the printer.
Note: Changes to individual print jobs can be accomplished by changing the software settings.
The offset values from Cut position and from software are added together for
execution. The software value does not replace the Cut position value, but temporarily
adjusts it for the current print job.