K-Patents PR-23 User Manual
Page 68

60
PR-23 instruction manual
a
b
c
d
e
f
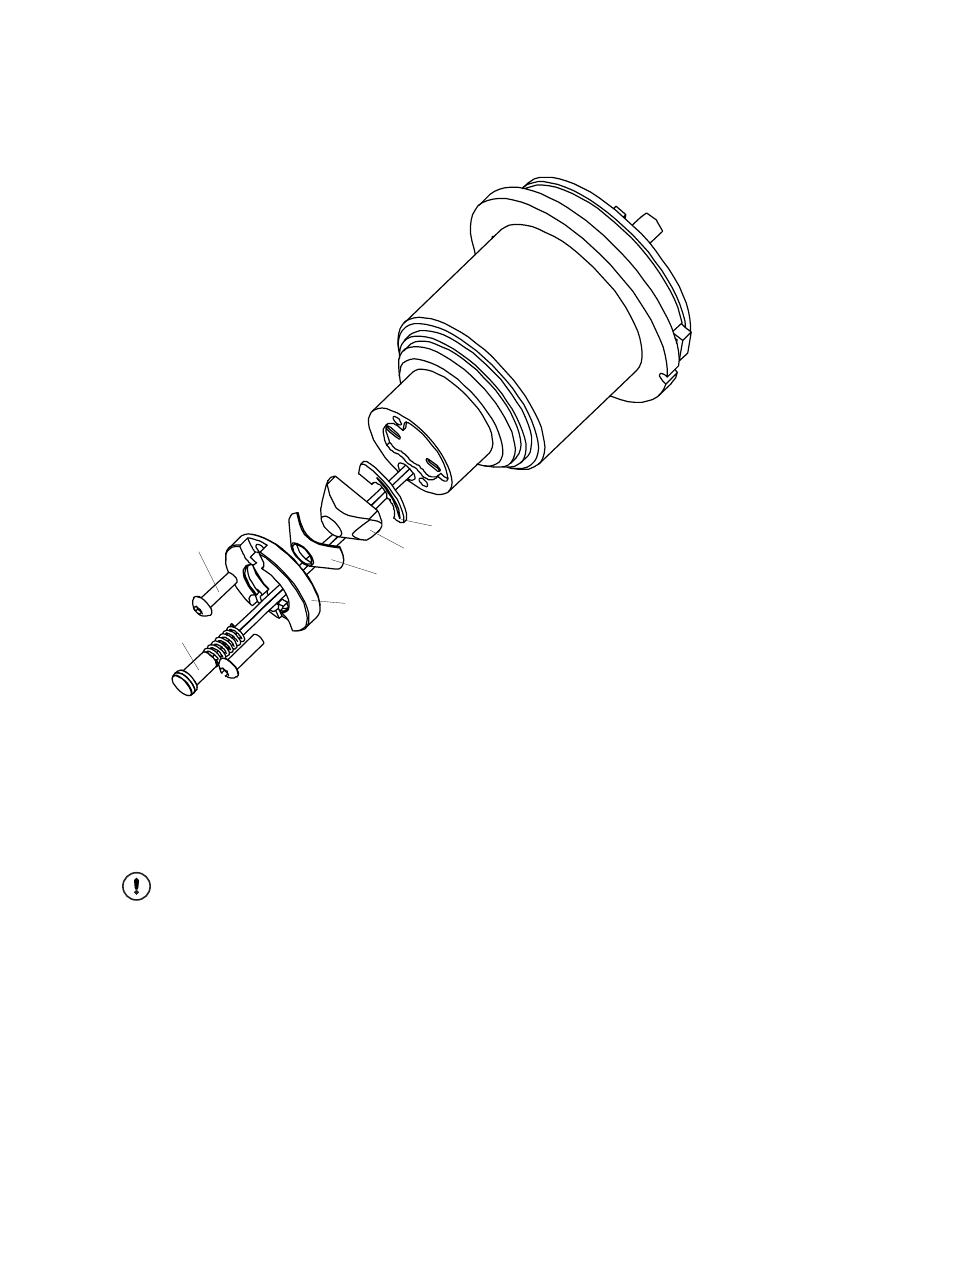
Figure 7.3
Removal of prism
9. Remove prism support (b) kept by two rounded hexagon socket screws (c).
10. Remove old prism gasket (d).
11. To remove the prism (e), push it gently against the springs machined into the prism
plate (f), as indicated by an arrow in Figure 7.4.
12. Clean the prism. Important:
Do not leave any fingerprints on any of the four
smooth optical surfaces!
13. Put the prism (e) in place, pushing gently against the springs of the prism plate (f).
The direction of the force is indicated in Figure 7.4, left. To make sure the prism is
in correct position, press the prism in the opposite direction of the arrow.
14. Cover the prism by a new prism gasket (d) (with the center hole uncut), Figure 7.4,
right.
15. Put the prism support (b) upon the gasket. Keep the gasket in place by keeping a
finger in the middle. Check that the gasket is symmetrical around the middle of
the prism surface.
