K-Patents PR-23 User Manual
Page 187
13 Sensor verification
179
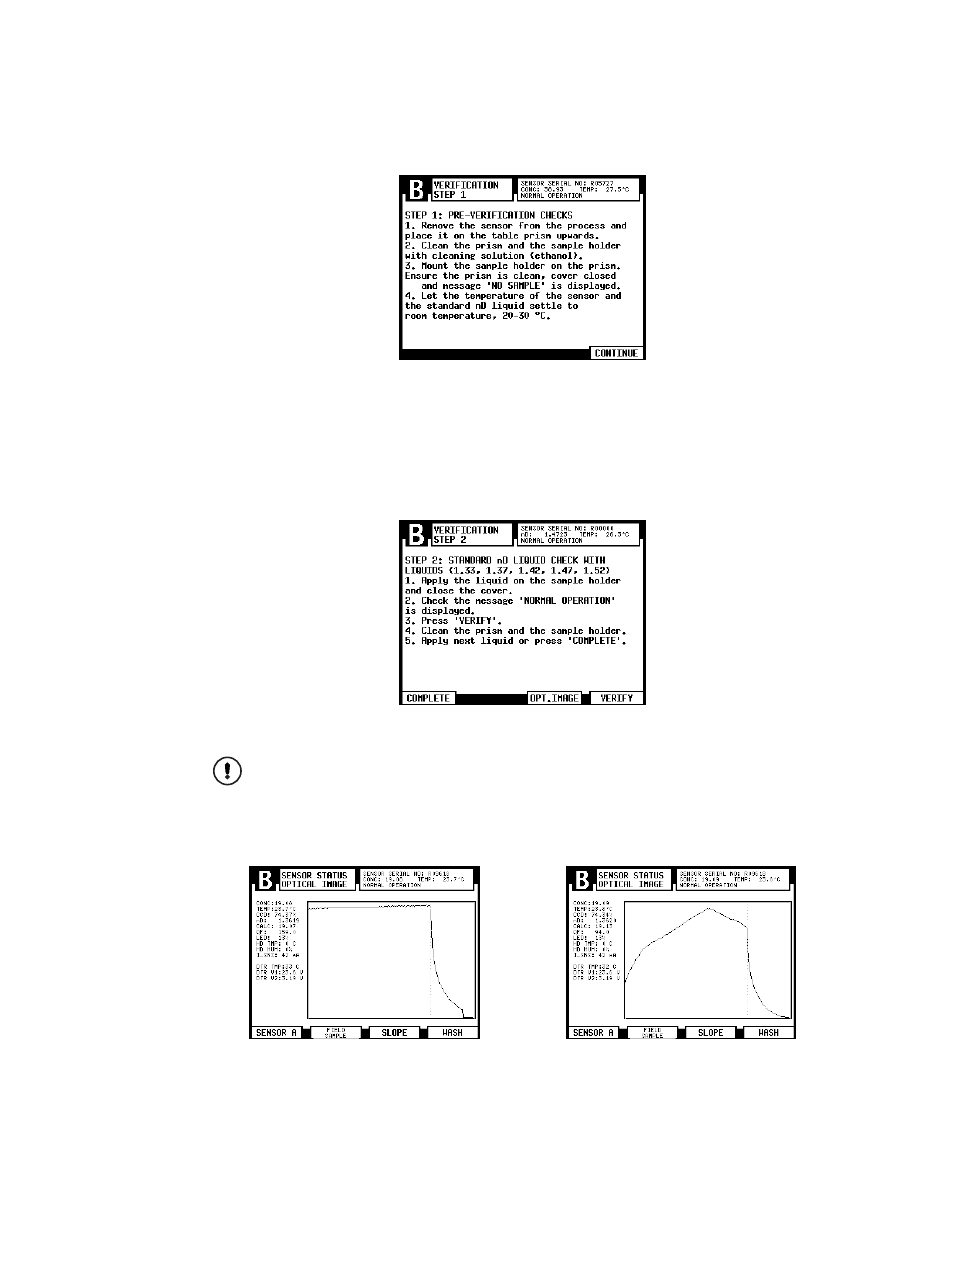
Figure 13.2
Verification, pre-verificaton checks
When you are finished with the preparations, press
CONTINUE
(right-most soft key)
to start the verification process.
The verification itself is done by the refractometer system, you only have to follow
the instructions on screen and apply one RI liquid at a time on the sensor and press
VERIFY
(right-most soft key). See Figure 13.3.
Figure 13.3
Verification display
Important:
Clean and dry the prism and the sample holder very carefully be-
tween the RI liquids. Use a suitable solvent, e.g., ethanol.
To check that the standard liquid is properly wetting the prism, it is possible to
press soft key
OPT. IMAGE
. The optical image should show a sharp shadow edge, as e.g.
in Figure 13.4. For more information on the optical image, please see section 5.4.1.
Sharp optical image (with IDS)
Sharp optical image (without IDS)
Figure 13.4
Typical optical images