3j avance rapide ou rebobinage de ia bande, Remarque, How to rewind or fast-forward the tape – Panasonic NV-RX1-2-5 User Manual
Page 38: Note
Attention! The text in this document has been recognized automatically. To view the original document, you can use the "Original mode".
ENGLISH
[3j Avance rapide ou rebobinage de ia
bande
Effectuer les opérations suivantes avec le caméscope en
mode VCR (le témoin “VCR” s'allume) et en mode arrêt.
■ Avance rapide
1
Appuyer sur la touche
[►►]
pour avancer
rapidement la bande vers l’avant.
• Lorsque la bande arrive à la fin, elle se rebobine
automatiquement jusqu’au début.
■ Rebobinage
2
Appuyer sur la touche pour
rebobiner rapidement la bande vers l’avant.
• Lorsque la bande arrive au début, le rebobinage
s’arrête automatiquement.
[
4
]
Commentéiimineriesdistorsions
d’image en ajustant i’aiignement
■ Pourquoi régler l’alignement
Il est possible que durant la lecture d'une bande
enregistrée, surtout une cassette vidéo enregistrée sur
un autre caméscope, des barres parasites blanches
horizontales
0
apparaissent dans l’image. Cela se
produit si durant la lecture, les têtes détectent les plages
vidéo enregistrées avec un décalage. Le réglage de la
configuration de l’alignement des têtes s’appelle réglage
de l'alignement.
1
Appuyer simultanément sur les touches
[◄ TRACKING] et [TRACKING ►].
Remarque:
Si la qualité de l’image ne s’améliore pas lorsqu’on
appuie simultanément sur les deux touches, faire le
réglage en appuyant uniquement sur la touche
[<
TRACKING] ou bien sur la touche [TRACKING ►].
(Il peut être impossible d’éliminer complètement ces
barres parasites.)
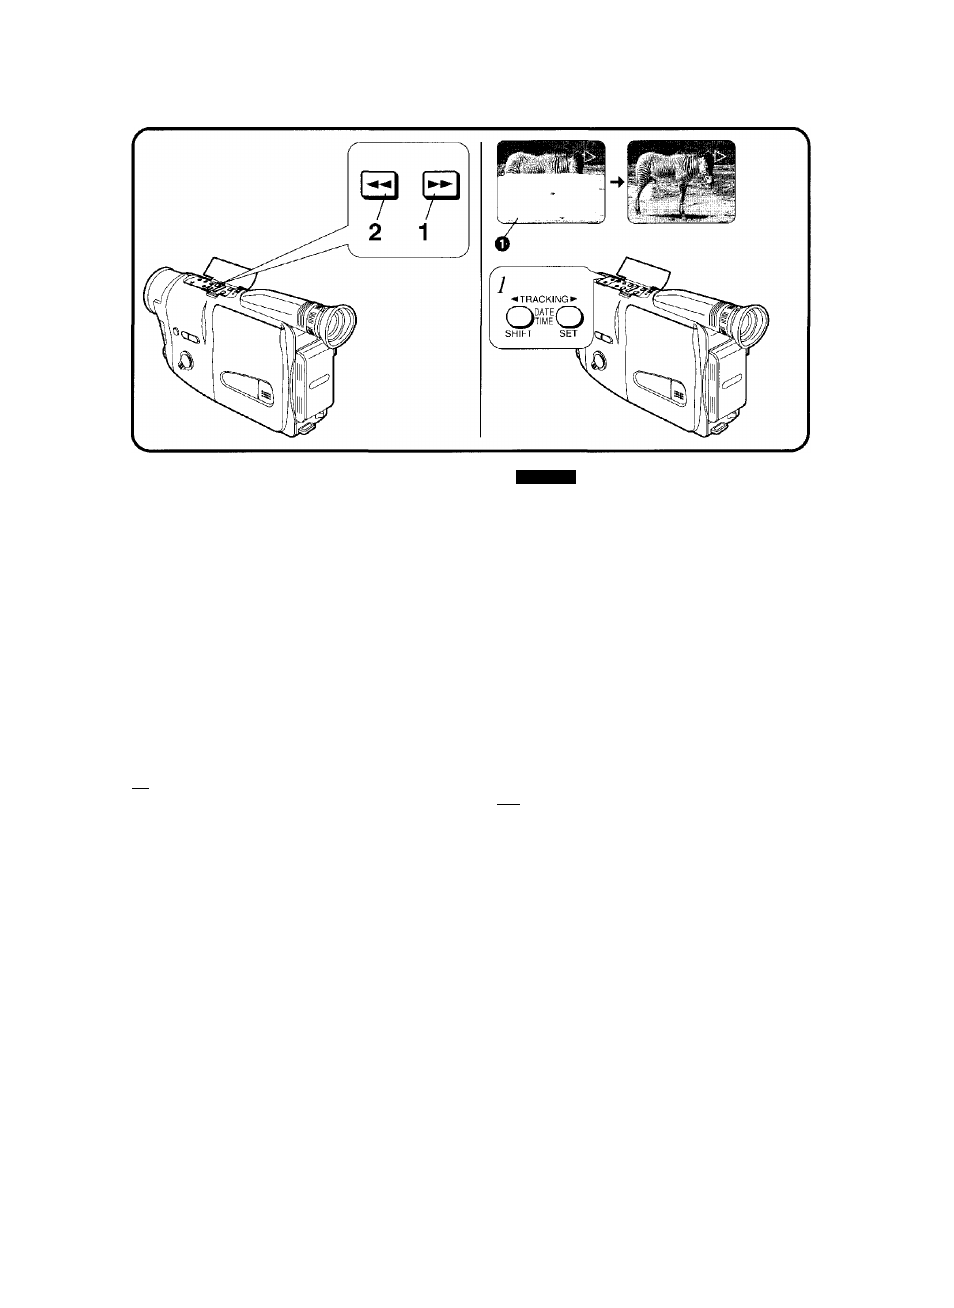
^ How to Rewind or Fast-Forward the
Tape
Perform the following operations with the Movie Camera
in the VCR Mode (“VCR” Indication Lamp lights) and in
the Stop Mode.
■ For Fast-Forwarding
1
Press the Button to wind the tape
forward at high speed.
•When the tape reaches the end, it automatically
rewinds to the beginning.
■ For Rewinding
2
Press the [^4^] Button to rewind the tape
at high speed.
•When the tape reaches the beginning, the
rewinding automatically stops.
|~4] How to Eliminate Picture Distortions
by Adjusting the Tracking
■ Purposeof the Tracking Adjustment
When playing back a recorded tape, especially a video
cassette recorded on another Movie Camera, horizontal
white noise bars ^ may appear in the picture. This
occurs when the video heads don't precisely trace the
recorded video tracks during playback. Adjusting the
tracking pattern of the heads is called tracking
adjustment.
7 Press both the [4 TRACKiNG] and the
[TRACKING ►] Button simultaneously.
Note:
If pressing both buttons simultaneously does not improve
the picture quality, adjust by pressing the
[4
TRACKING] or [TRACKING ►] Button individually,
(It may not be possible to remove the noise bars
completely.)
42